Southend’s defensive record so far this season has been fantastic. We’ve conceded just 20 National League goals from our 22 matches, keeping 11 clean sheets in the process. We also have the best ‘expected goals against’ (xGA for short) figure in the whole division of 18.63.
One reason for this that I haven’t really mentioned before is because of our ‘rest defence’.
A side’s ‘rest defence’ refers to how they structure the remainder of their players when they are attacking to mitigate turnovers of possession. Basically, when they are attacking how are the rest of their players positioned, and how well does this limit the effectiveness of opposition turnovers?
Southend have settled on a 3-1-4-2 formation recently with Cav Miley sitting in front of the defence. Once we have progressed the ball into the opposition third and are in a position to try and score, we end up looking something like this:
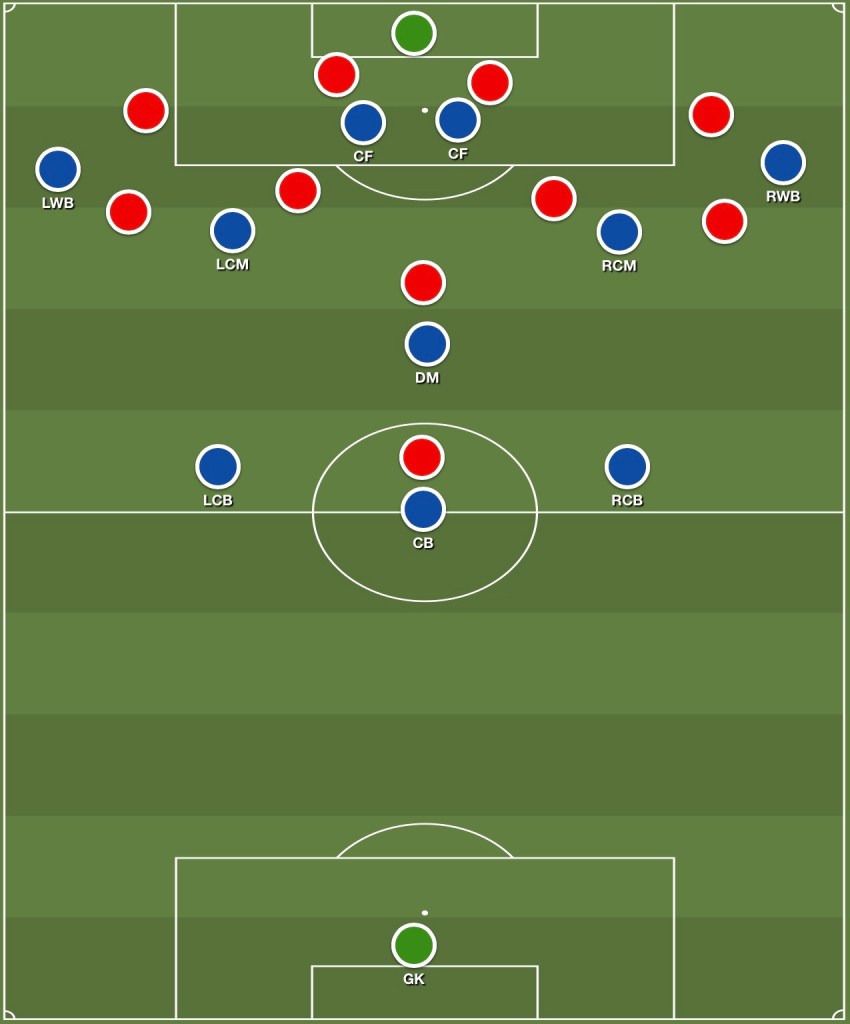
As you can see from the above, our ‘rest defence’ consists of our back three with Miley just in front: a 3-1 structure. Our two centre midfielders position themselves in the half spaces on either side, our wing backs occupy the wide spaces and we’re left with two players in the penalty area.
In our last match (vs. Altrincham [H]) we set up in this same structure when attacking. Altrincham left striker Connor Jennings up front and positioned attacking midfielder Chris Conn-Clarke on Miley. They then made sure that their near-side wide player would drop back to support their full back, whilst keeping the far-side wide player higher up in space (see below).
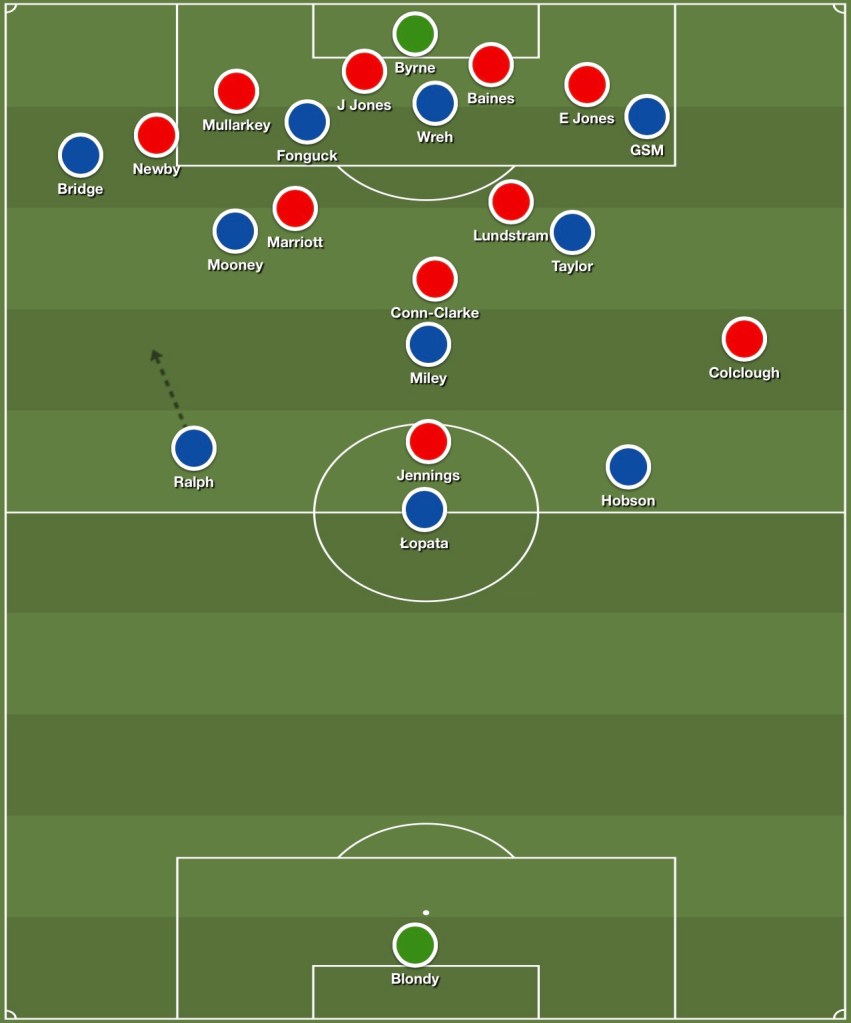
As a lot of our attacks come from our left side through Jack Bridge, this meant that it was often Elliot Newby who would drop back, whilst Ryan Colclough would stay in space. This meant that there was space for Nathan Ralph to move forwards into to offer another passing option for Bridge. When play was on his opposite side, Southend wing back Gus Scott-Morriss would also occupy the penalty area to wait for a cross (see above).
In the event of a turnover of possession, the idea here is to try and force Altrincham out wide so that they have a greater distance to travel to our goal than us, meaning we have a greater chance of getting players back quicker (see below).
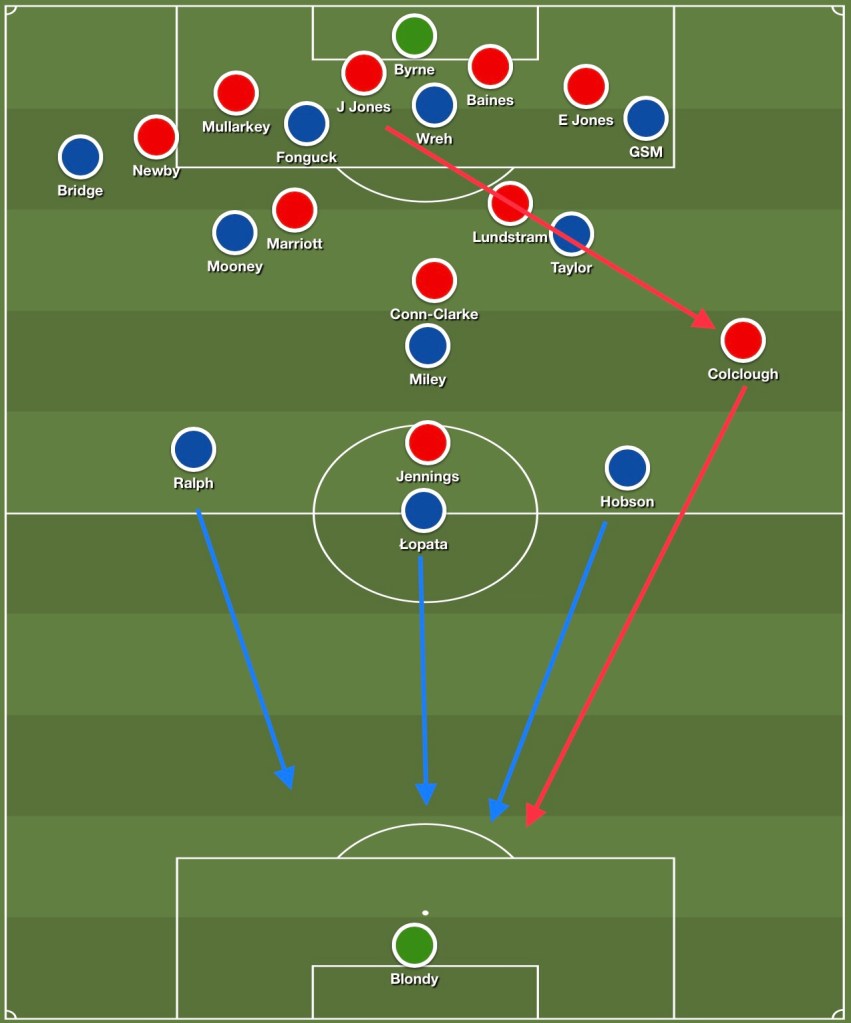
Once the ball goes out to Colclough, Shaun Hobson can come across to stop him having a clear run at our goal, leaving both Kacper Łopata and Ralph to mark Jennings. Conn-Clarke should hopefully be occupied by Miley, and then it’s just a case of us getting our other players back quicker than Altrincham can get their players forward – if we haven’t already won possession back.

In our match away to Dagenham & Redbridge you can see a similar structure. In the second half we used a 3-4-2-1 formation instead, but the principle remained the same.
We again had the 3-1 ‘rest defence’ structure but instead used the wing back and wide player on each side of the pitch to try and create an overload out wide. This left us with two players on the edge of the penalty area again, with Scott-Morriss and a striker waiting to receive a cross (see below).
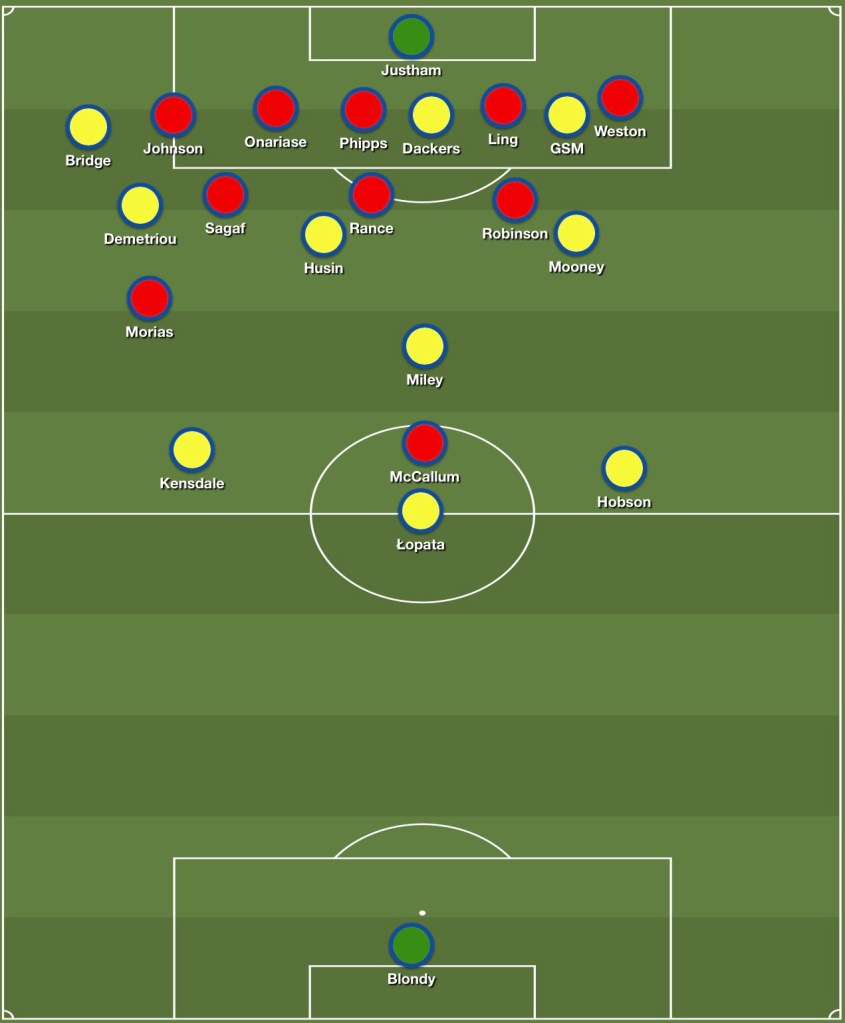
As you can see from the below image, we very clearly set up in this 3-1 structure. In this instance, once Dagenham win possession back their only real option is to go long to striker Paul McCallum – but he is outnumbered 3v1 against our defence.
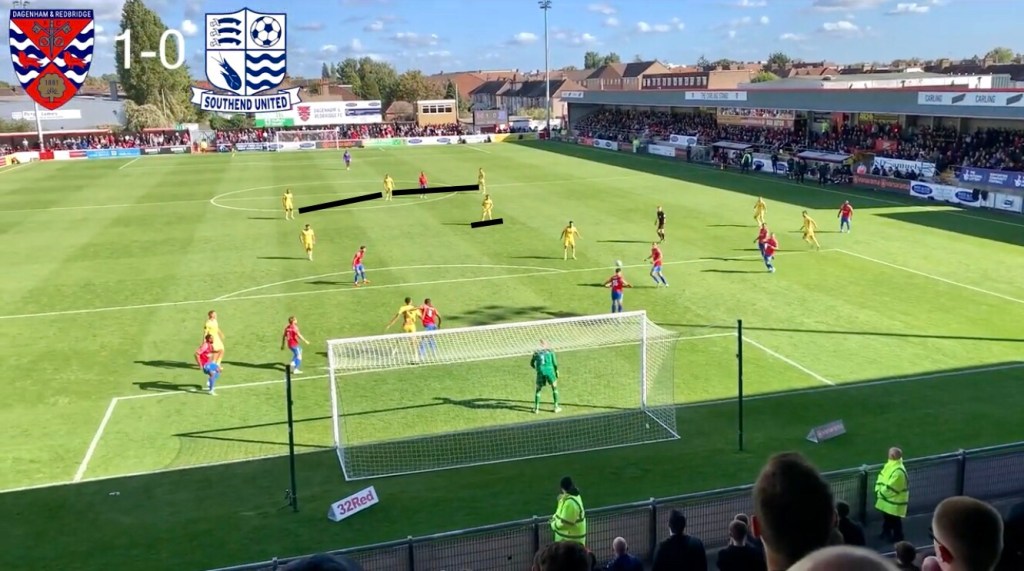
This gave us a numerical advantage (3v1), meaning we had a greater chance of regaining possession.
Our ‘rest defence’ enabled us to reduce Dagenham’s threat from turnovers, helping us to win possession back quickly after losing it before starting a new attack. This helped us to control the majority of the second half.

You must be logged in to post a comment.