Southend’s defenders have earned lots of praise for the number of clean sheets they have kept so far this season.
The Shrimpers have kept eleven clean sheets from their 22 National League matches so far this season (the highest amount in the whole division), whilst just 20 goals have been conceded in that time.
However, instead I want to write about the importance that Southend’s outside centre backs have when we are in possession of the ball, in particular Shaun Hobson.
Amongst other qualities, both Hobson and Ollie Kensdale possess the ability to accurately play long passes across to the opposite side of the pitch. This helps us to switch play from one side of the pitch to the other quickly, enabling us to unsettle opposition defences.
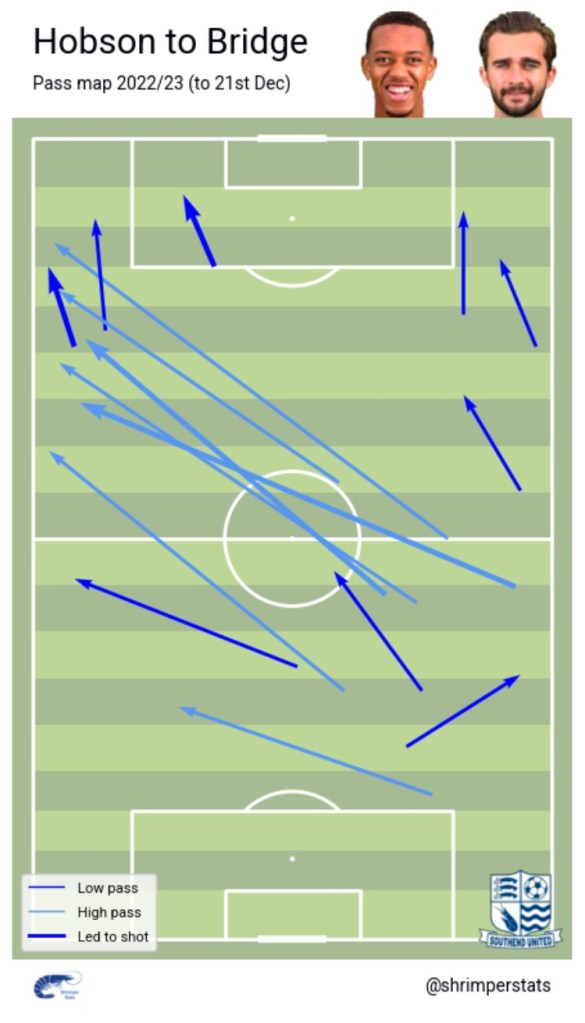
As a lot of our attack comes from our left side through Jack Bridge, it’s quite often Hobson playing these long passes to switch play from our right side to our left. The below visualisation shows all of Shaun Hobson’s passes which were received by Jack Bridge so far this season, and as you can see there are a lot of these long passes.
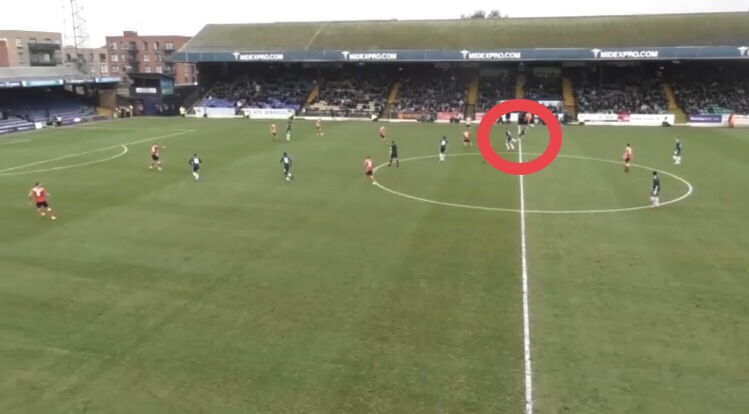
During our last league match vs. Altrincham (H), there were a few occasions where Hobson would switch play to Bridge. This was quite often when we had most of our players on one side of the pitch and left Jack Bridge wide on the opposite side in space (below).
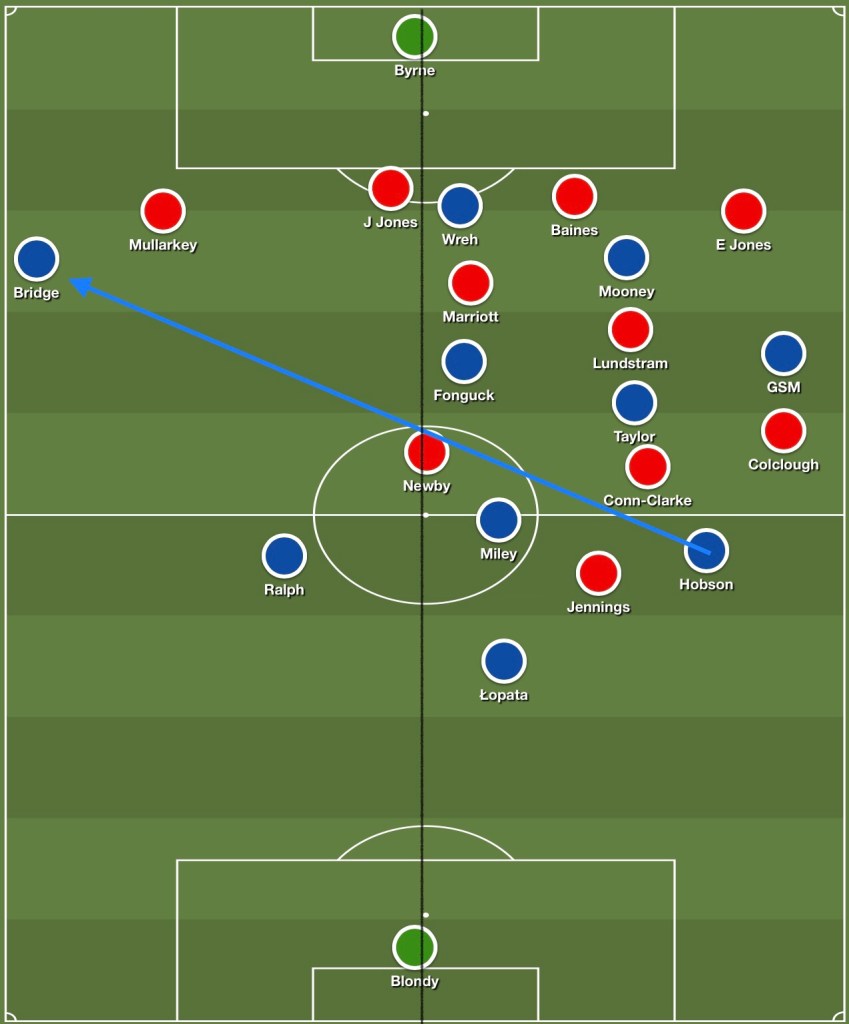
This tactical idea is known as ‘overload to isolate’. In this instance, we overload our right side by moving most of our players there whilst isolating Jack Bridge wide on our left. If we can get the ball to him quickly then Bridge will have a 1v1 situation against the opposition full back and can then cause problems for an opposition defence who will have to reorganise and move from one side of the pitch to the other.
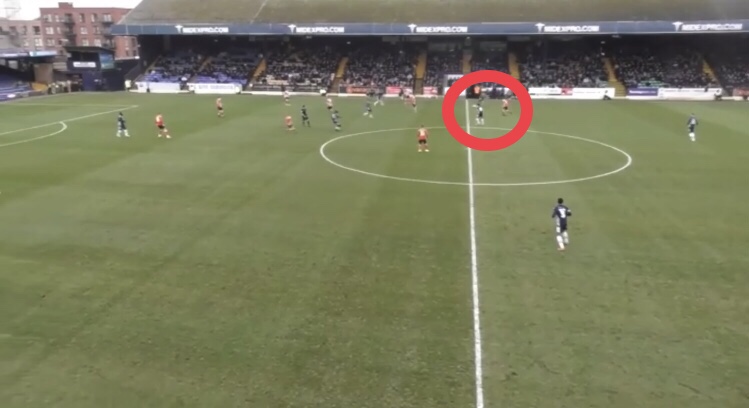
Example 1:
In this first example vs. Altrincham (H), you can see all of the players are on our right side other than Nathan Ralph, Bridge and Altrincham’s right back Toby Mullarkey (who are both out of shot). Hobson switches play to Bridge who, after beating his marker, can drive into space towards Altrincham’s goal. This eventually leads to a Southend shot which is blocked and Altrincham clear.
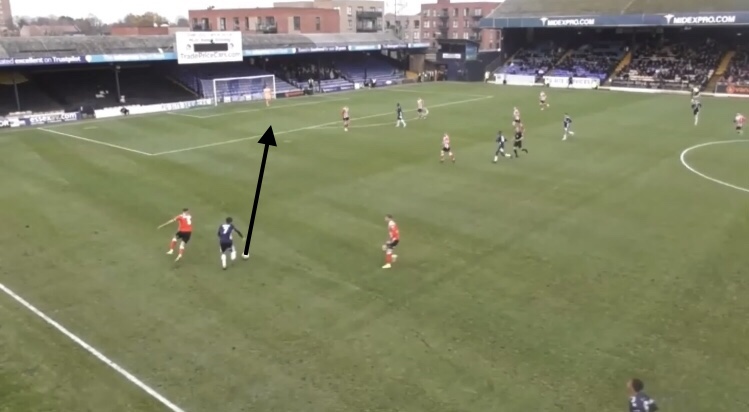
Example 2:
In the next example, Hobson again finds Bridge but this time space opens up potentially for Wes Fonguck to run into. Bridge eventually puts a cross into the box and wins a corner.

It’s clear that Jack Bridge has been hugely influential to Southend’s chance creation during his second spell at the club. He excels in 1v1 situations where he can beat his marker before putting the ball into the penalty area. By keeping him isolated on the far side it helps to provide him with these 1v1 situations, but only if we have the players who can switch play quickly.
Hobson has proved he can do this consistently, and although it’s something that he may only attempt once or twice per match, it can be a very useful skill to have, and no doubt contributes to the strong season that he’s having.

You must be logged in to post a comment.