On Easter Monday the top two sides in the National League went head to head at the Racecourse Ground in arguably the most highly anticipated match in the division’s history.
With both Wrexham and Notts County level on an incredible 100 points going into the match, and with only the league champions guaranteeing themselves a place in League 2 next season, the victors would be in pole position to lift the trophy at the end of the month.
Wrexham won the match 3-2, even after Notts went into half time with a 1-0 lead. Here, I’ll look at how the sides set up whilst in possession, how each side aimed to press the opposition, and how Wrexham managed to win the match and become clear title favourites.
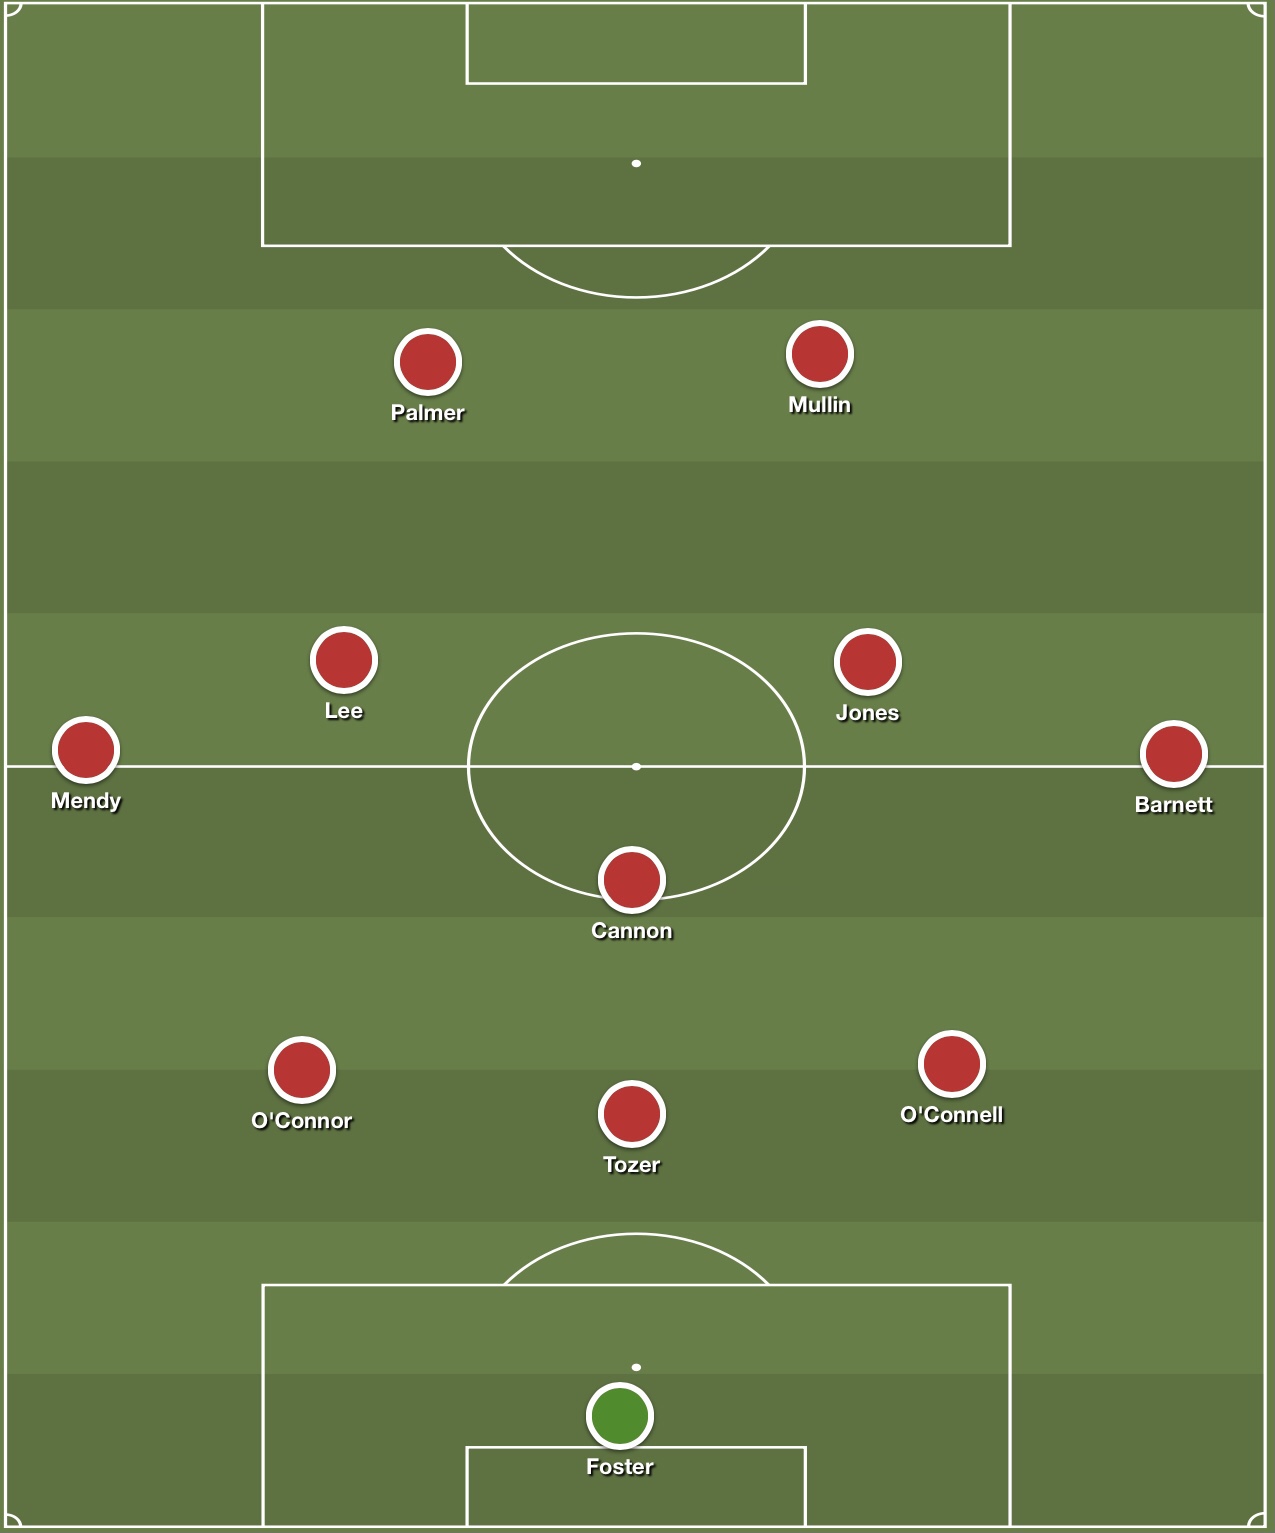
Lineups
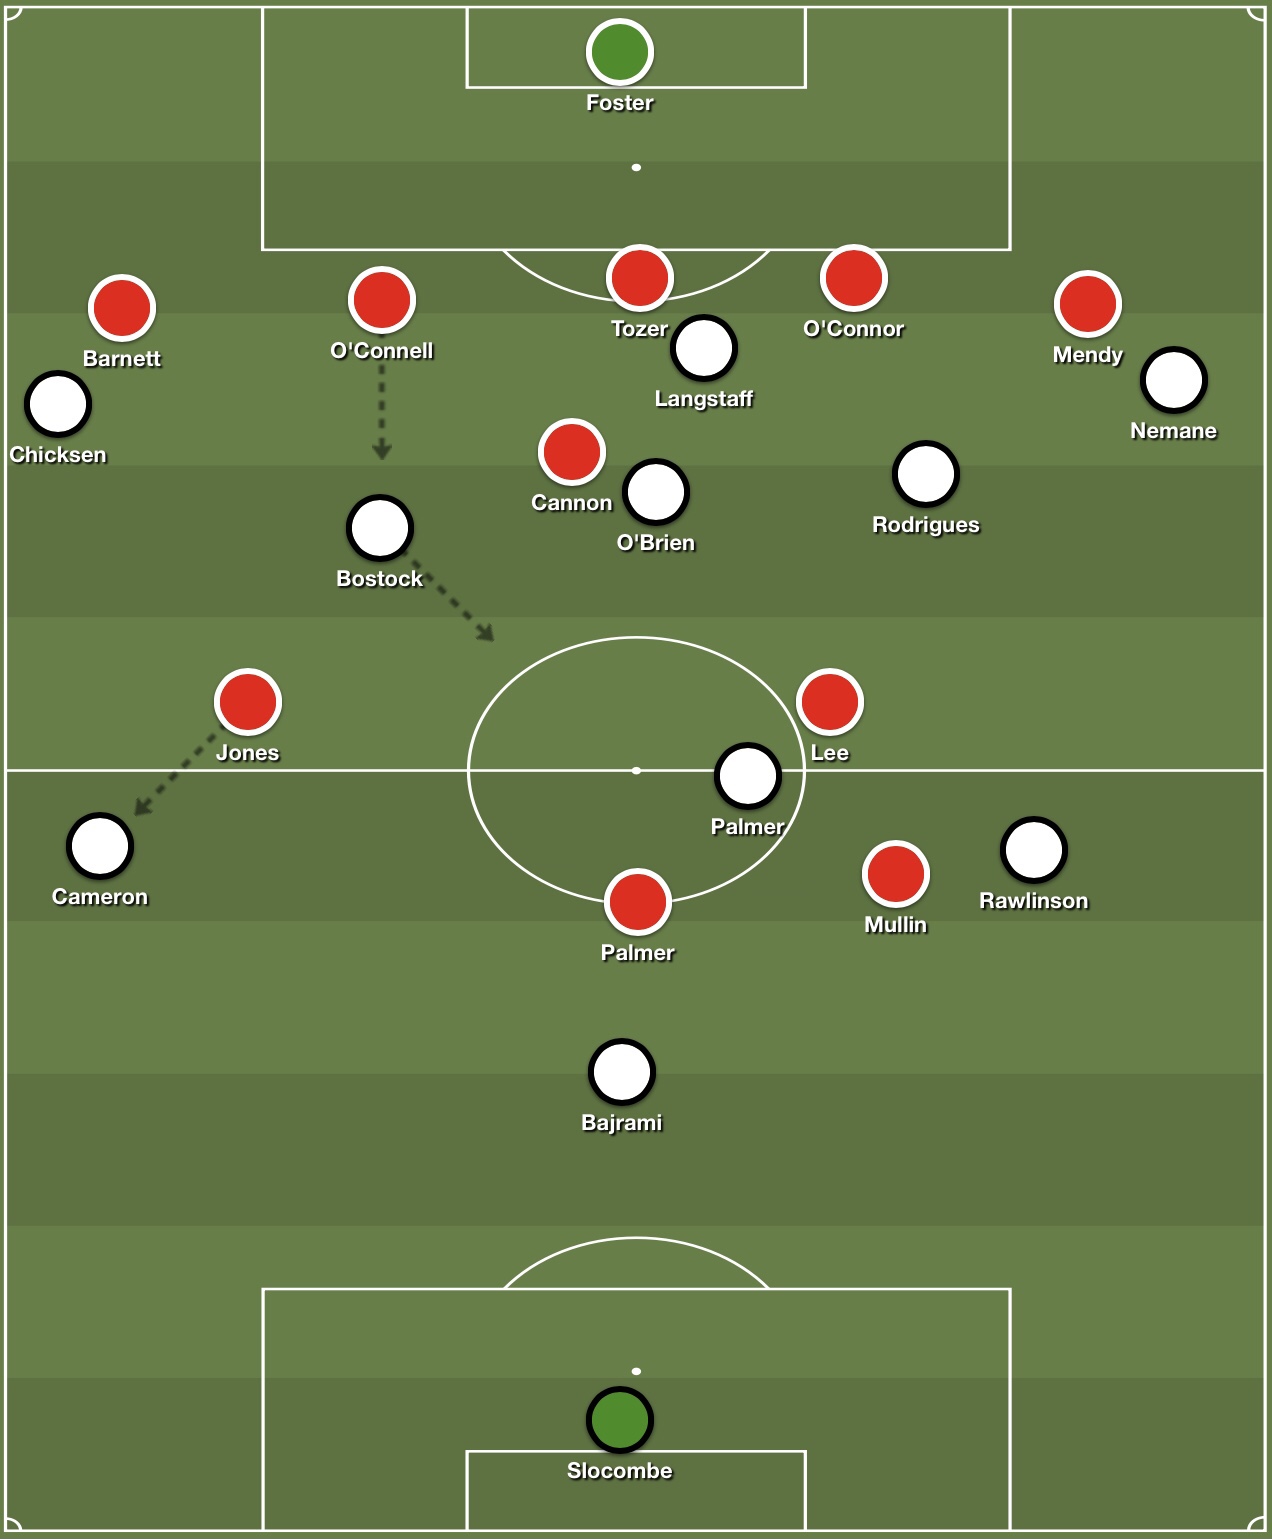
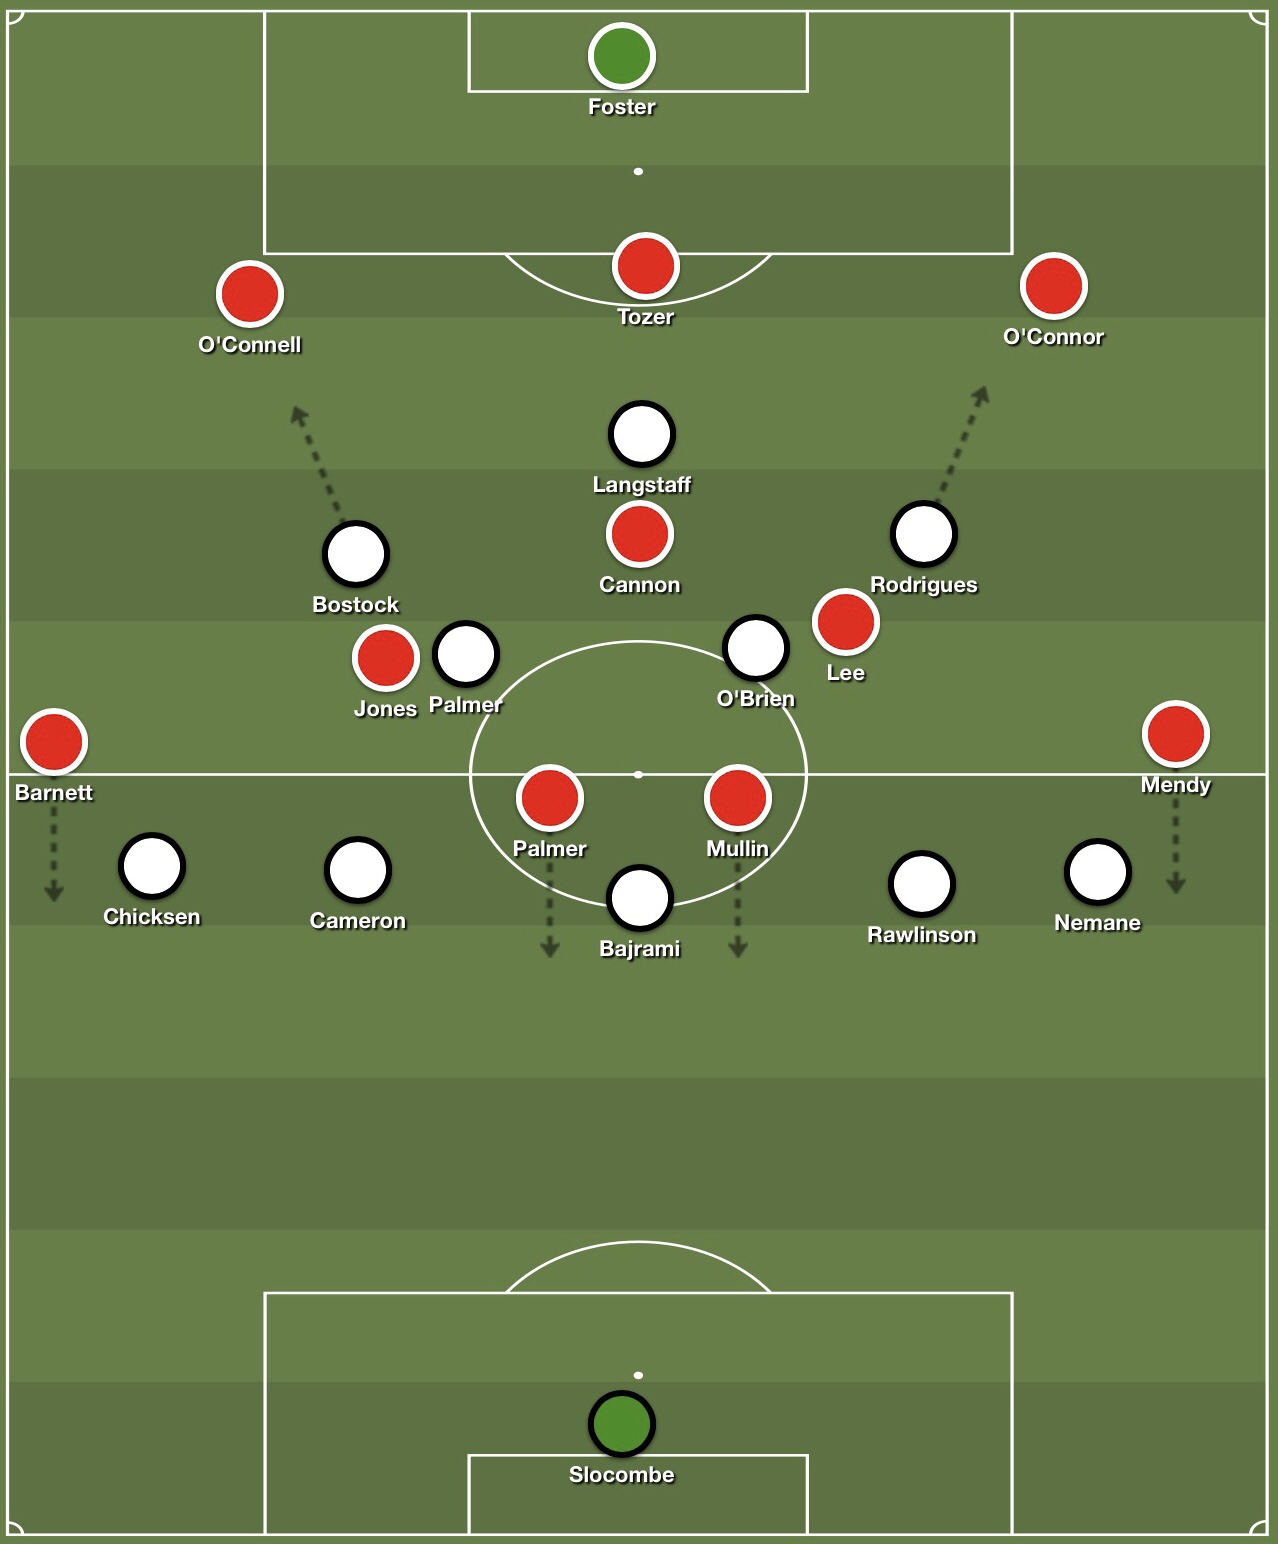
Wrexham went with a 3-5-2 formation, with former Premier League goalkeeper Ben Foster between the sticks, and top scorer Paul Mullin partnering Ollie Palmer in attack.
Notts also used their familiar wing back system, but instead aimed to overload the midfield by dropping Rúben Rodrigues deeper from the attack.

Notts County In-Possession
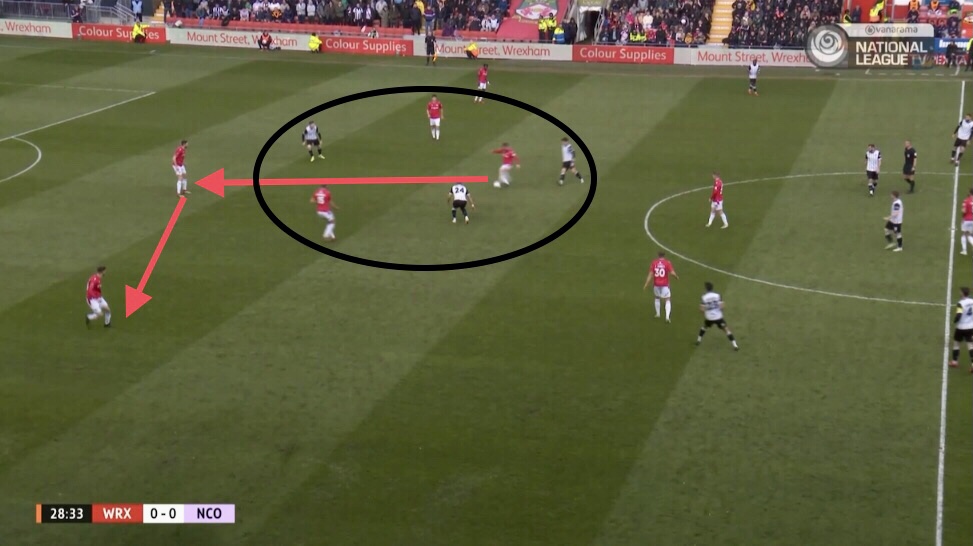
Notts County aimed to control possession, as illustrated by their huge possession share of 75%. During the first phase of build-up, they formed either a 3-1 or 3-2 shape and pushed their remaining players forwards to pin Wrexham into a back five.
Wrexham committed to a man-to-man press, making sure that each Notts player was picked up. They pushed James Jones out onto Kyle Cameron, and Elliot Lee and Andy Cannon marked Notts’ Matt Palmer and Jim O’Brien.
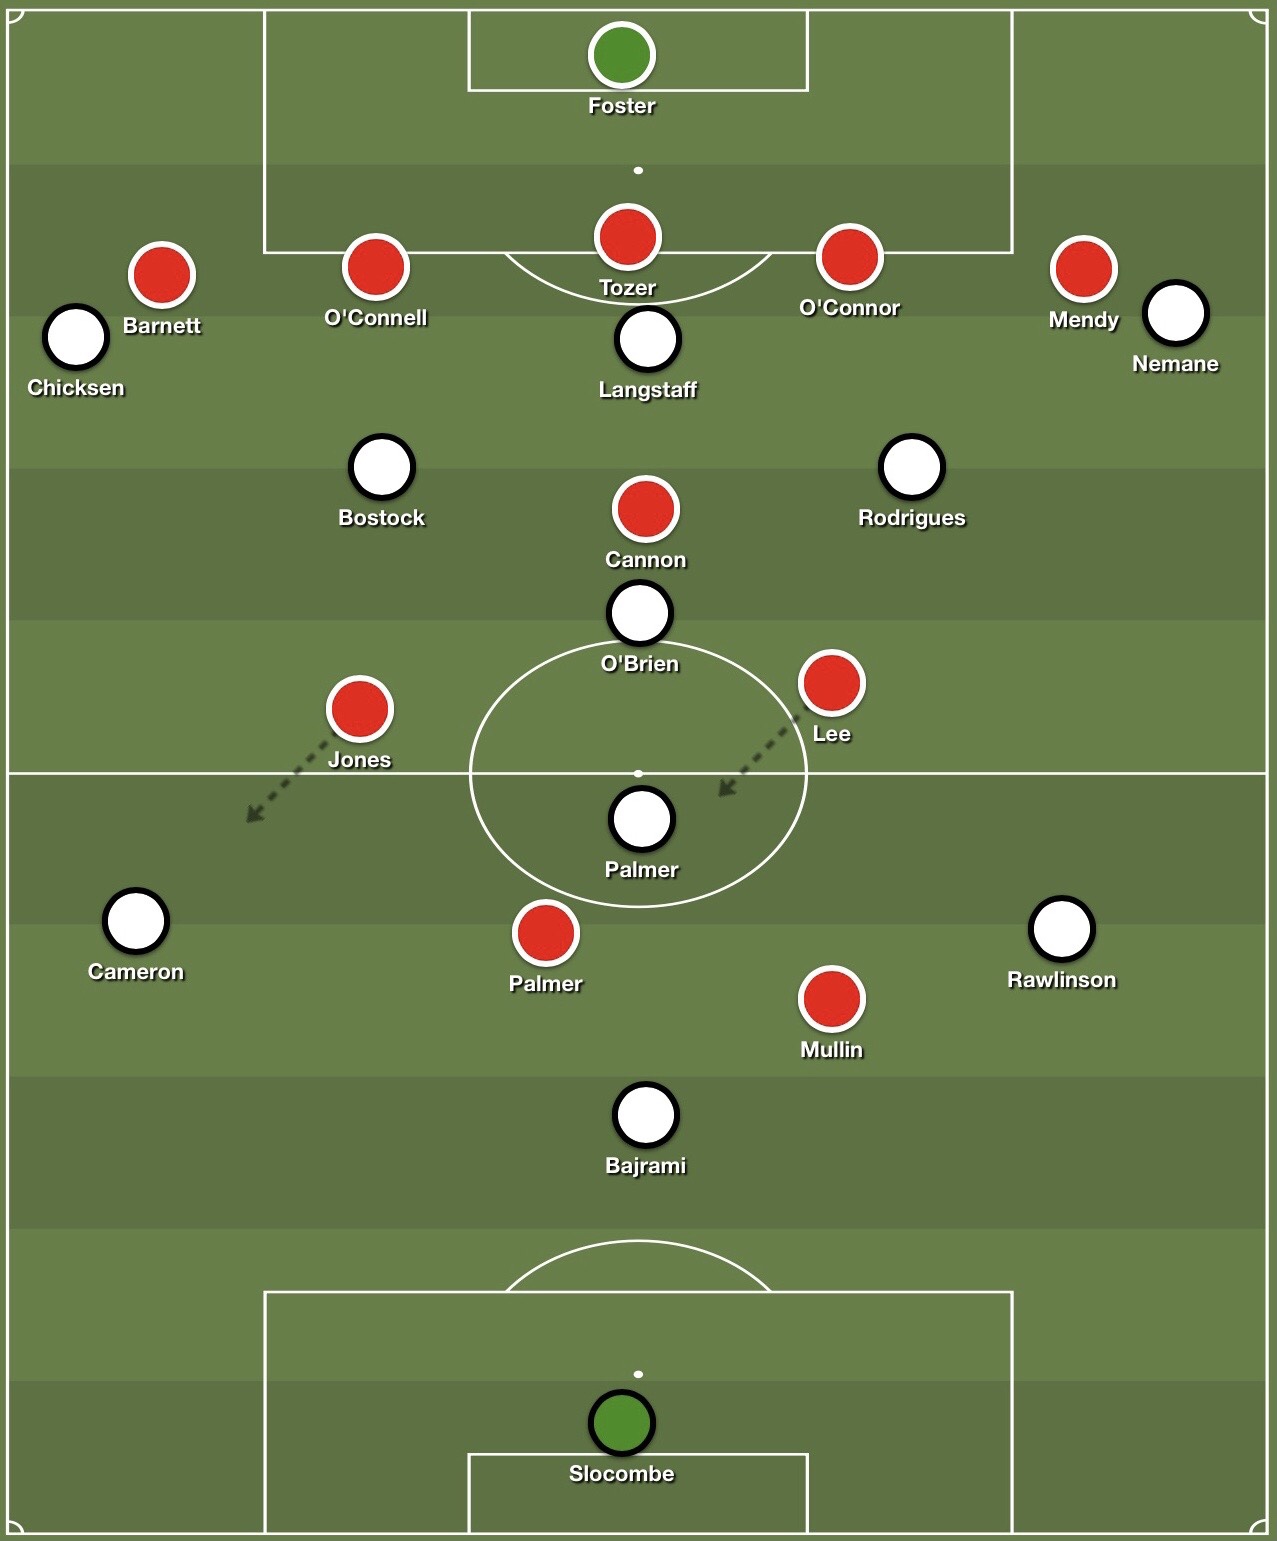

This may seem risky as it potentially leaves Rúben Rodrigues or John Bostock free if they drop deeper to assist Notts’ build-up. However, Wrexham’s man-to-man press aimed to deal with this as well.
If Rodrigues or Bostock dropped deeper, one of Wrexham’s wide centre backs (Eoghan O’Connell and Thomas O’Connor) would follow them, whilst still leaving Wrexham with a back four.
Notts County are a very patient team in build-up, and are happy to go backwards to recycle possession and wait for another opportunity to progress the ball, if the opponent’s press requires them to do so.
The aim for Wrexham was to either stop Notts from progressing play into dangerous areas, or force them into playing the ball long where they’d have to contest Wrexham in 1v1 duels, as there was numerical parity across the pitch thanks to Wrexham’s man-to-man press.
When Notts managed to beat Wrexham’s press and progress play into the final third, Wrexham’s 5-3-2 defensive block ensured they could cover the width of the pitch whilst having compactness in the central areas.
Wrexham In-Possession
As previously mentioned, Notts had a 75% possession share. This meant that Wrexham didn’t see an awful lot of the ball, but they were still very effective with it.
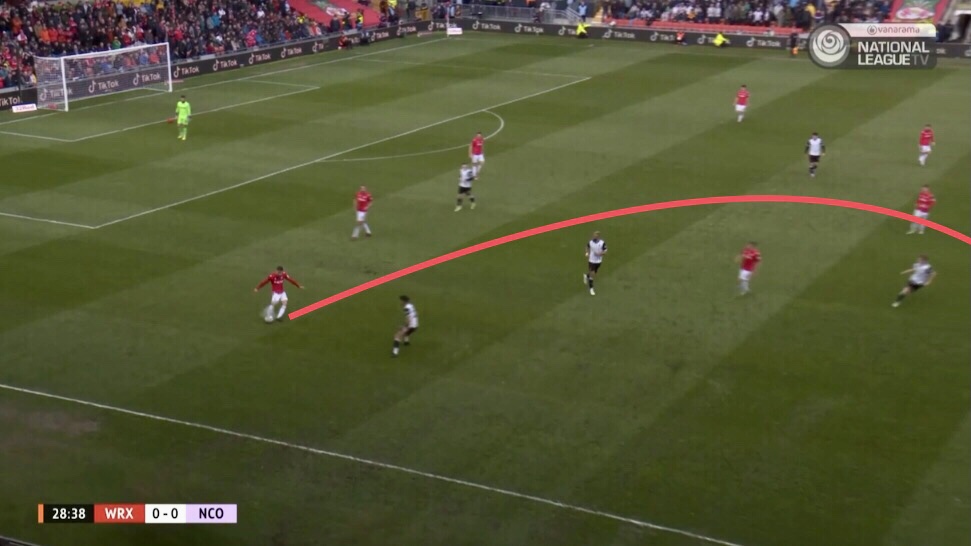
They aimed to take advantage of Notts’ high defensive line by playing long balls over the defence for their forwards to run onto. This was a clear tactic of Wrexham’s, and to a large extent the high line worked for Notts, as they managed to catch Wrexham offside on eleven occasions.
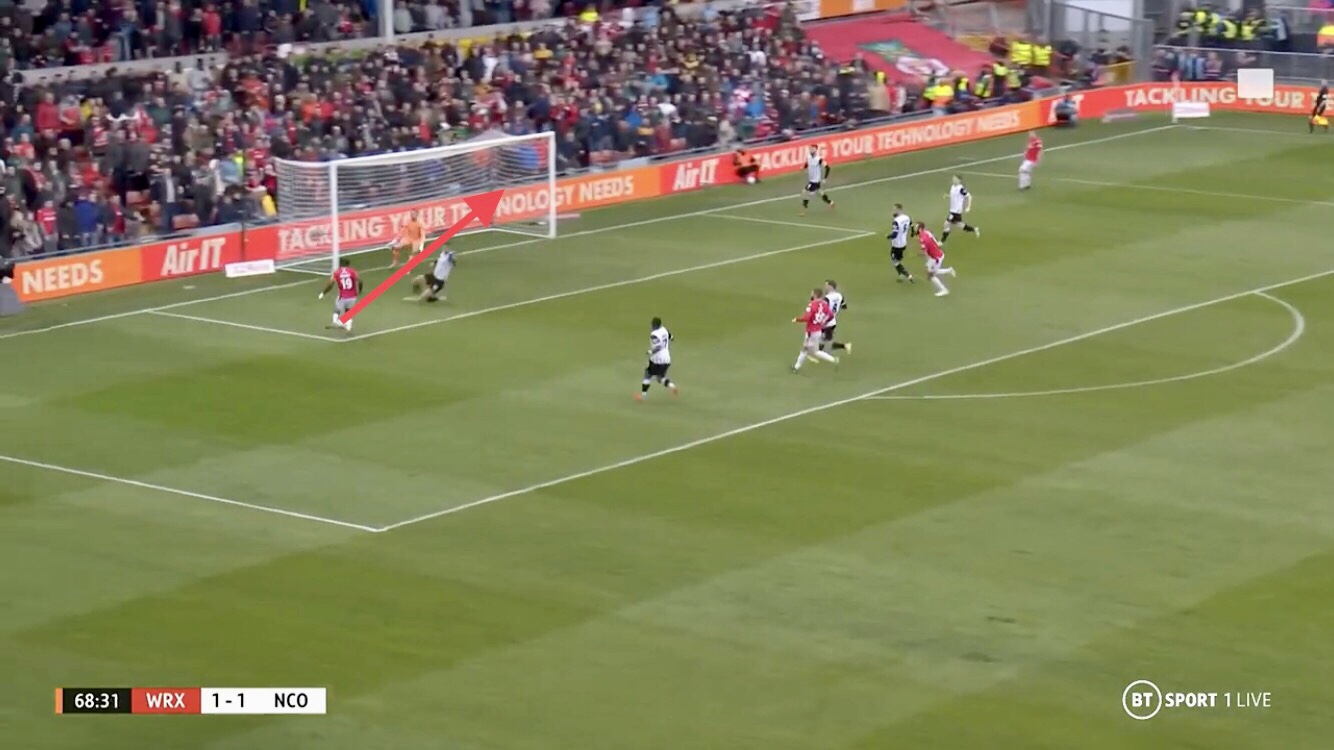
Despite this, Wrexham still looked very dangerous from these long balls, and managed to cause Notts problems, as illustrated by Wrexham’s second goal which put them 2-1 up.
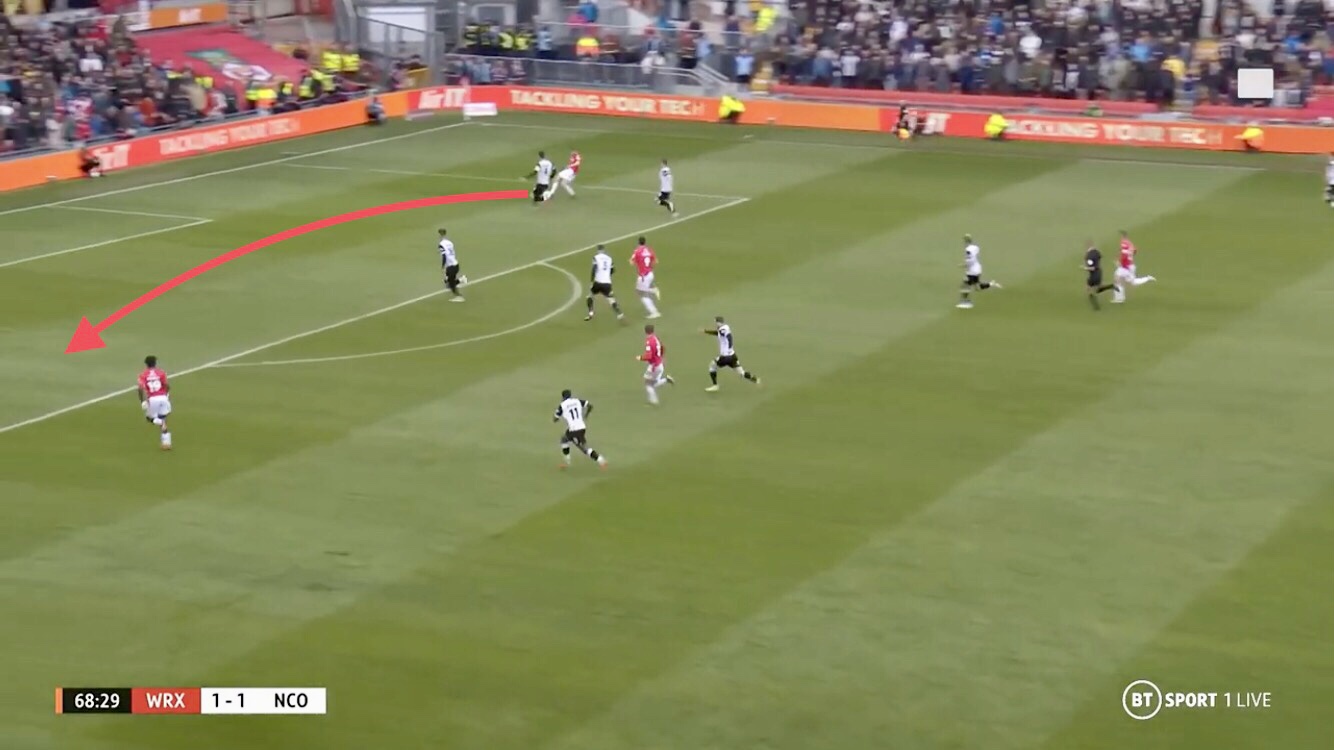
Wrexham had a free kick in their own half. Striker Paul Mullin made a bending run around Notts’ Kyle Cameron to give him a head start, and the free kick was played over the top of the Notts defence for Mullin to run onto (screenshot below).
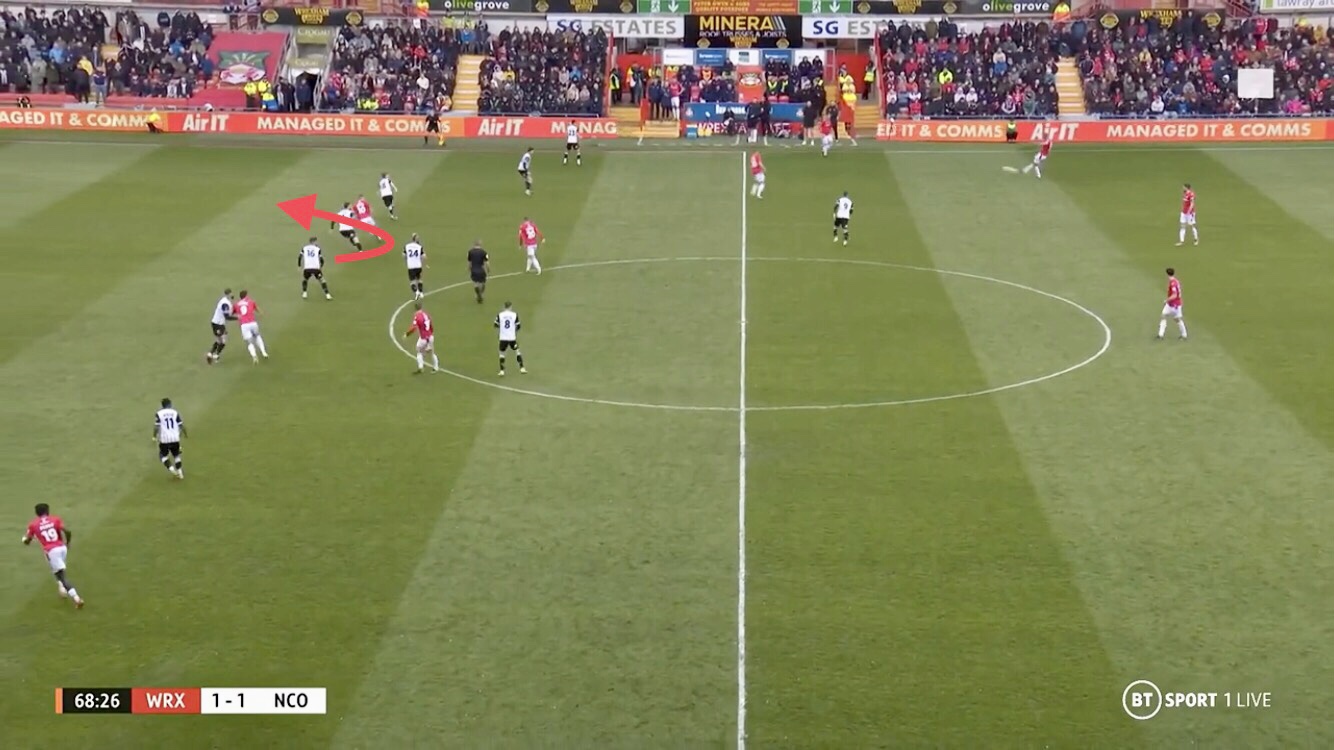
Mullin collected the pass before crossing to left wing back Jacob Mendy, who scored.
The high defensive line has clear benefits, and as previously mentioned, it worked fairly well for Notts. It meant Wrexham were less able to pin Notts back into their own penalty area and sustain attacks.
The high line also allows you to push forwards and squeeze the pitch, assisting your press in the process. However, I felt that Notts’ shape didn’t help them press Wrexham’s defenders well enough.
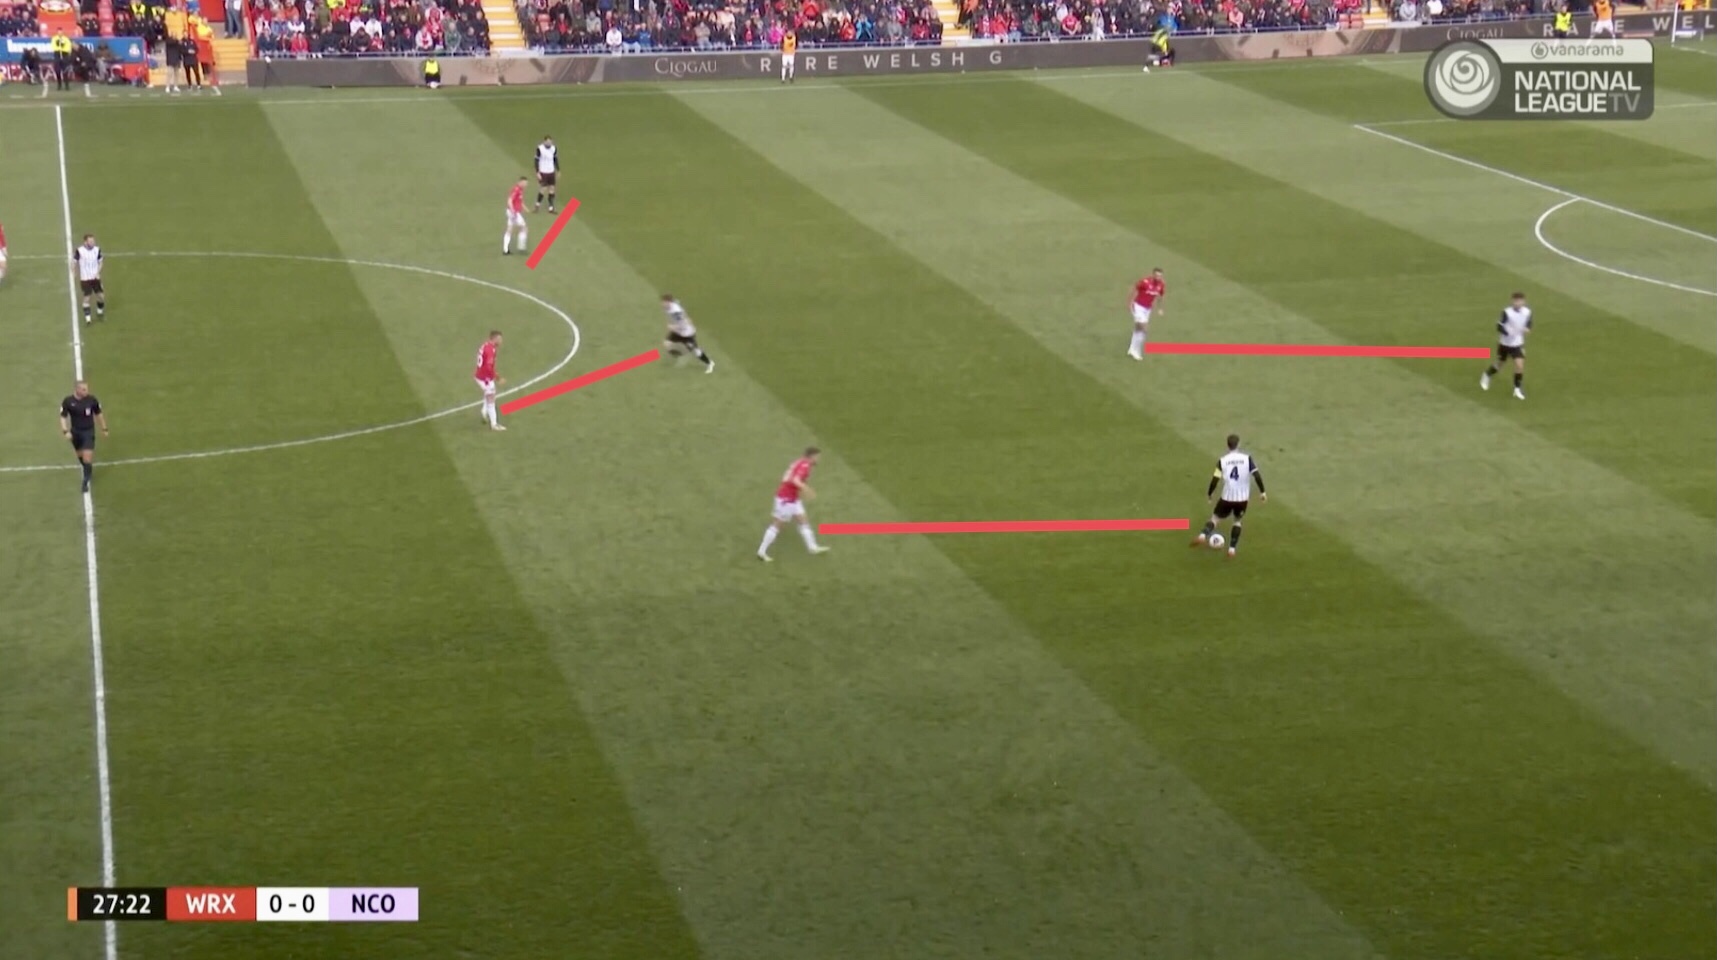
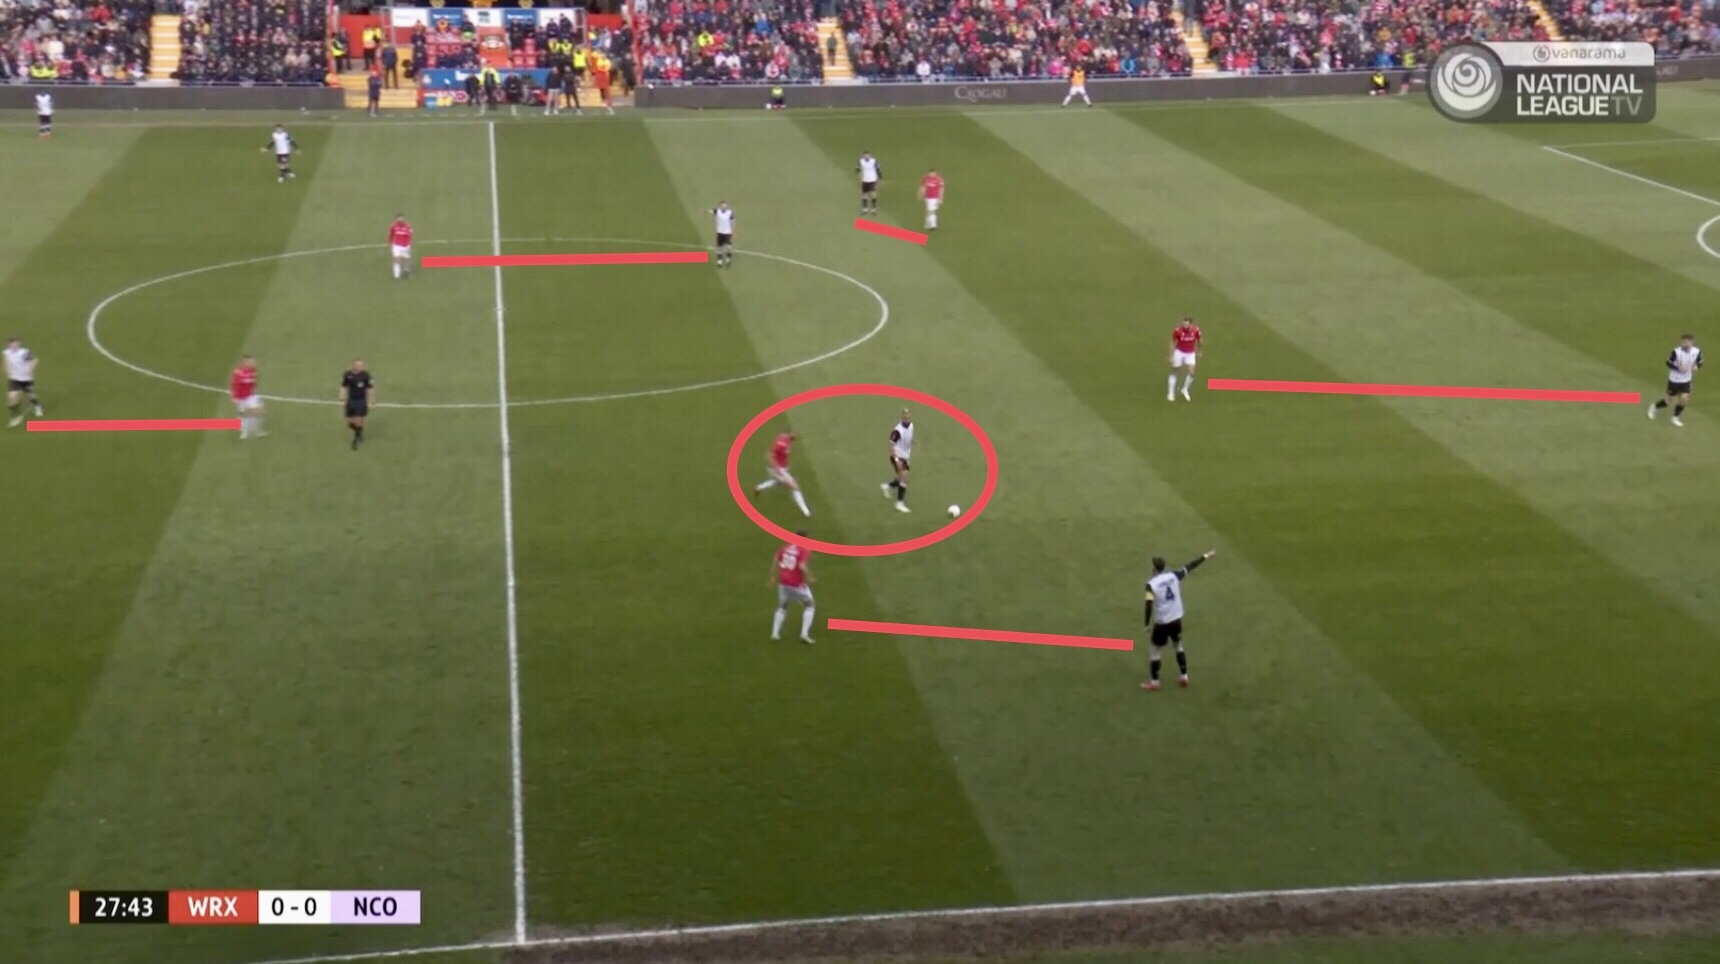
When Wrexham pushed their wing backs forwards, Notts were pinned into a back five. Notts used Rodrigues and Bostock to press Wrexham’s wide centre backs, and with Palmer and O’Brien occupied, this left Wrexham with a 4v3 numerical advantage in the first phase of build-up.
Either Rodrigues or Bostock had to travel quite some distance to get out to whichever one of Wrexham’s wide centre backs had the ball, meaning they often had time to play a long ball over the top of Notts’ defence for one of the forwards to run onto.
Here’s a good example. Wrexham forced Notts goalkeeper Sam Slocombe into playing a long ball which led to a 1v1 duel.
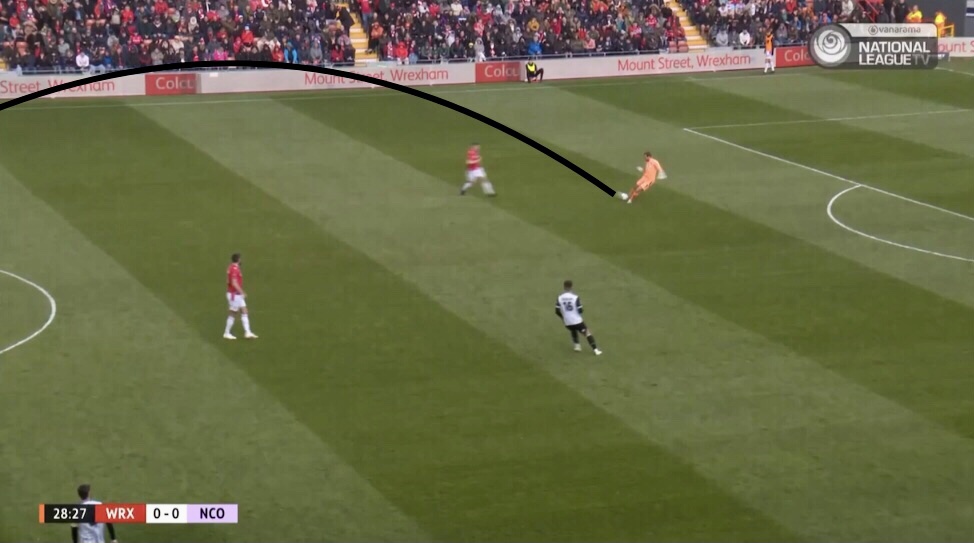
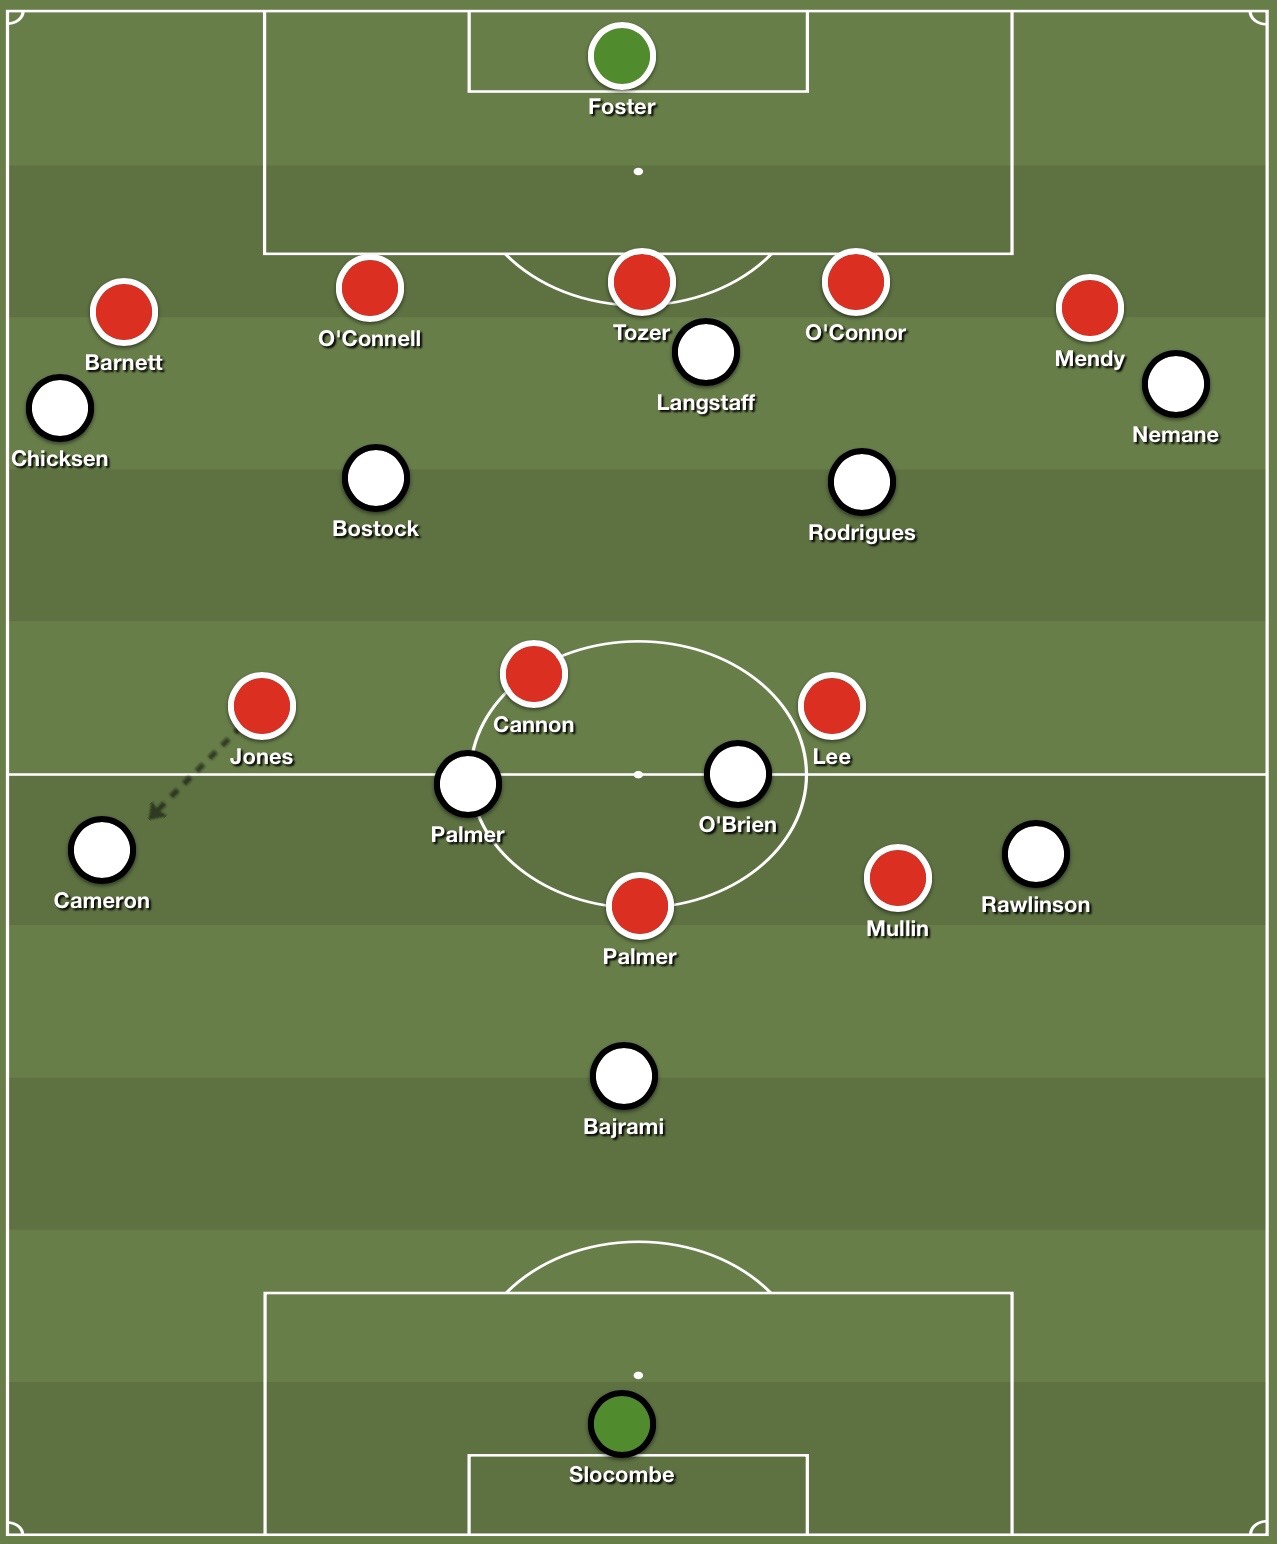
After the aerial duel, the loose ball fell to Wrexham, who recycled the ball out to their right side.
In this instance, the ball falls to Wrexham right wing back Ryan Barnett rather than one of their wide centre backs, and it’s up to Notts’ left wing back Adam Chicksen to press him.
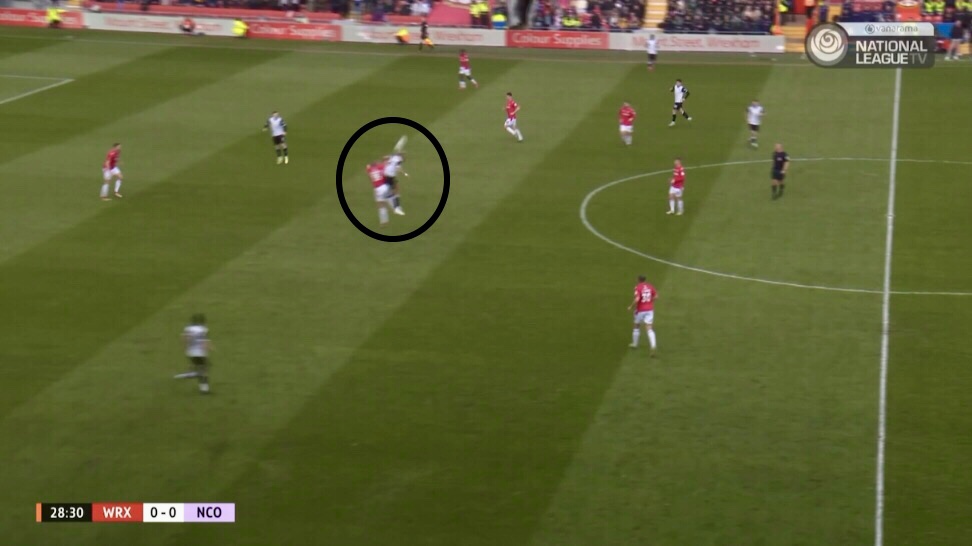
Chicksen couldn’t get out to Barnett quick enough, and he played a long ball over the top of Notts’ defence for striker Paul Mullin to run onto.
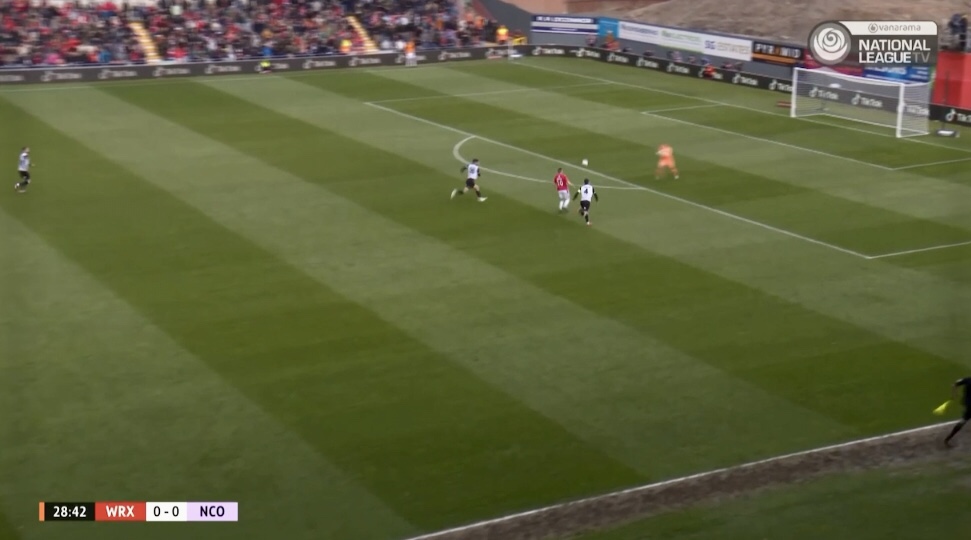
On this occasion, Slocombe did well to come off of his line quickly to deal with the long ball, but it was still a very dangerous moment that arose partly because of a lack of pressure on Wrexham’s wide players.

You must be logged in to post a comment.