Notts County reached the National League Play-Off Final with a dramatic 3-2 victory over Boreham Wood at Meadow Lane.
Two goals from defender Aden Baldwin — the second in stoppage time at end of the 90 minutes — and a 120th minute winner from Jodi Jones came after Boreham Wood had taken a two goal lead, meaning Notts will play Chesterfield at Wembley Stadium for a chance at promotion to the Football League on Saturday.
In this article I will look at the formations the sides used, how Boreham Wood looked to attack, how they aimed to prevent Notts from building up, and how Notts managed to counteract this.
Formations
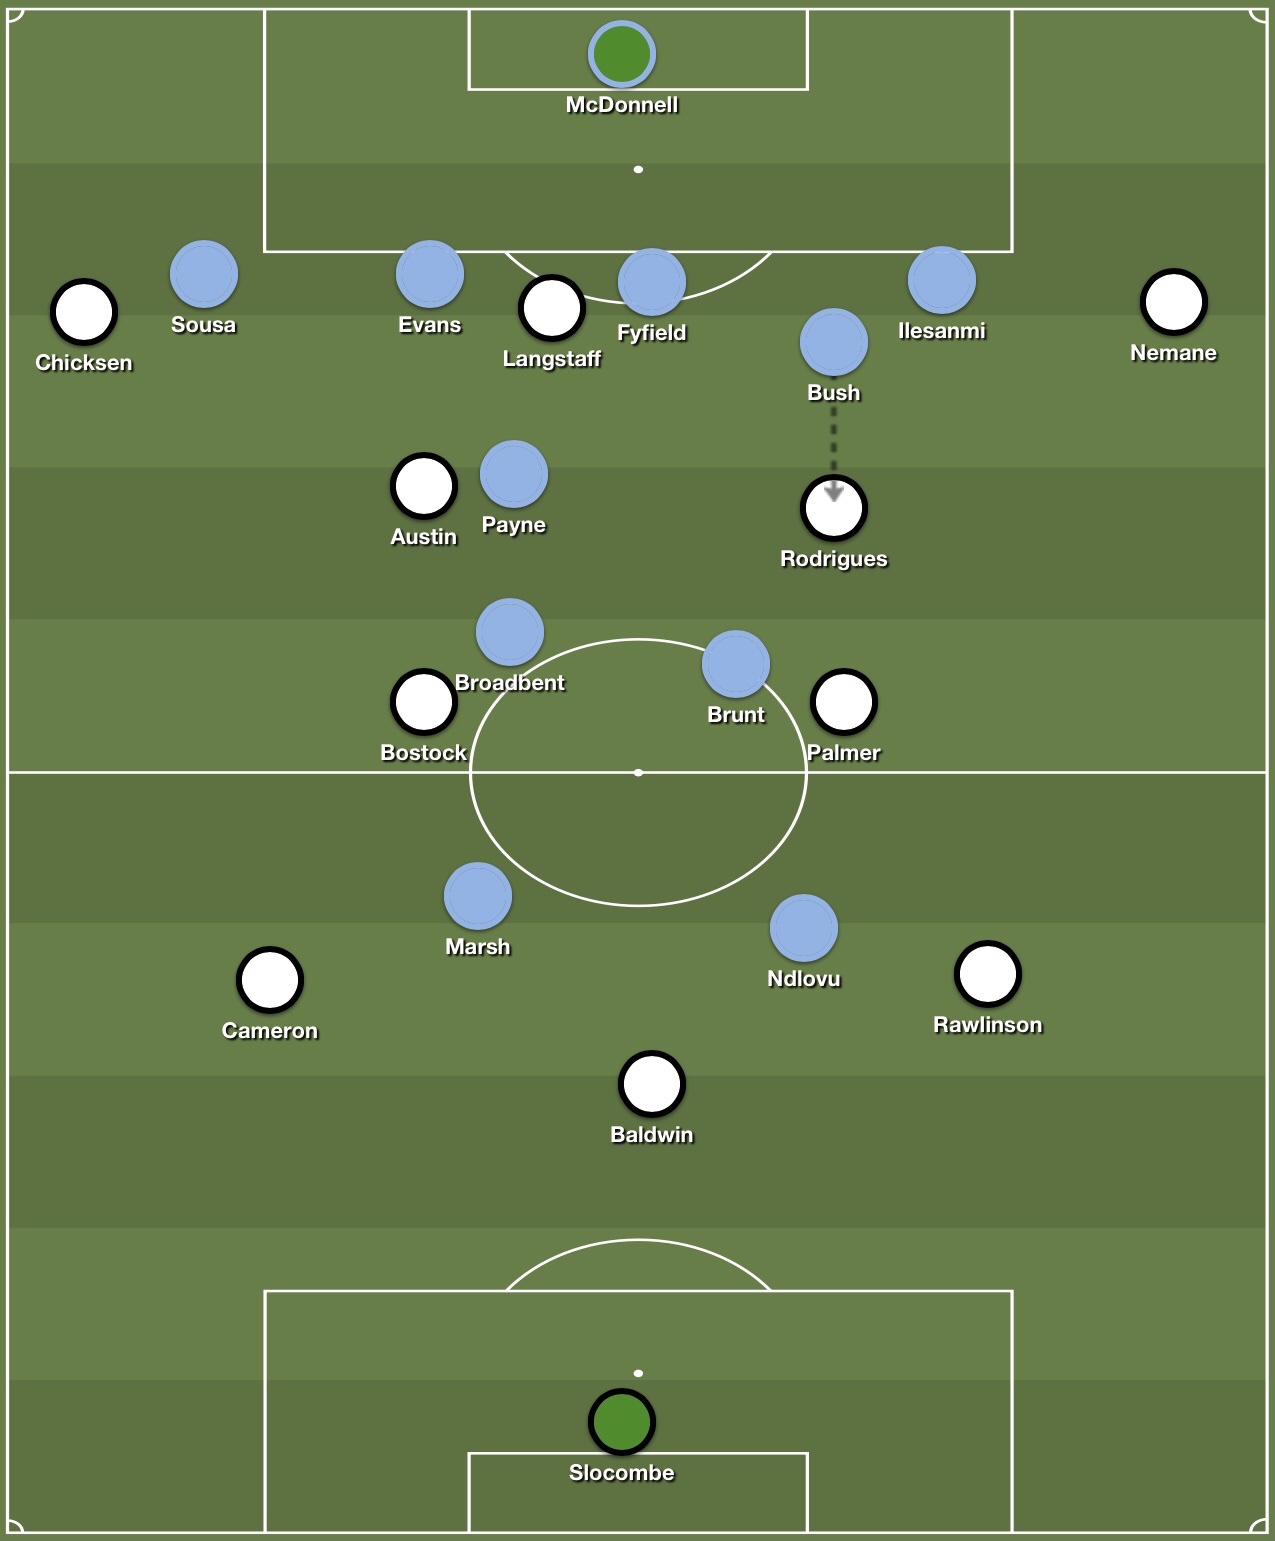
Notts went with a 3-4-2-1 formation. Sam Slocombe was between the sticks, behind a back three of Connell Rawlinson, Aden Baldwin and Kyle Cameron. Aaron Nemane and Adam Chicksen were the wing backs, whilst Matt Palmer and John Bostock were the two central midfielders. Rúben Rodrigues and Sam Austin played just behind striker Macaulay Langstaff.

Boreham Wood used a 5-3-2 formation. Emergency loanee Joe McDonnell replaced the injured Nathan Ashmore in goal. He played behind a back five of Érico Sousa, Will Evans, Jamal Fyfield, Chris Bush and Femi Ilesanmi. The midfield trio were George Broadbent, Jack Payne and Zak Brunt, whilst Tyrone Marsh and Lee Ndlovu were the strikers.

Boreham Wood’s Attack
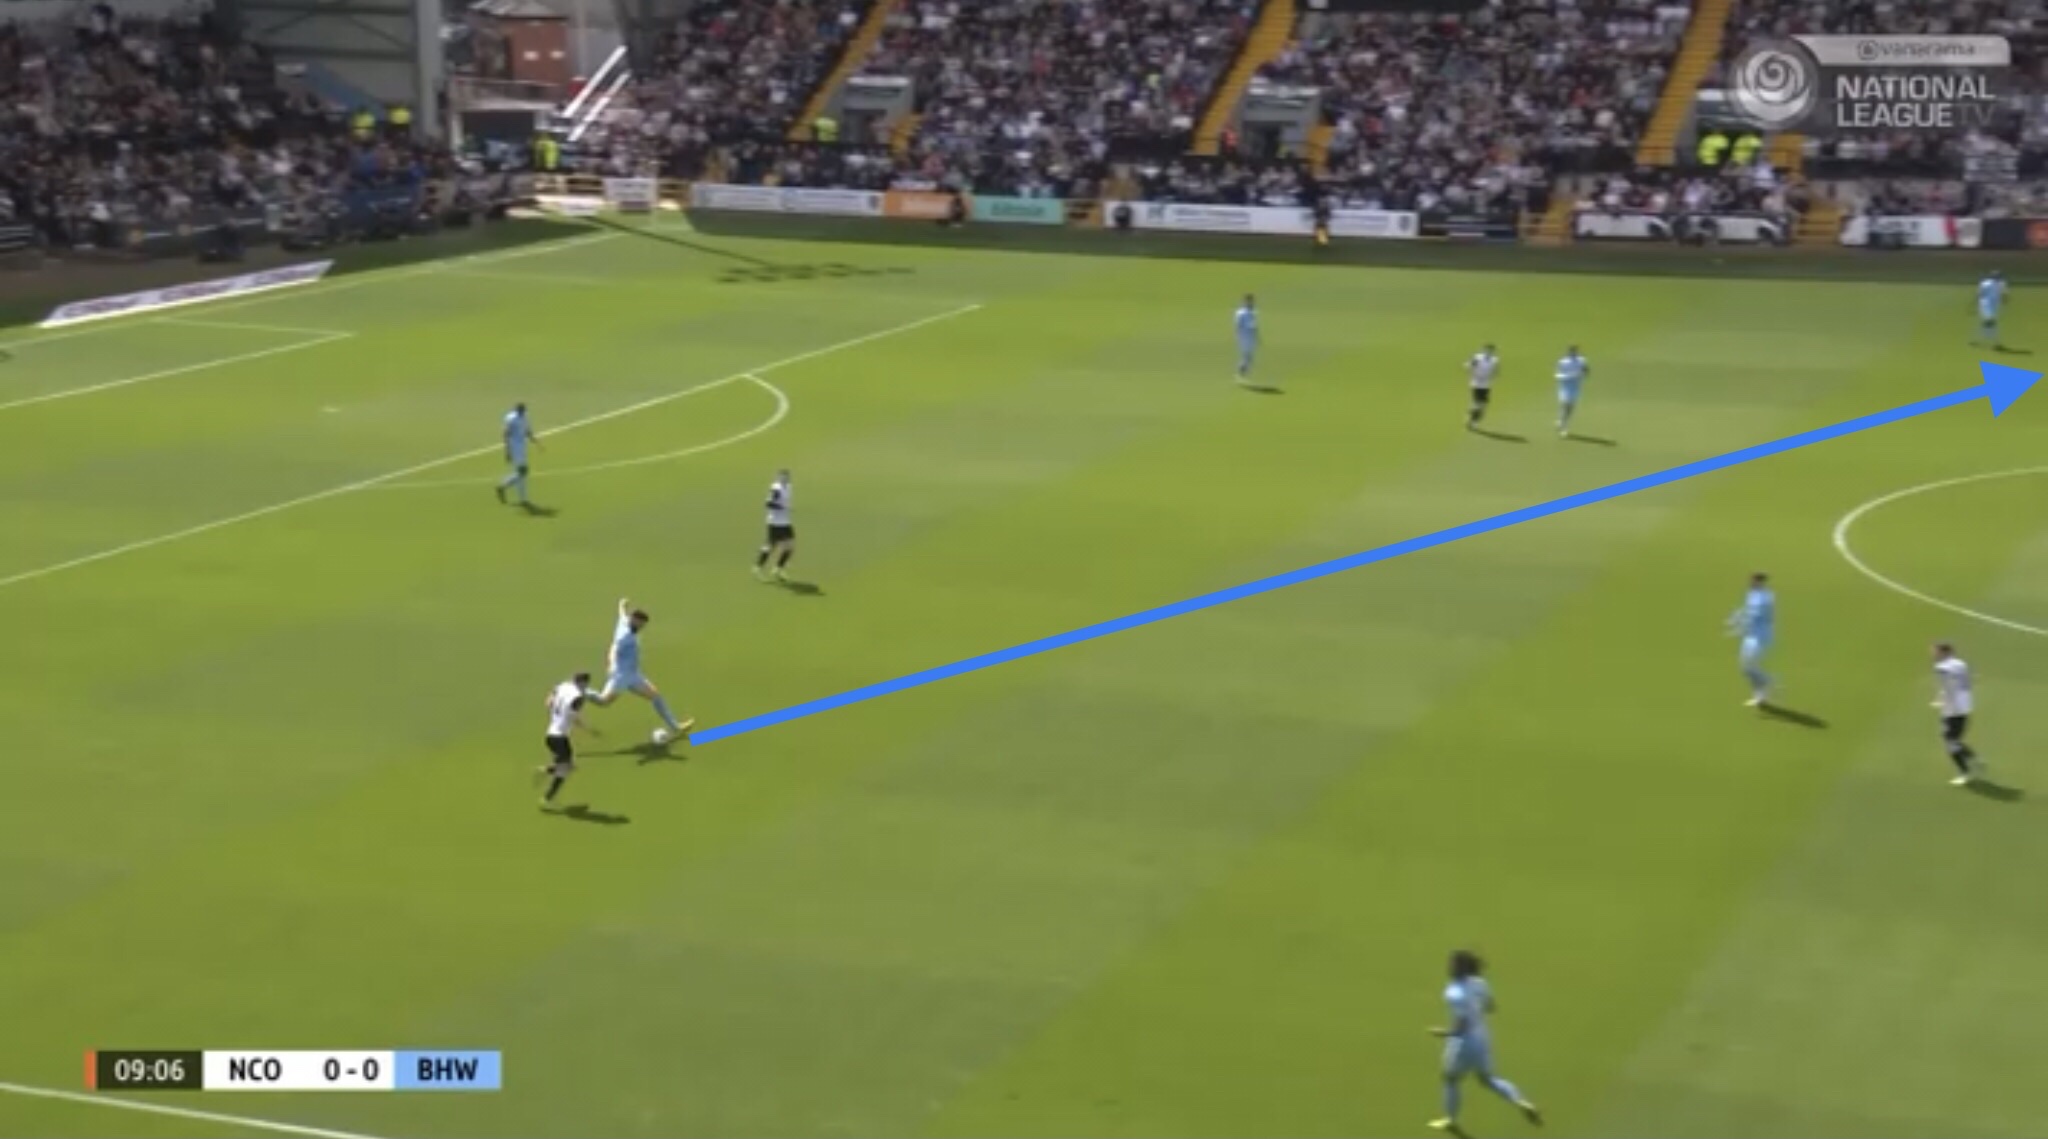
With Notts controlling the majority of possession, once Boreham Wood turned over the ball in their own third they often looked to play a quick vertical pass up the pitch. This was with the intention of relying on the physicality of their strikers to win duels against Notts’ defenders.
Here’s an example, with Boreham Wood switching the play diagonally towards a striker. They managed to win a free kick on this occasion, presenting them with an opportunity to get the ball into the Notts penalty area.
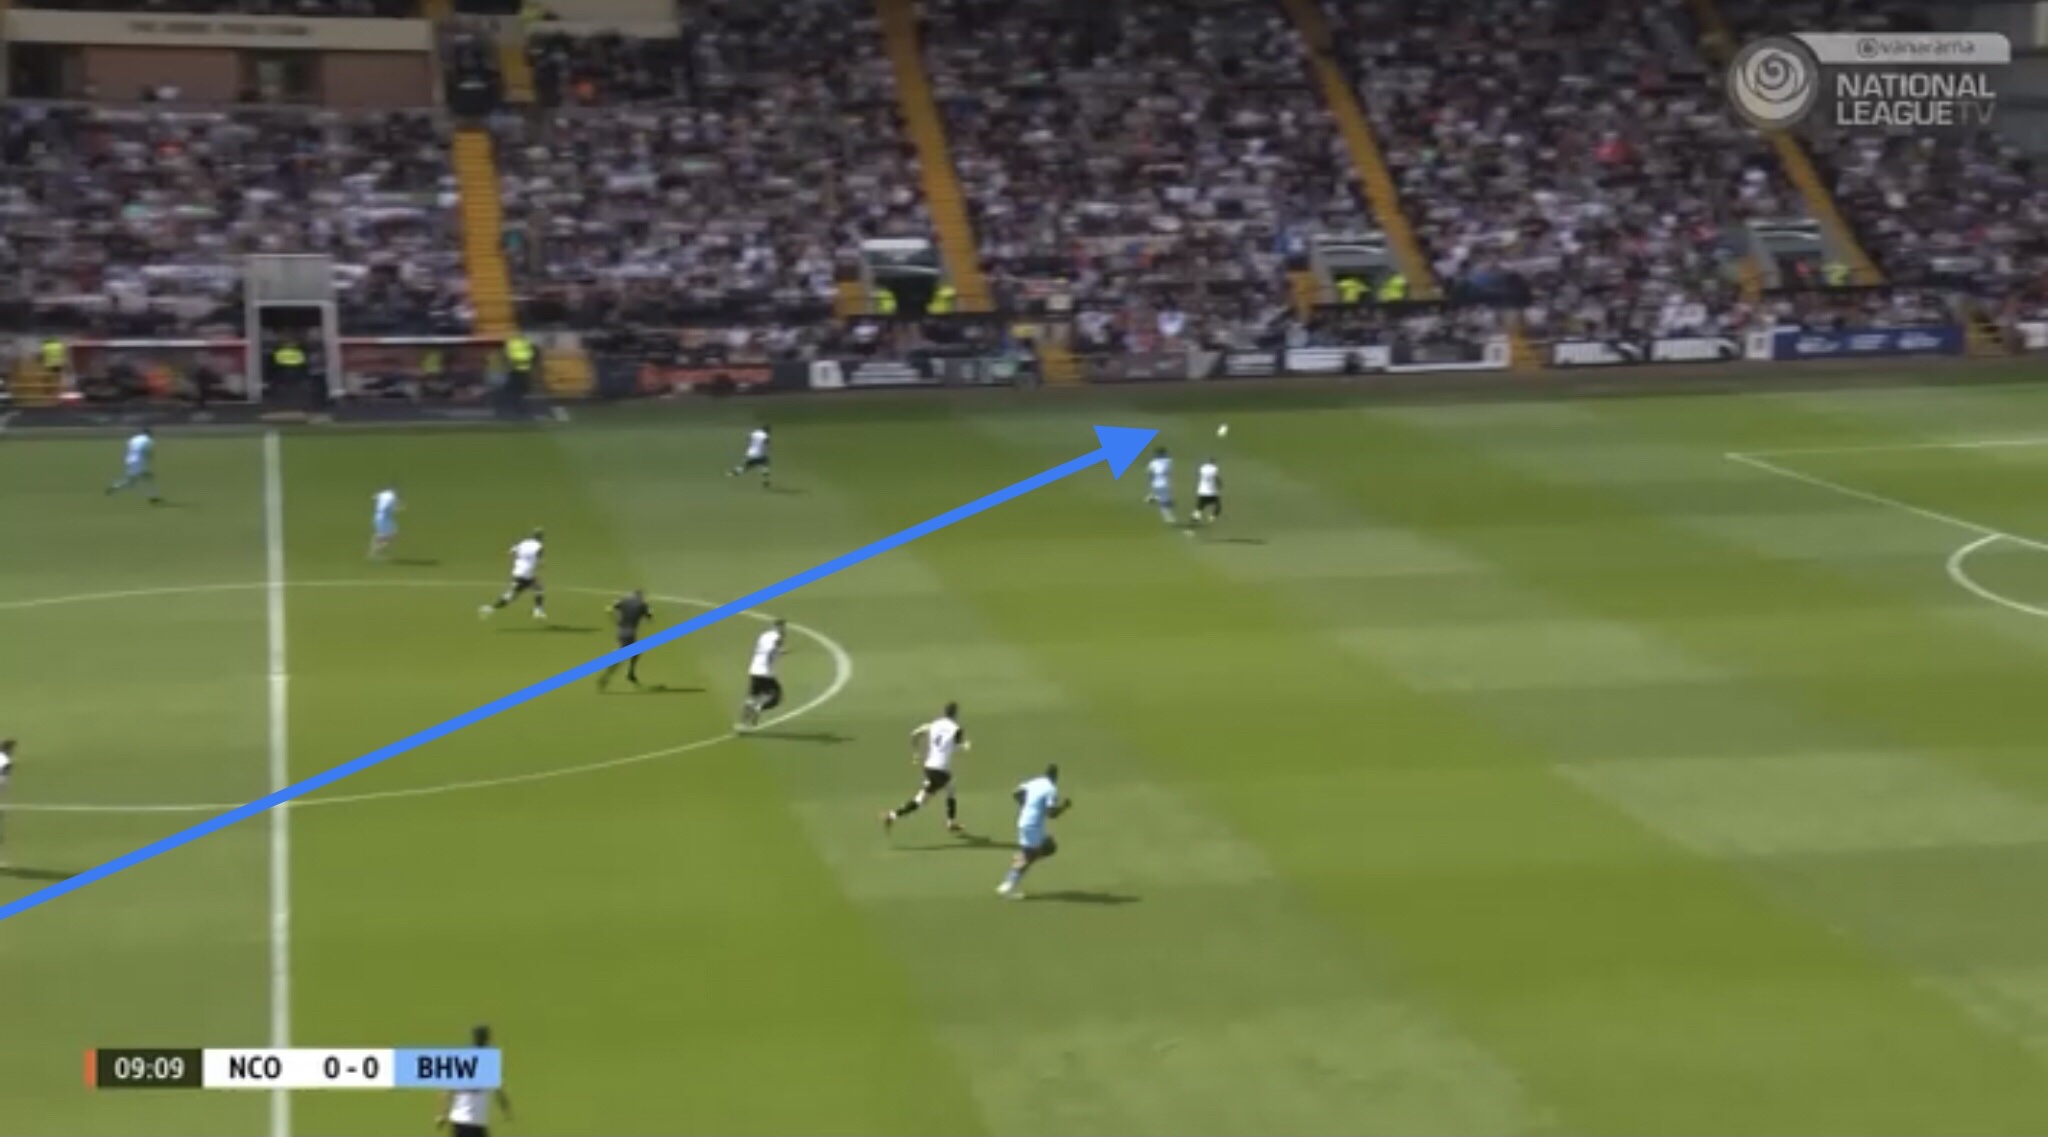
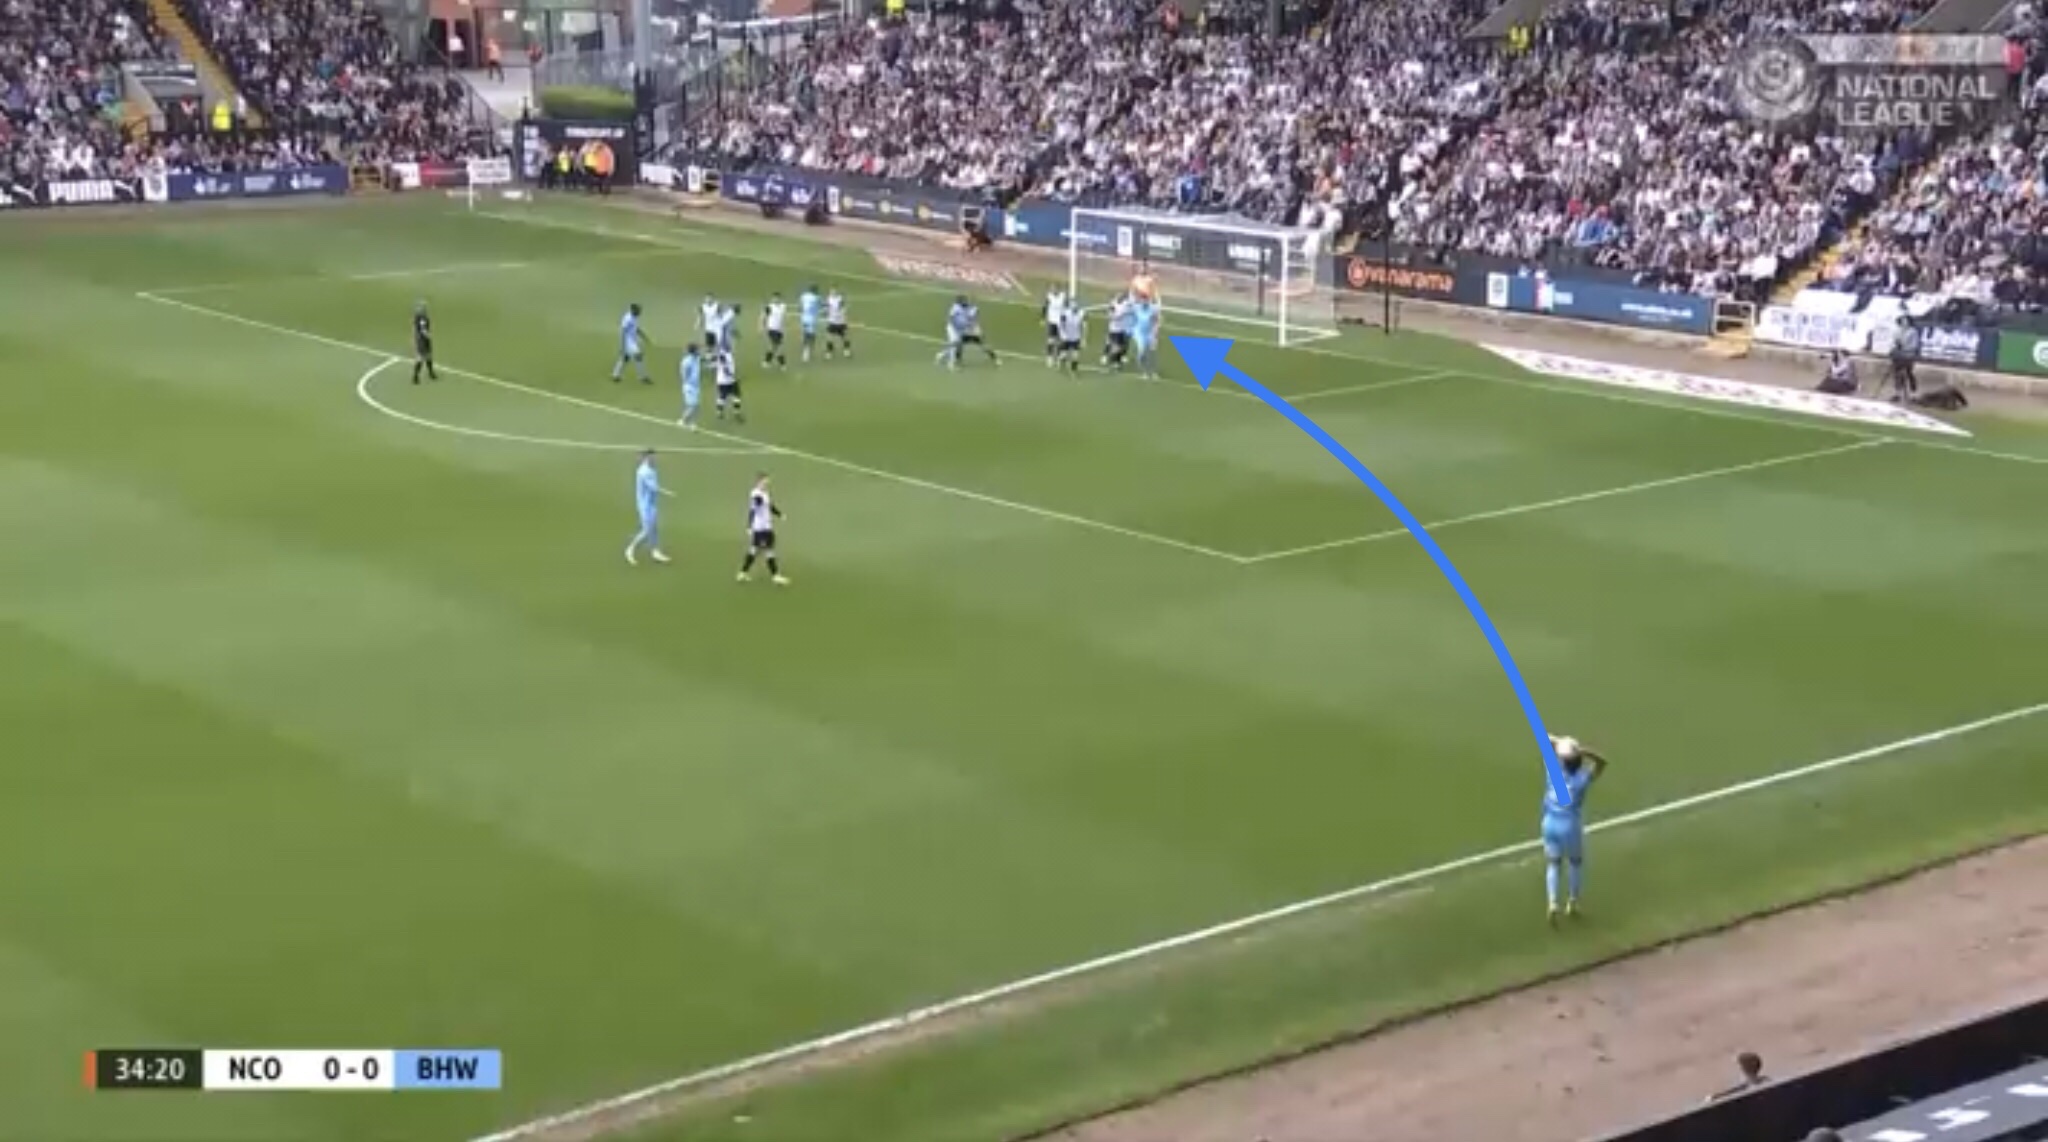
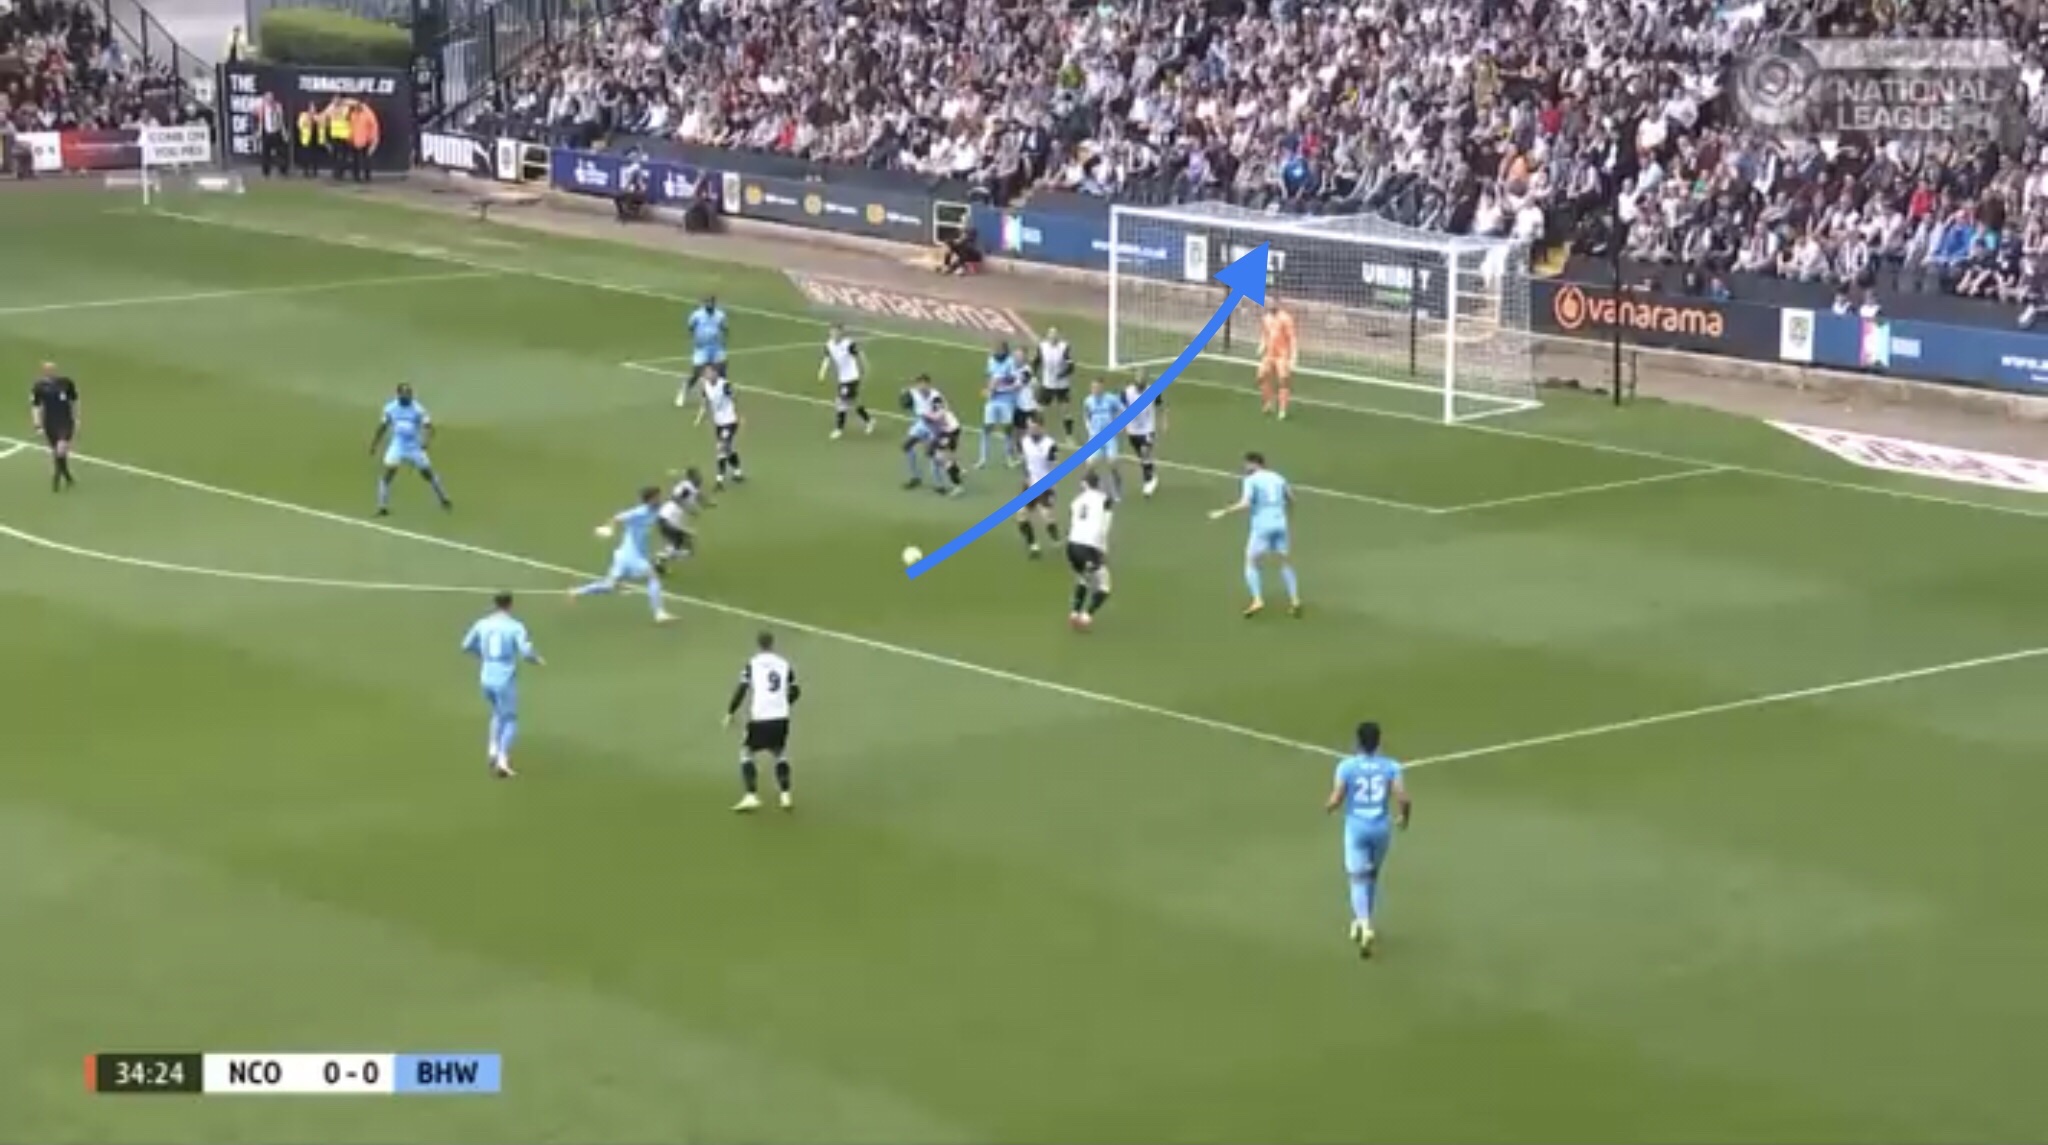
Boreham Wood looked to use set-pieces to their advantage. Here’s an example of a long throw which led to a long range shot, which was ultimately tipped over the crossbar.
Boreham Wood also looked to use their quick, vertical passes to exploit Notts’ high defensive line.
Here’s a couple of examples.
First, Boreham Wood play the ball over the top of Notts’ defence.
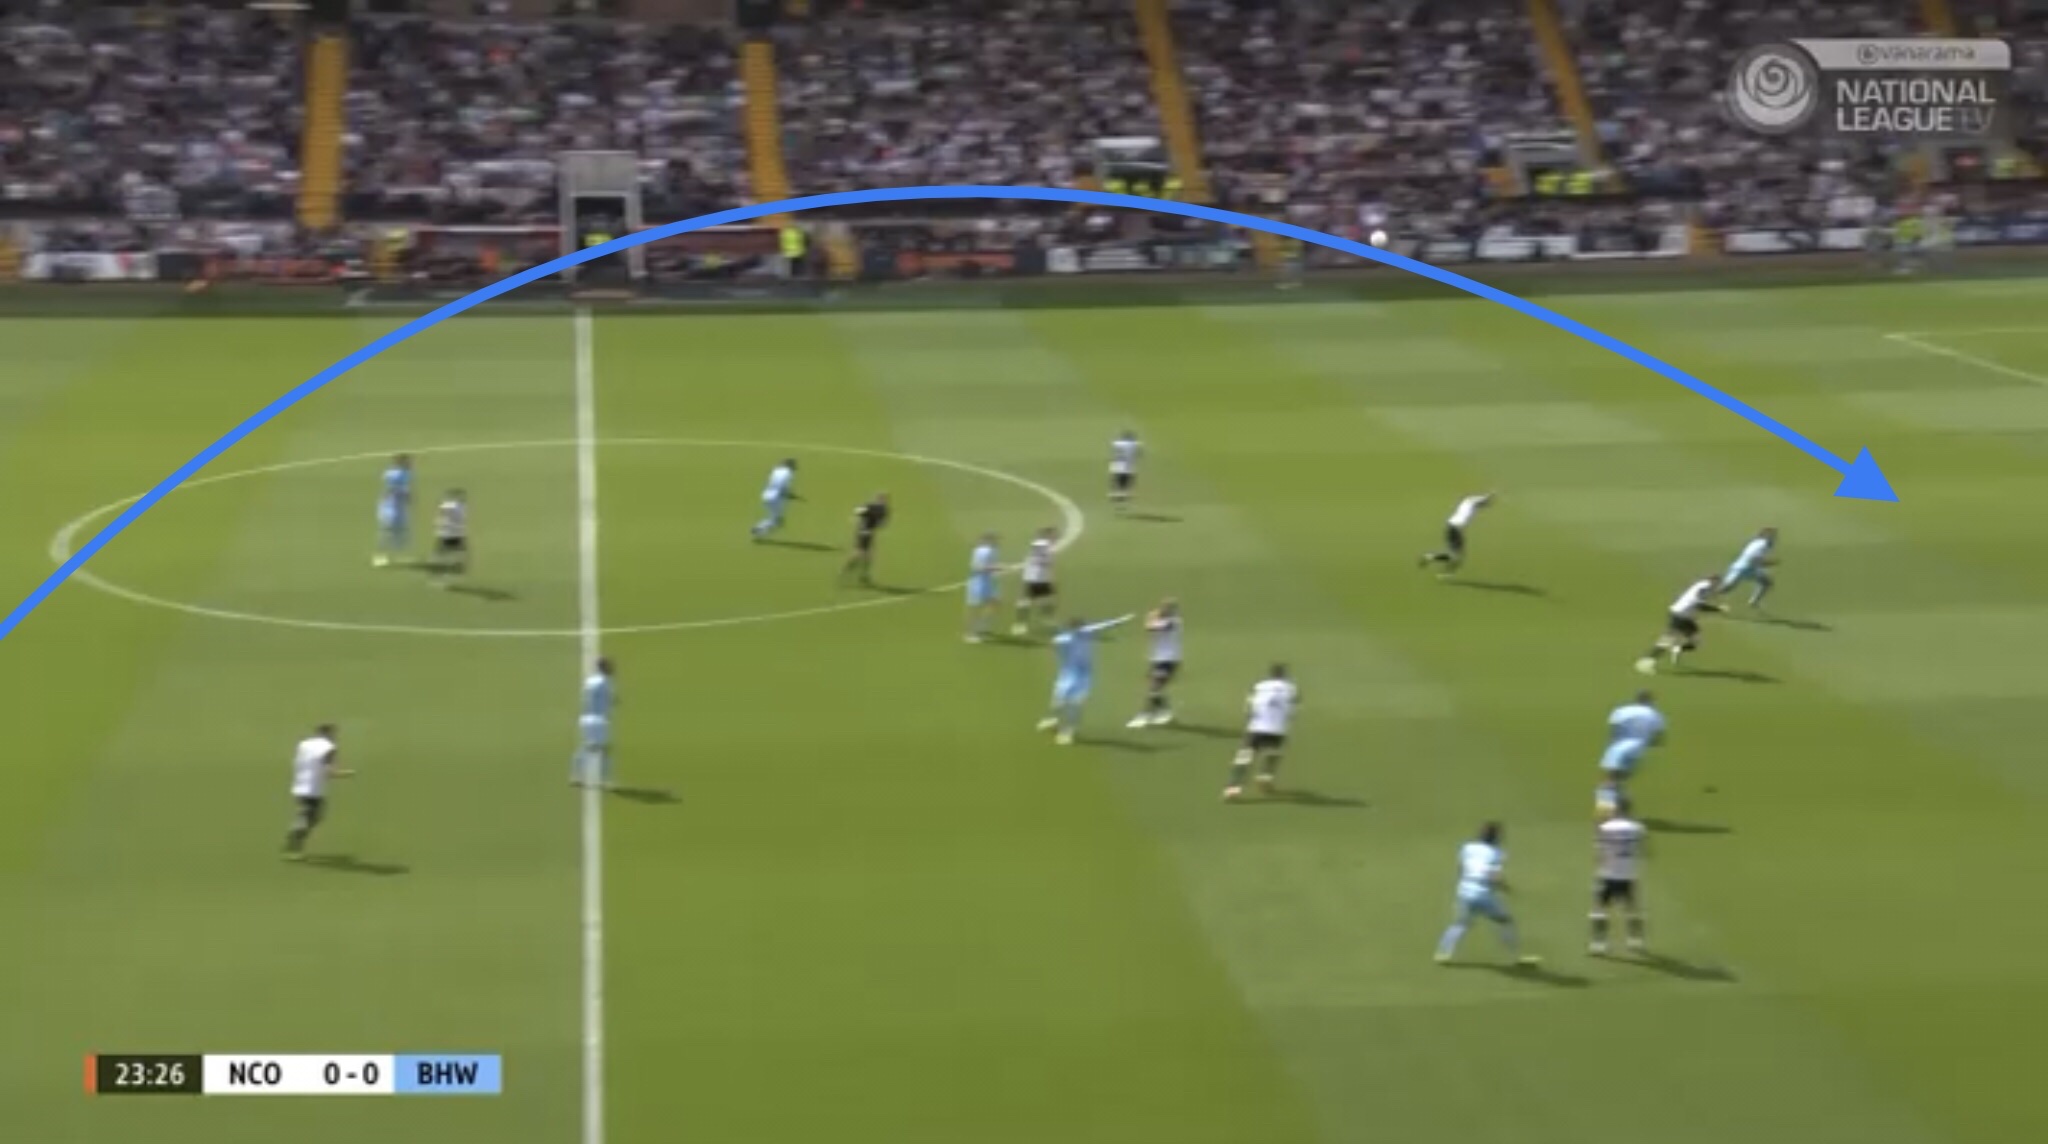
The ball is held up to give them a chance to get players up the pitch in support, and eventually they manage a shot which is saved by Slocombe.
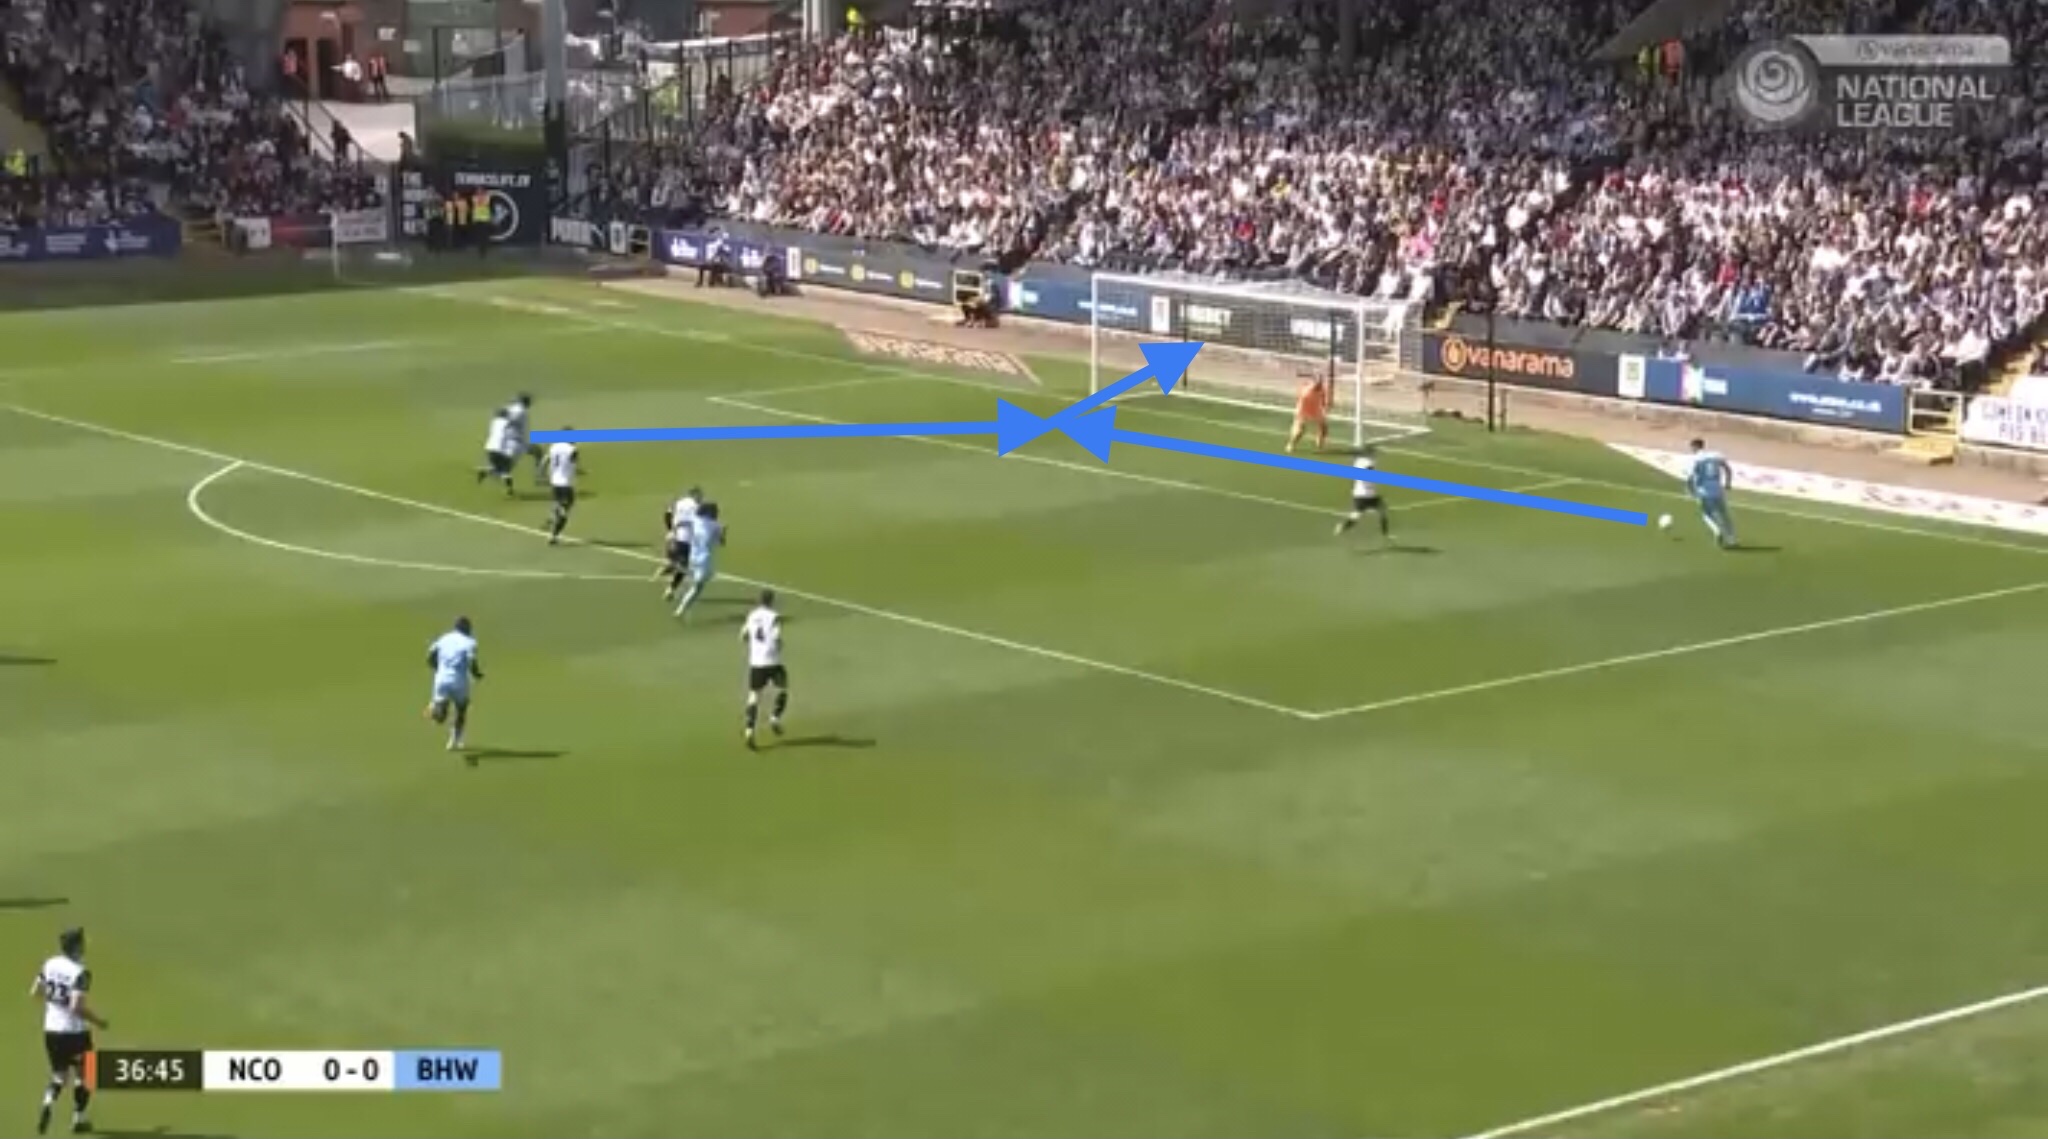
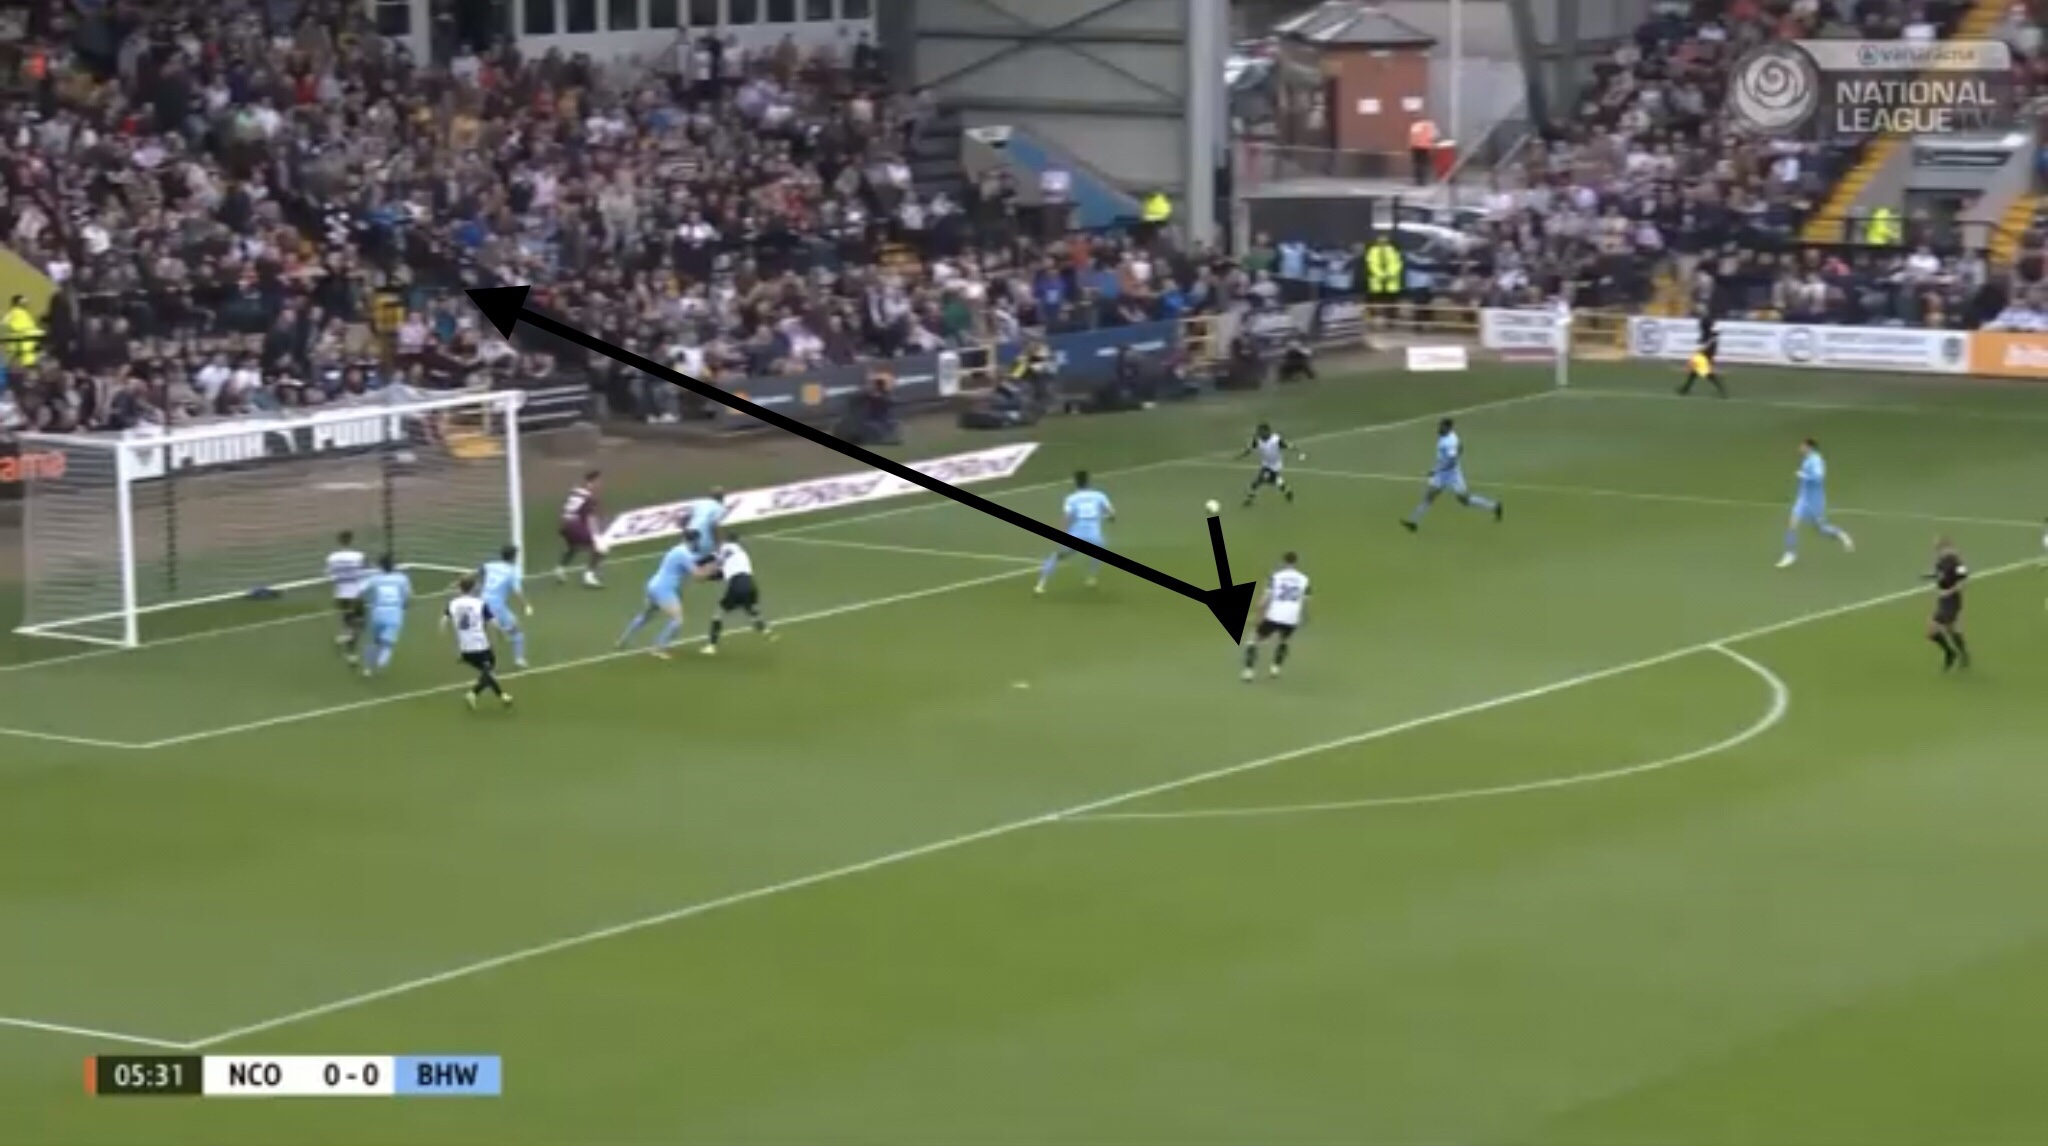
This was a warning sign for Notts. In this second example, Boreham Wood had a 3v1 numerical superiority on the right side, making it easier for them to play the ball over Notts’ defence. Broadbent made a forward run beyond the defence, leaving Palmer, and ran onto the through pass.
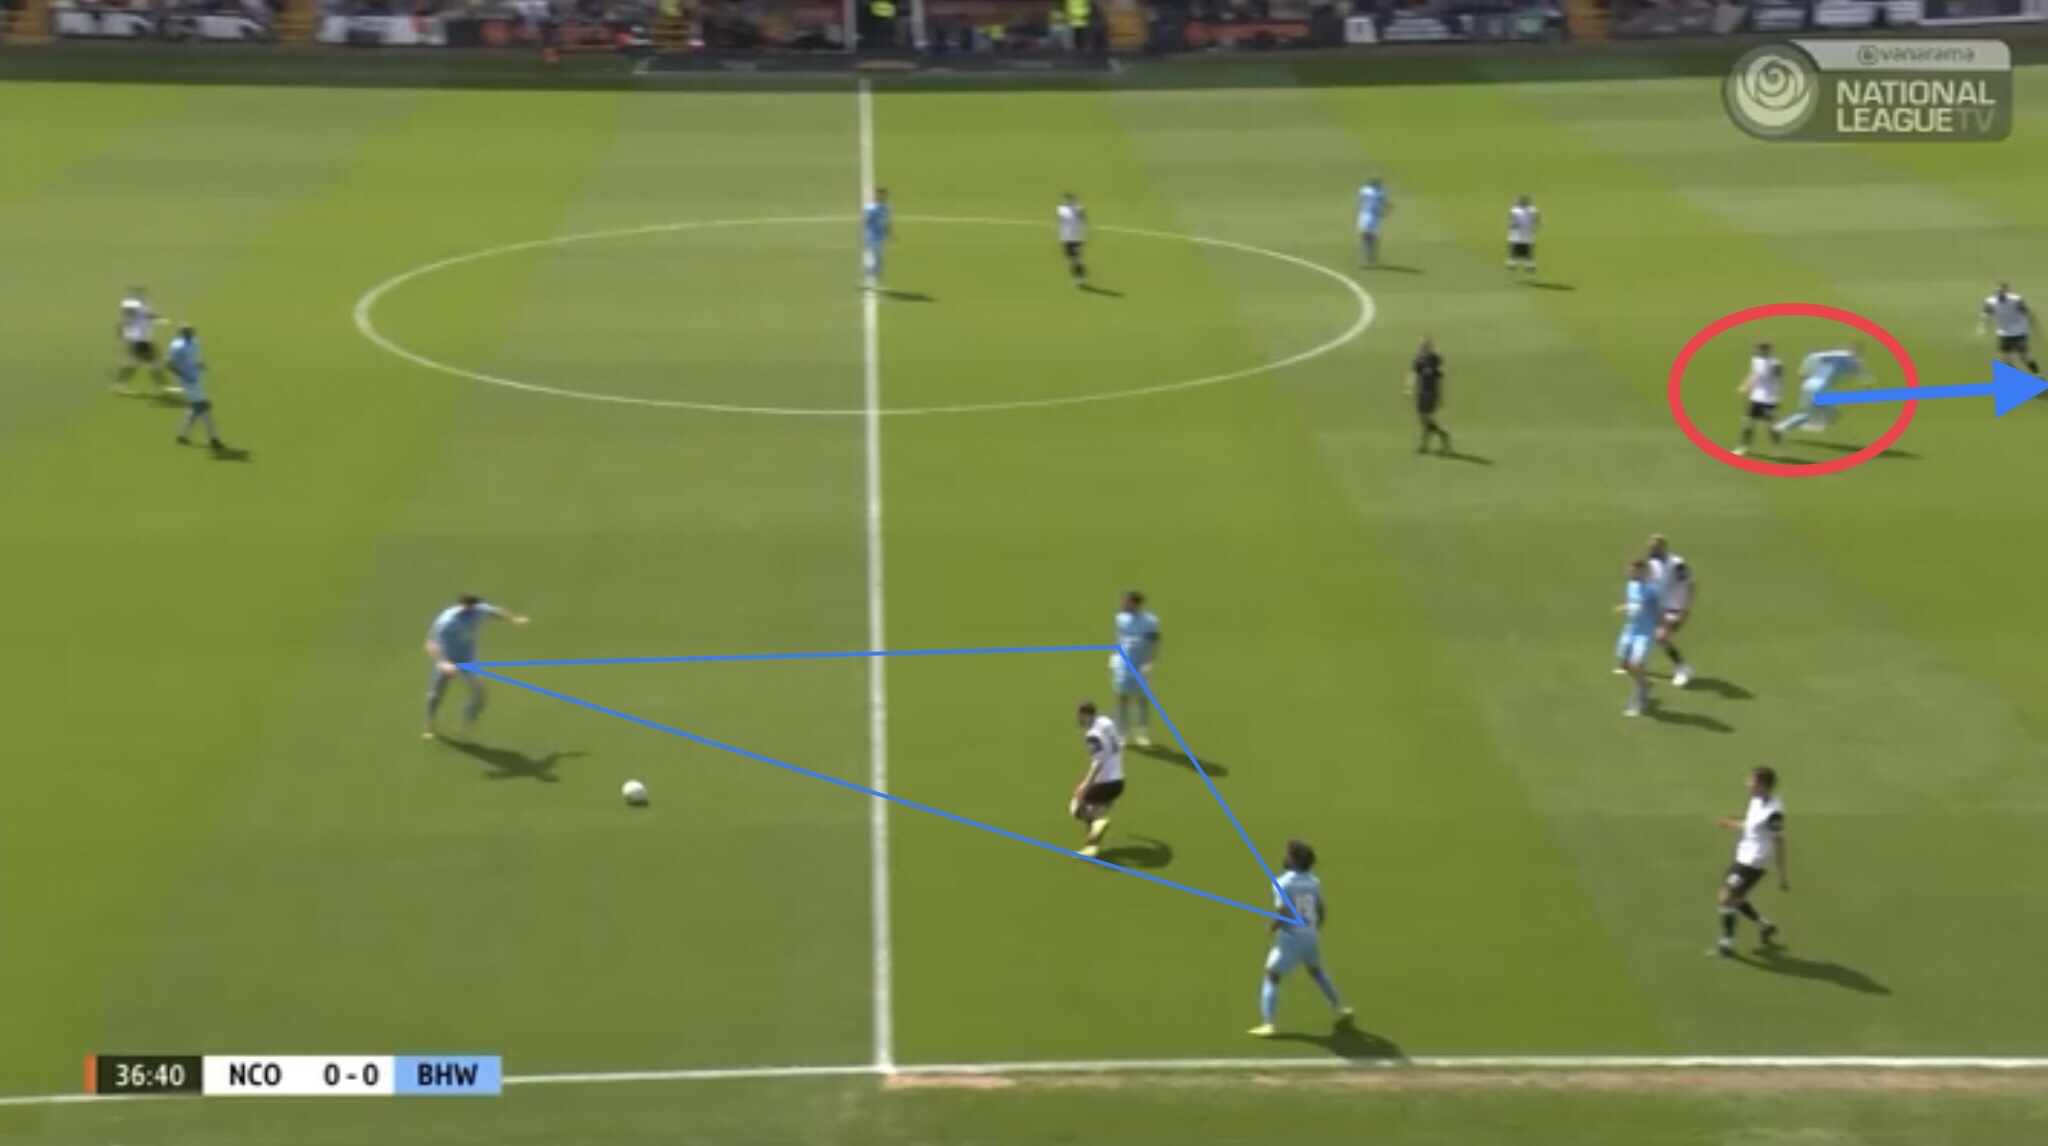
He cut the ball back for Ilesanmi, who scored to give Boreham Wood the lead.
Notts County Build-Up / Boreham Wood Pressing Structure
When in possession, Notts aimed to build play using a 3-box-3 shape. This meant that attacking midfielders Rodrigues and Austin dropped slightly deeper to create a box shape with Palmer and Bostock. Their wing backs Nemane and Chicksen pushed forwards to form a front three, pinning Boreham Wood’s wing backs deeper.
Boreham Wood utilised a man-orientated pressing structure, meaning every one of their players had the responsibility of picking up a Notts player.
There was one exception to this. Boreham Wood made sure they had a man advantage in defence (5v4) to make sure Notts’ top scorer Langstaff didn’t have space to exploit. This extra man was taken from Boreham Wood’s attack, meaning Notts had a 3v2 numerical superiority in the first line of build-up.
Because Boreham Wood had a man disadvantage in this part of the pitch, they were happy to let Notts centre back Baldwin have possession without applying too much pressure on to him.
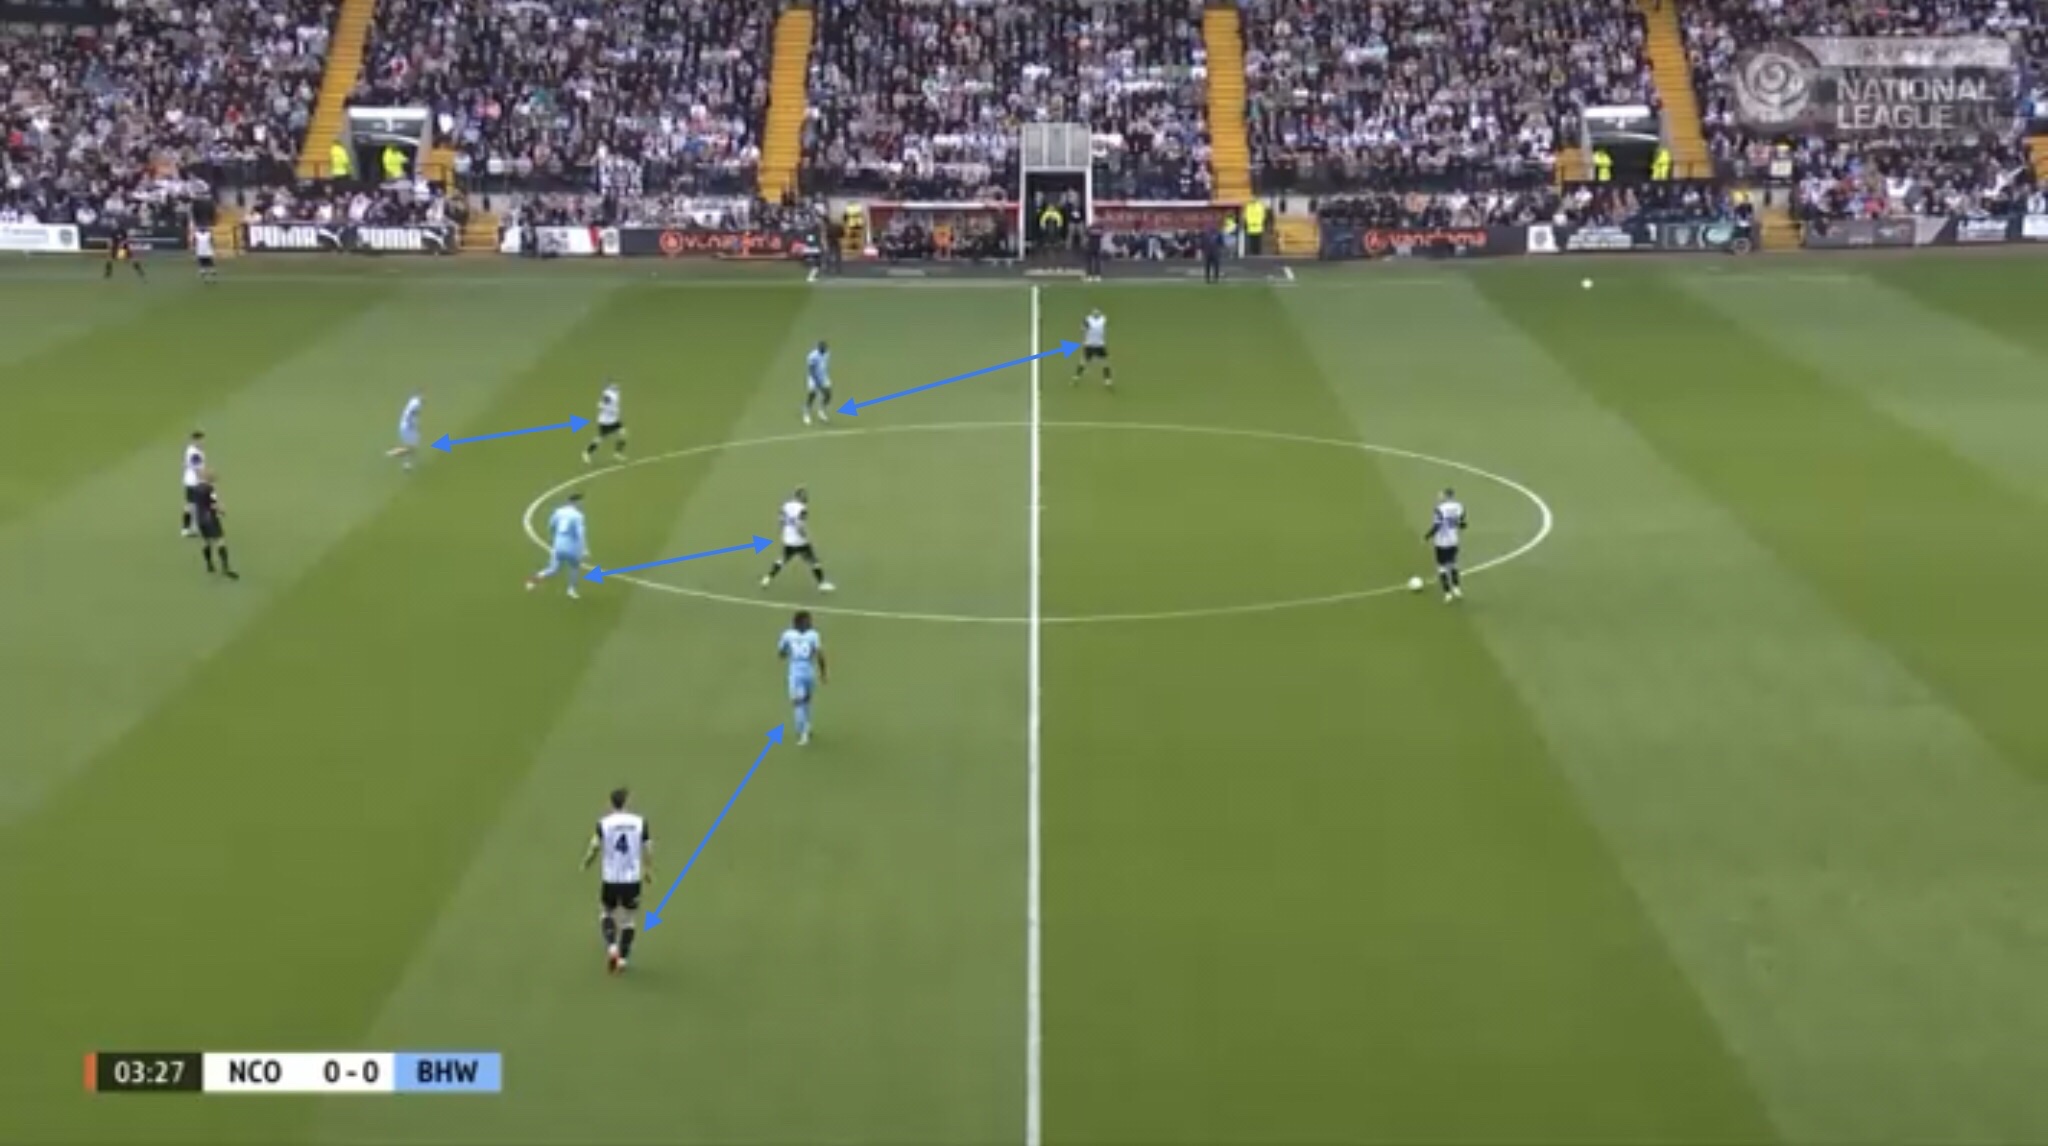
Here’s an example of Boreham Wood’s press working:

Man-to-man pressing structures can be very difficult to play against, as, by definition, all of your players are in close proximity to opponents, making it difficult for them to receive the ball in space.
So how exactly did Notts manage to break Boreham Wood’s press?
Dragging Players Out Of Position
One of the ways Notts managed this, was through creating space by dragging players out of Boreham Wood’s defensive line.
As Boreham Wood marked man-to-man, it was often the responsibility of left centre back Chris Bush to step forwards out of defence to apply pressure to Notts’ Rodrigues.

If Notts could get it right, there would be space in Boreham Wood’s defensive line to exploit.
Here’s an example. Below, you can see Bush move forwards onto Rodrigues. Rodrigues passes to Nemane, but as Bush has left his defensive line, this leaves Ilesanmi isolated 1v1 against Nemane, with space to be driven into.
Nemane beats his man and cuts the ball back to Rodrigues, who shoots over the bar.
Another example here. Bush again steps forwards to mark Rodrigues, but then he gets distracted and goes to press the ball carrier instead, leaving Rodrigues unmarked.
Notts are able to find Rodrigues in space in a couple of passes, buts his shot is saved.
Pinning The Opposition
I’ve already mentioned how their wing backs aimed to pin Boreham Wood’s wing backs deeper, but Notts also managed to pin Boreham Wood’s midfielders narrower.
This was another way Notts managed to play through Boreham Wood’s press. With Boreham Wood man marking, when Notts managed to do this, it meant there was space in the half spaces for them to exploit, either side of the compact central area of the pitch.
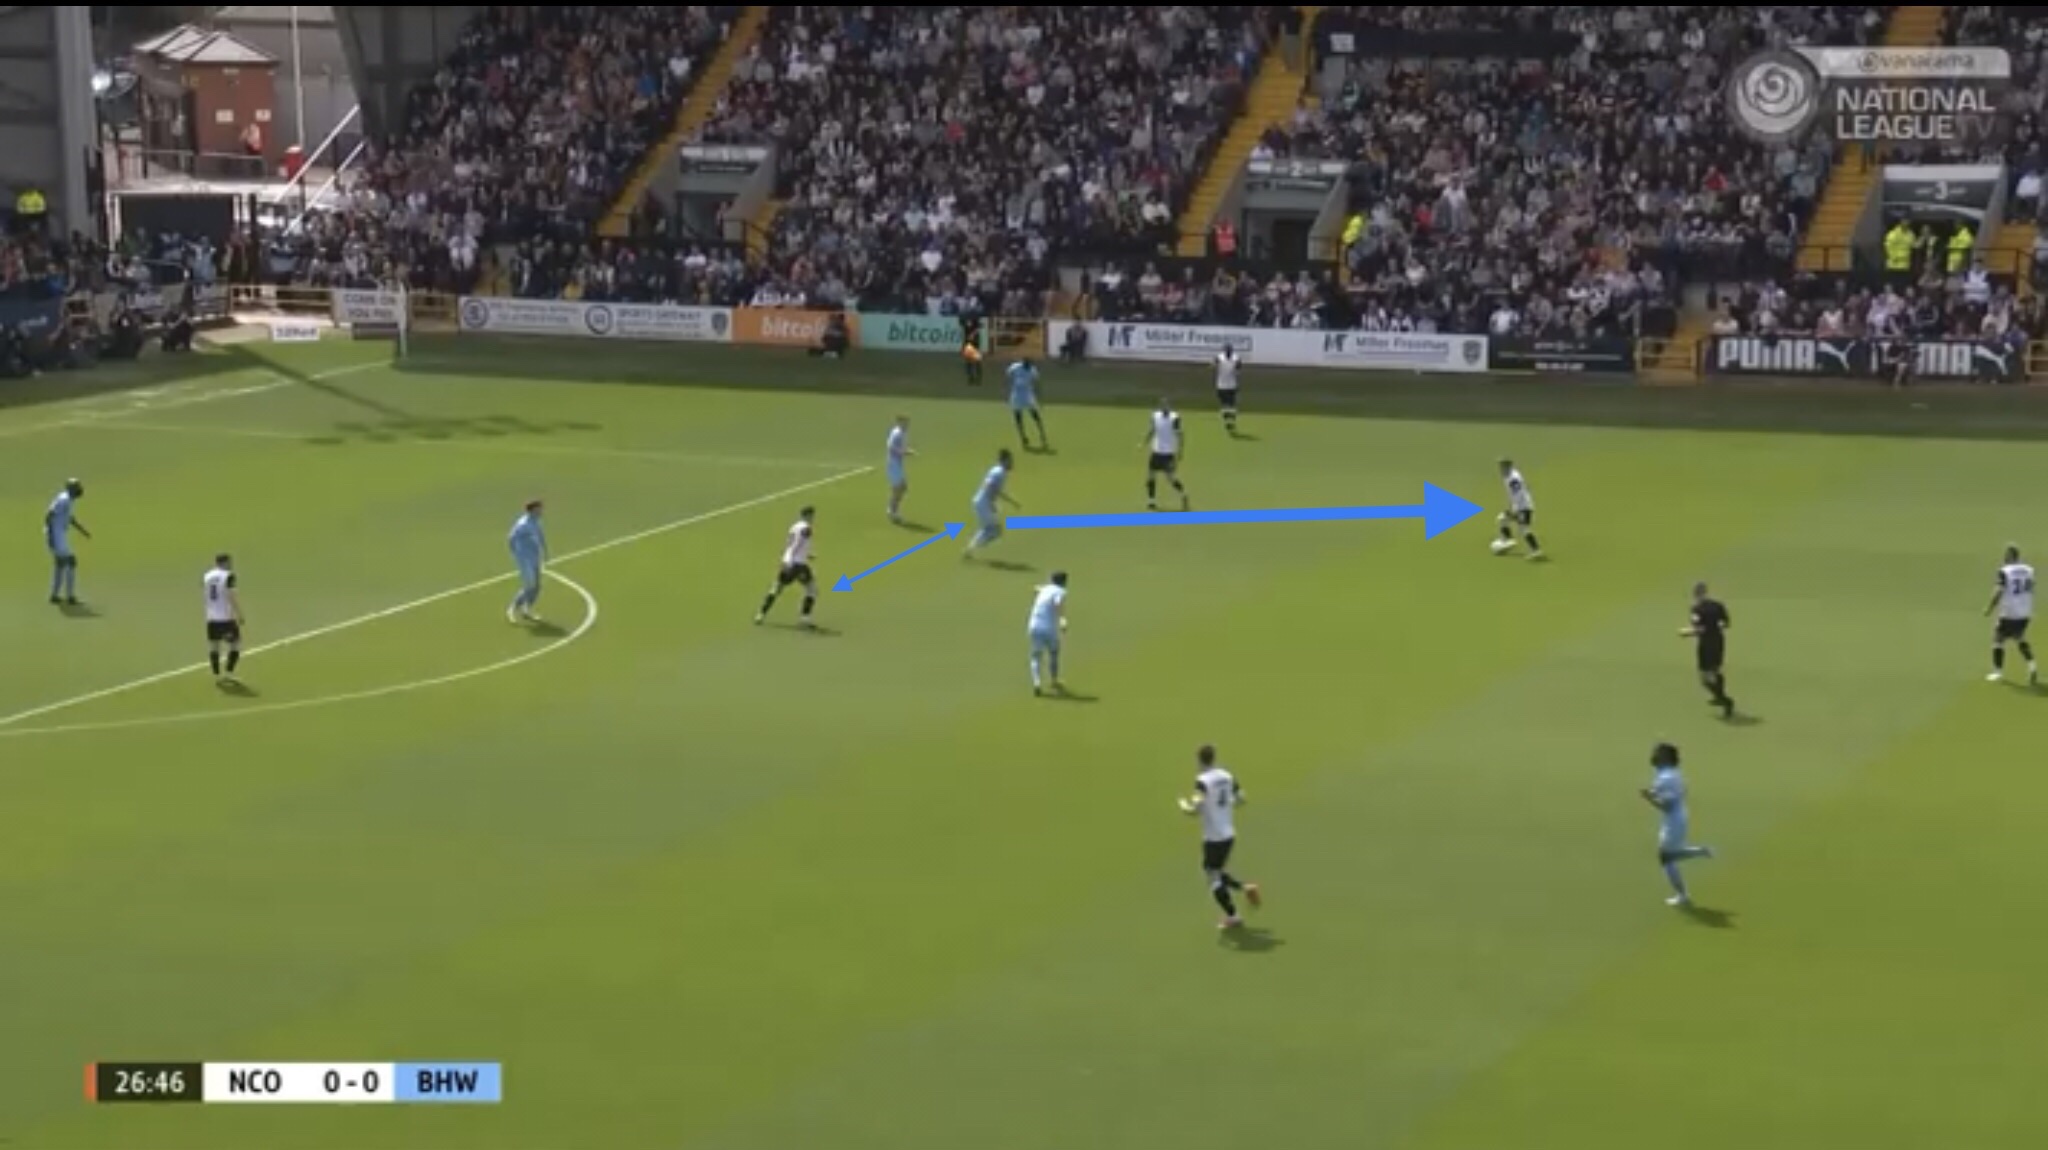
Here’s an example. Here, you can see Notts’ central midfielders Palmer and Bostock positioned in front of each other, rather than side by side.
This meant that once Baldwin had baited the Boreham Wood press, it created space for Cameron to receive a pass in the left half space. From here, he could carry the ball forwards and initiate an attack.
Exploiting The High Press
When Boreham Wood had pushed higher up the pitch, it presented Notts with an opportunity to exploit the space that was left behind.
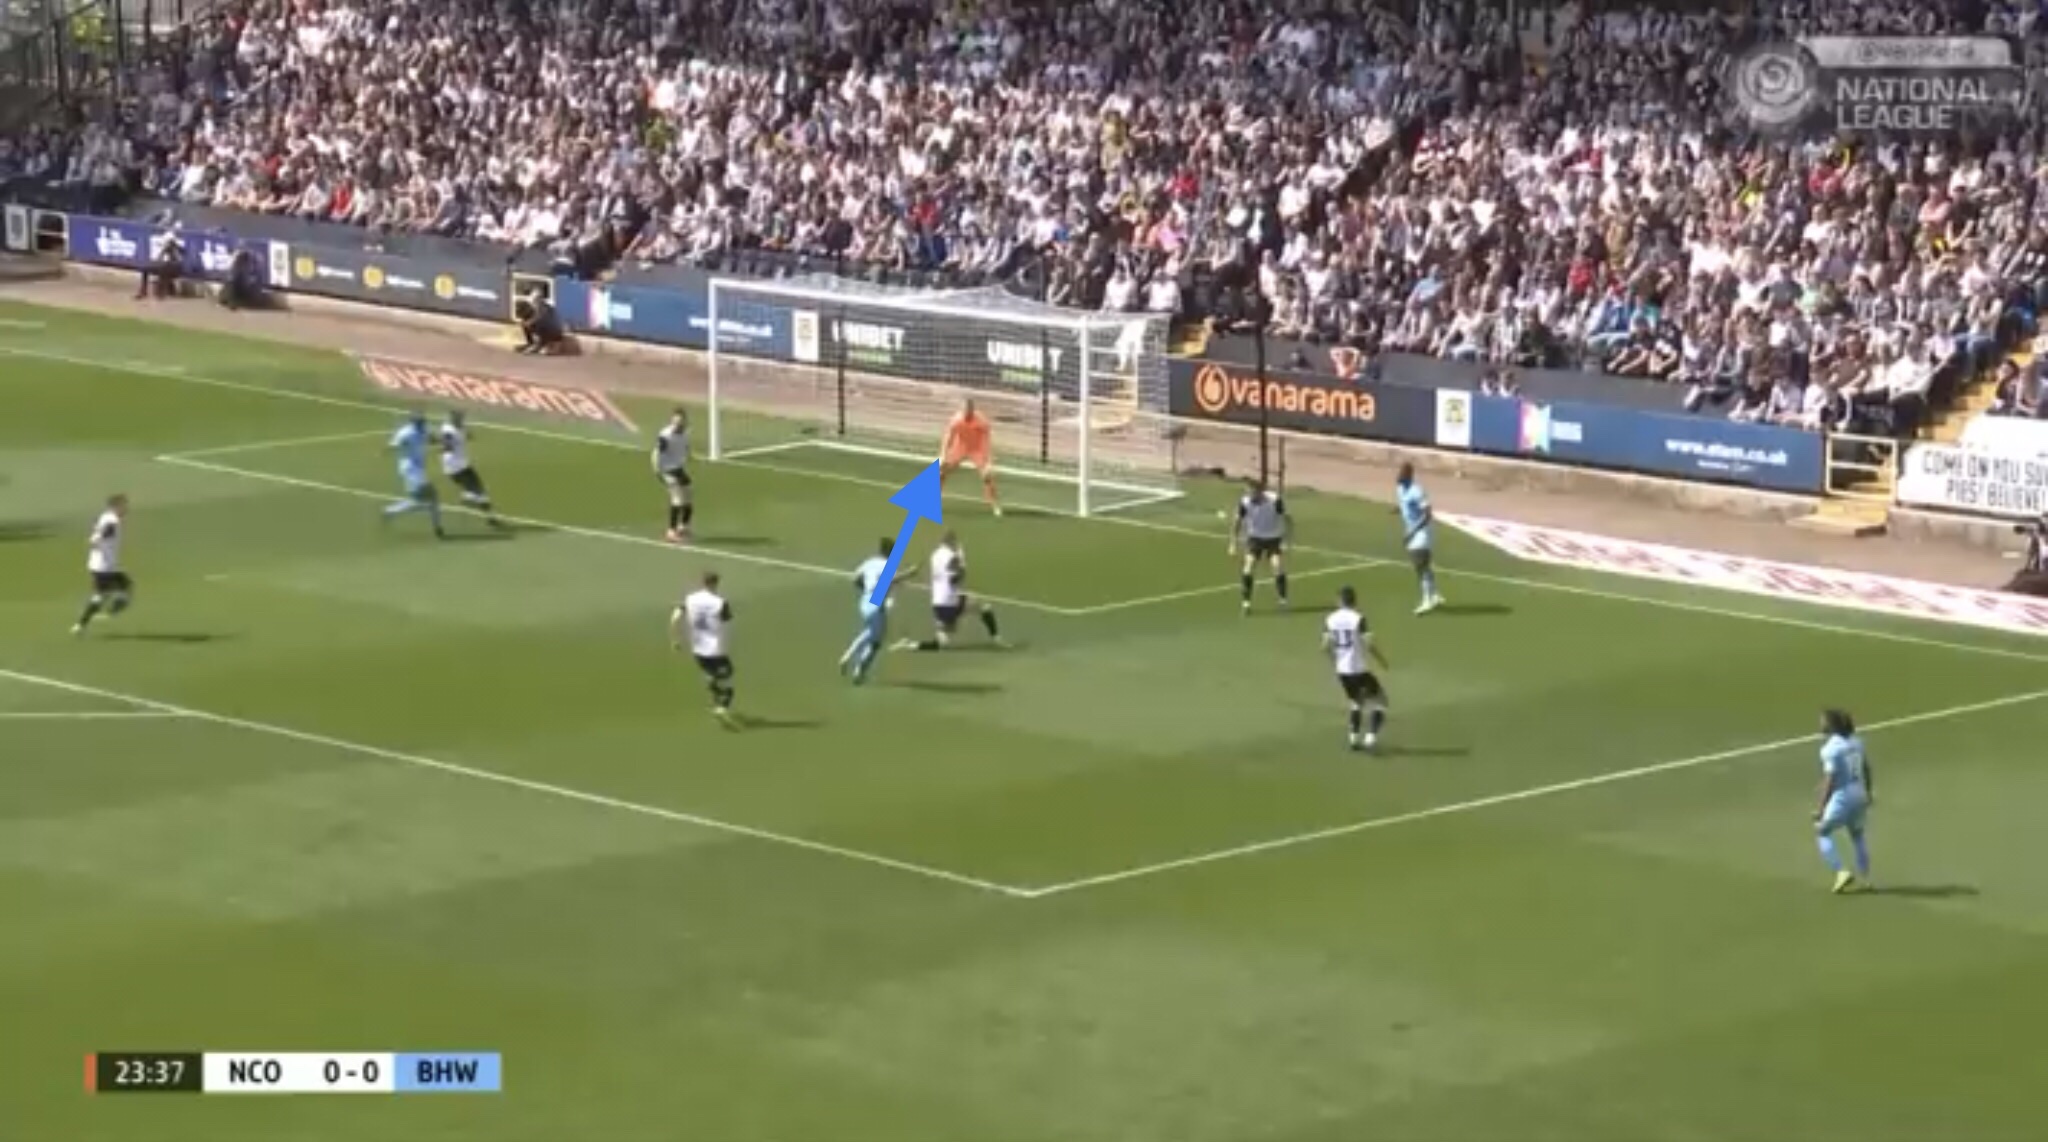
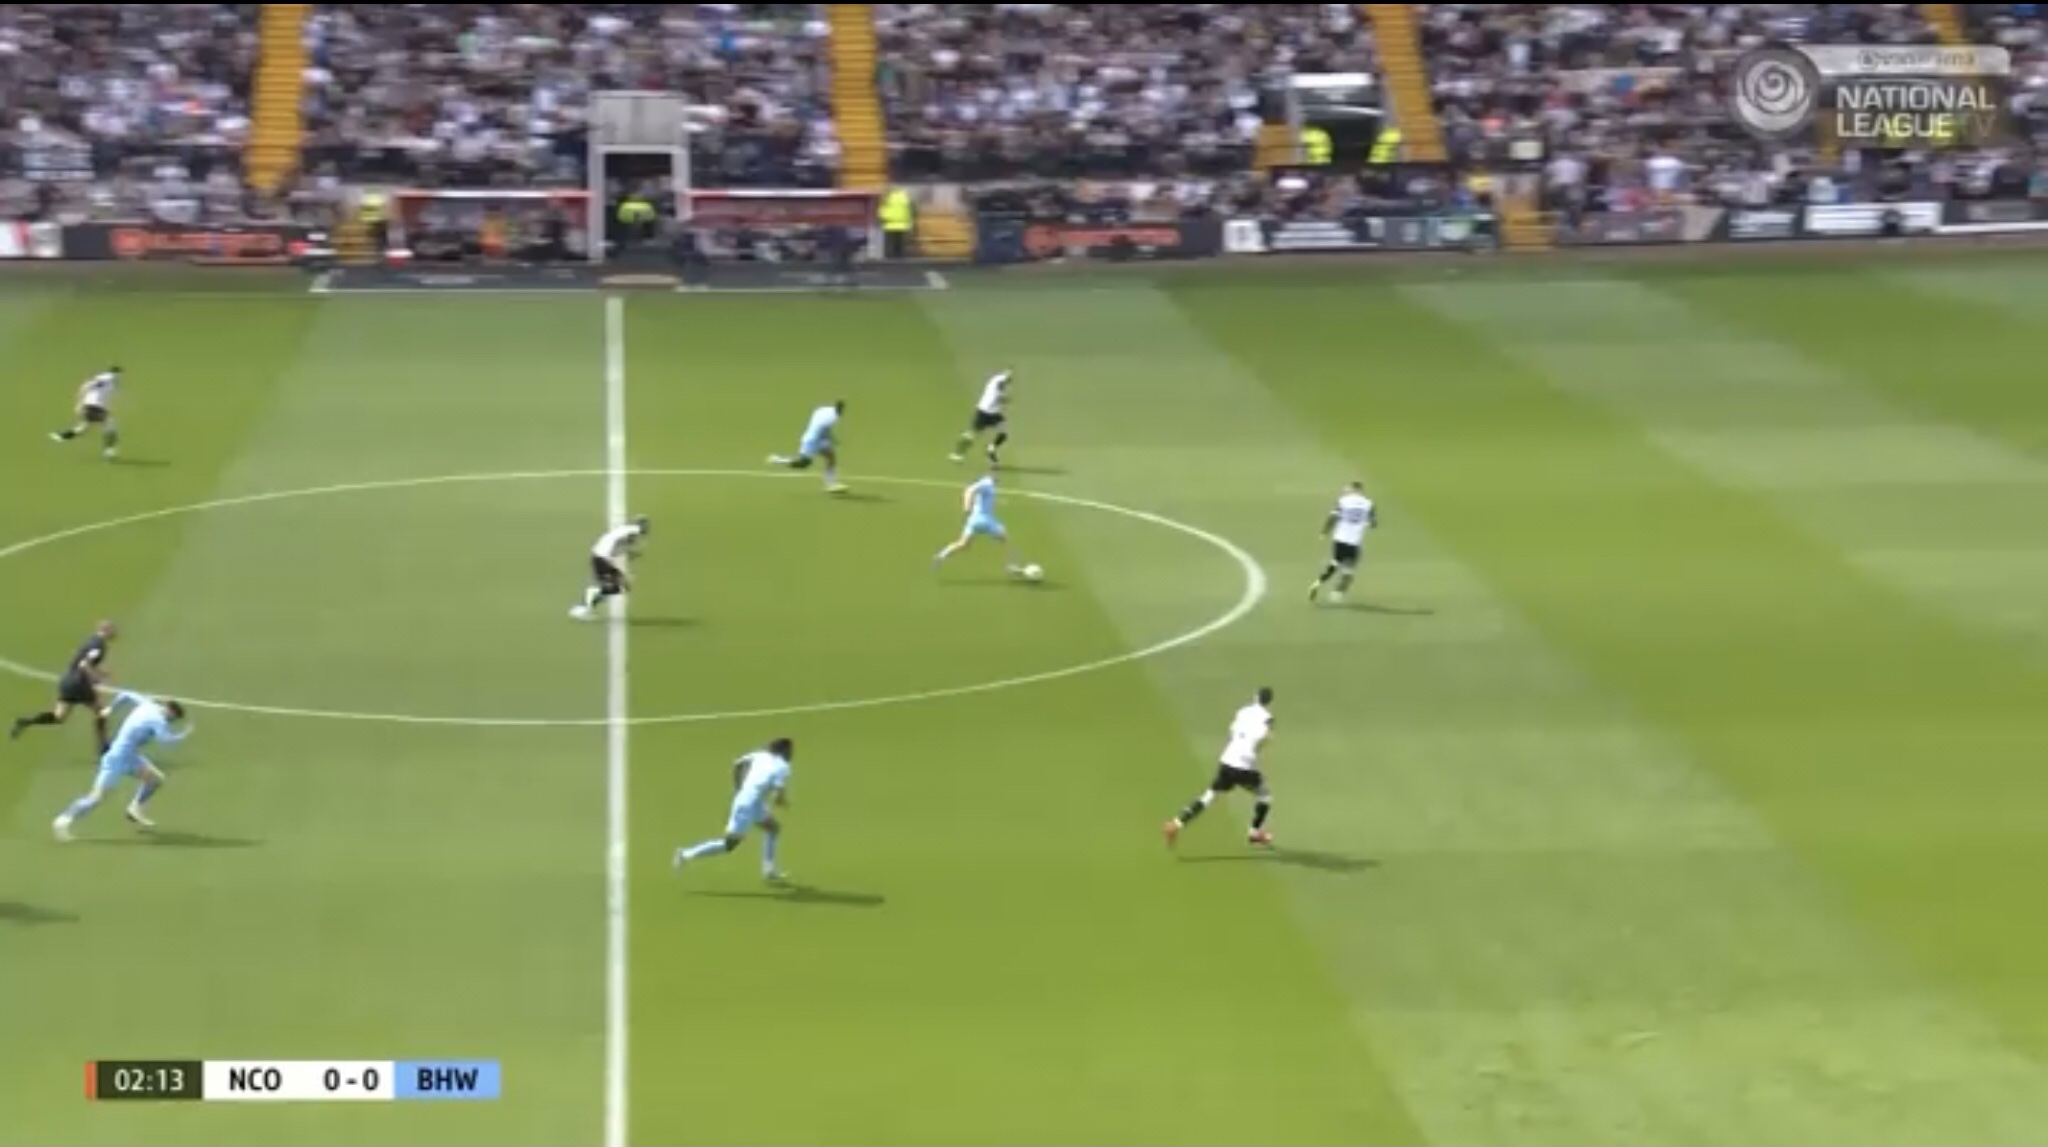
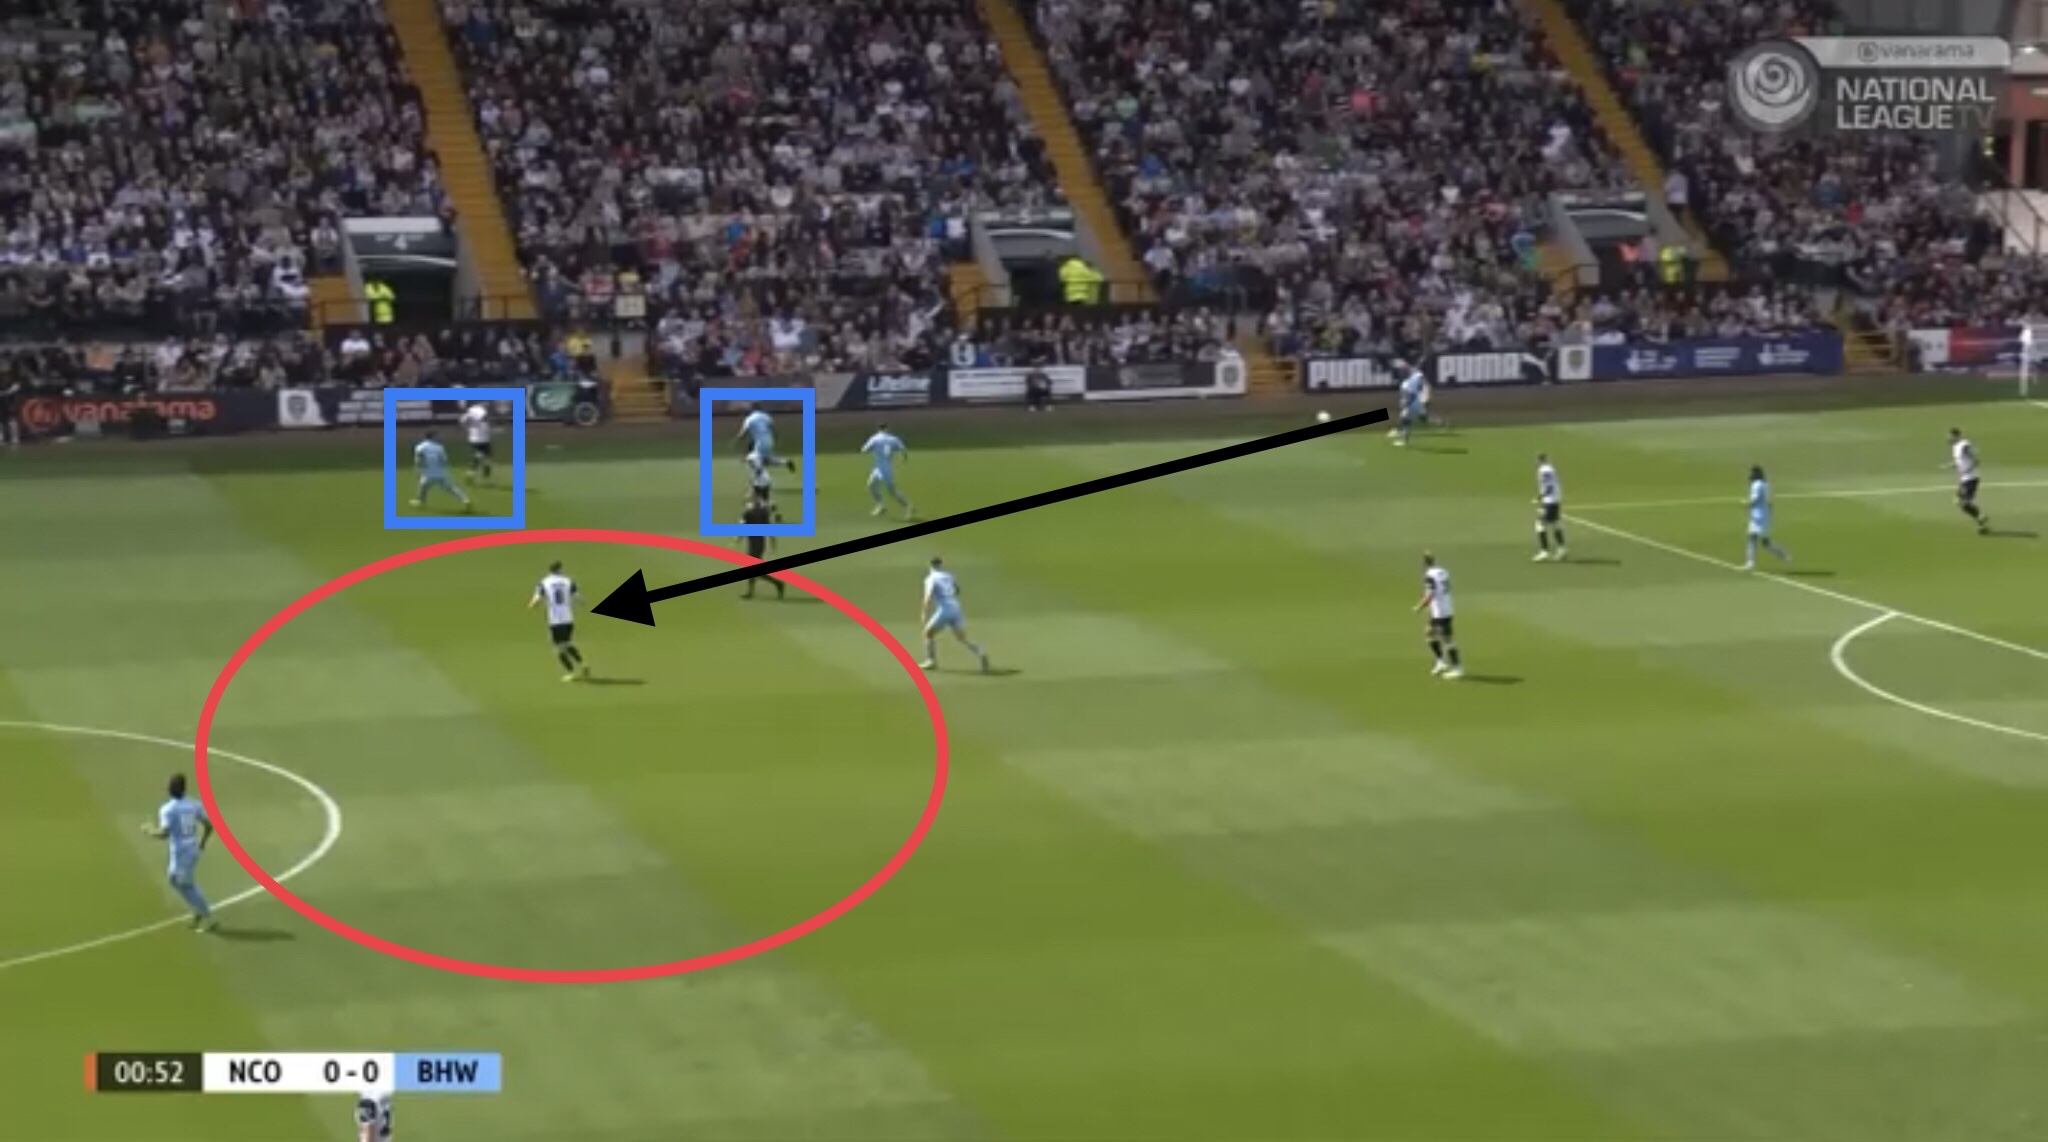
In the very first minute of the match, Boreham Wood looked to counter-press — that is, pressing as soon as they lost possession themselves.
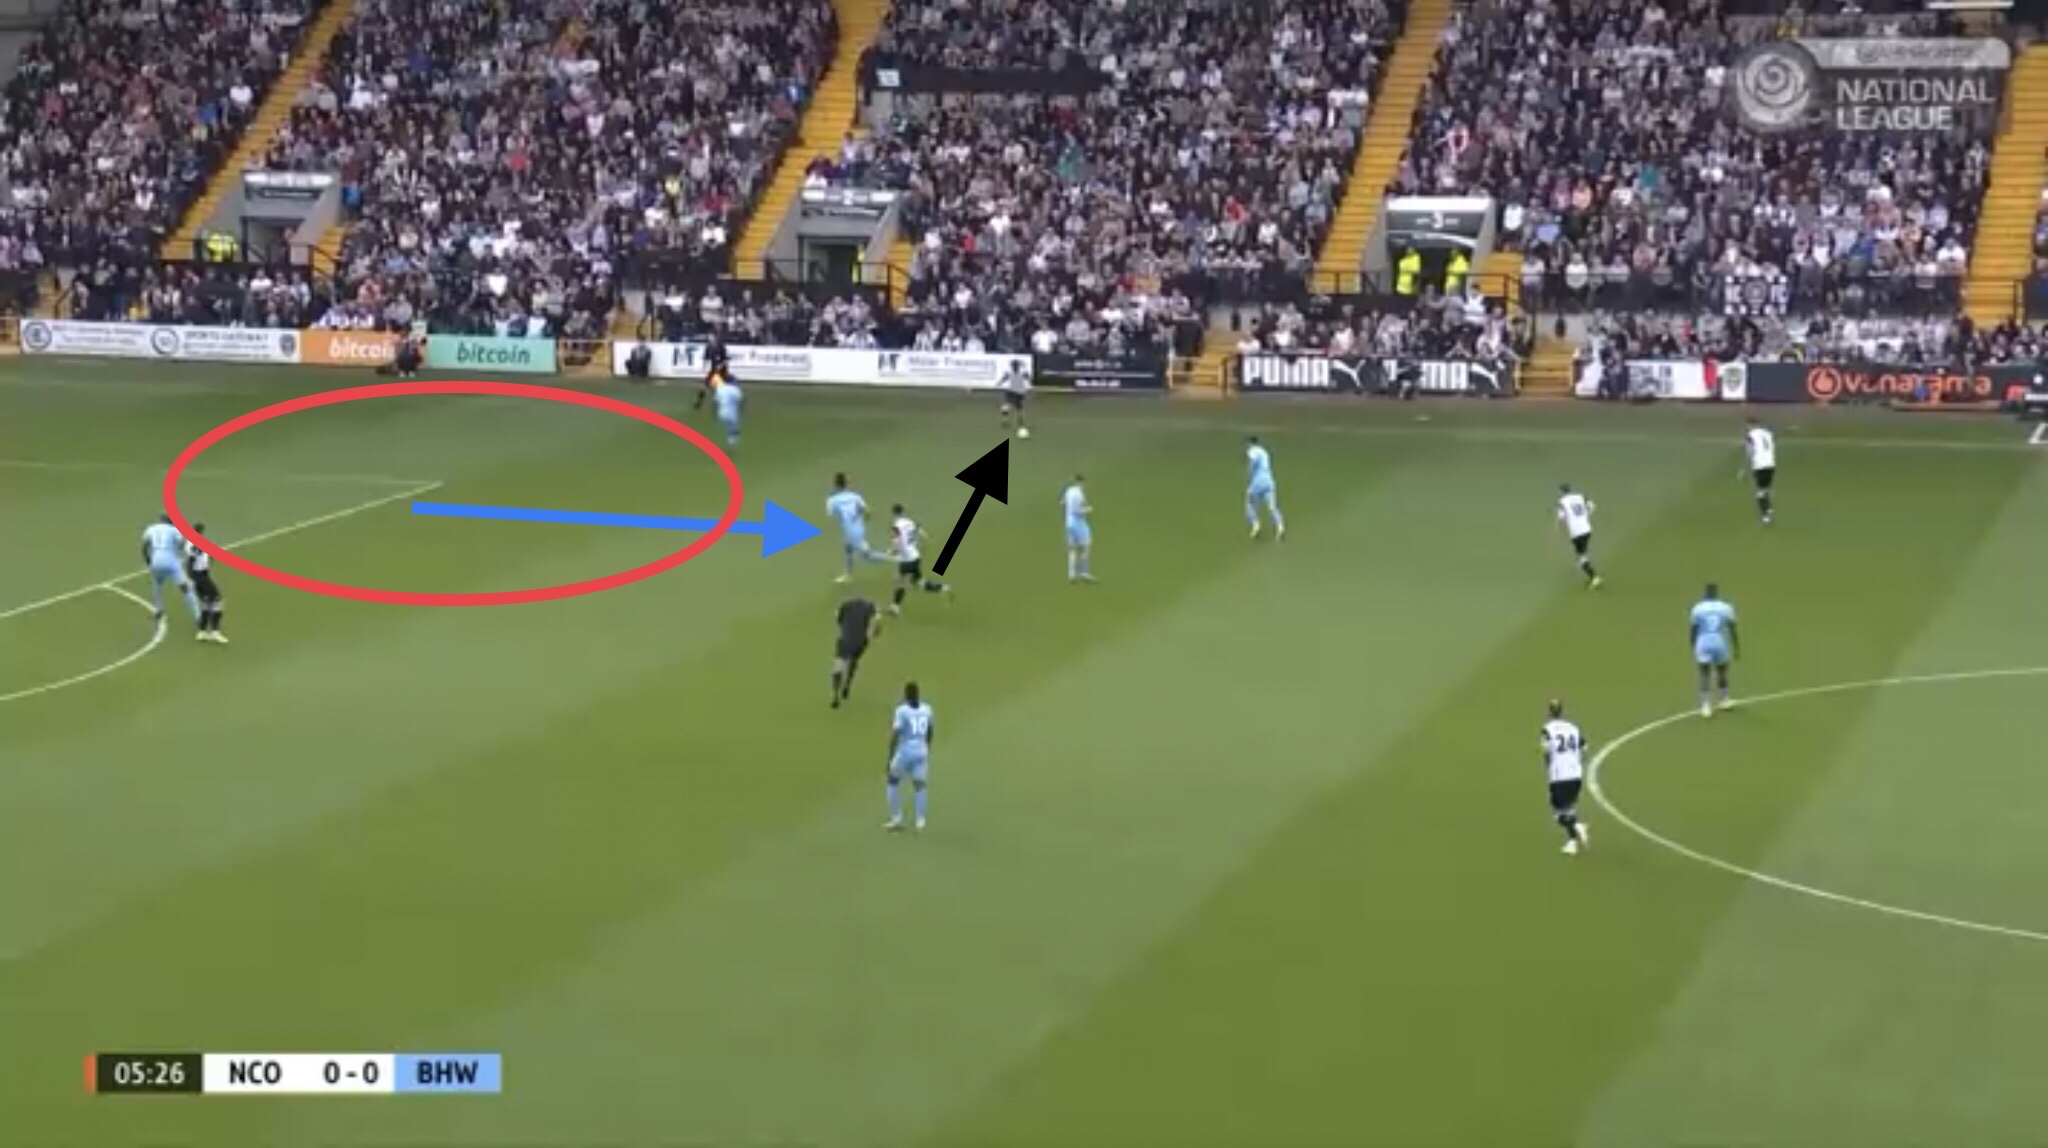
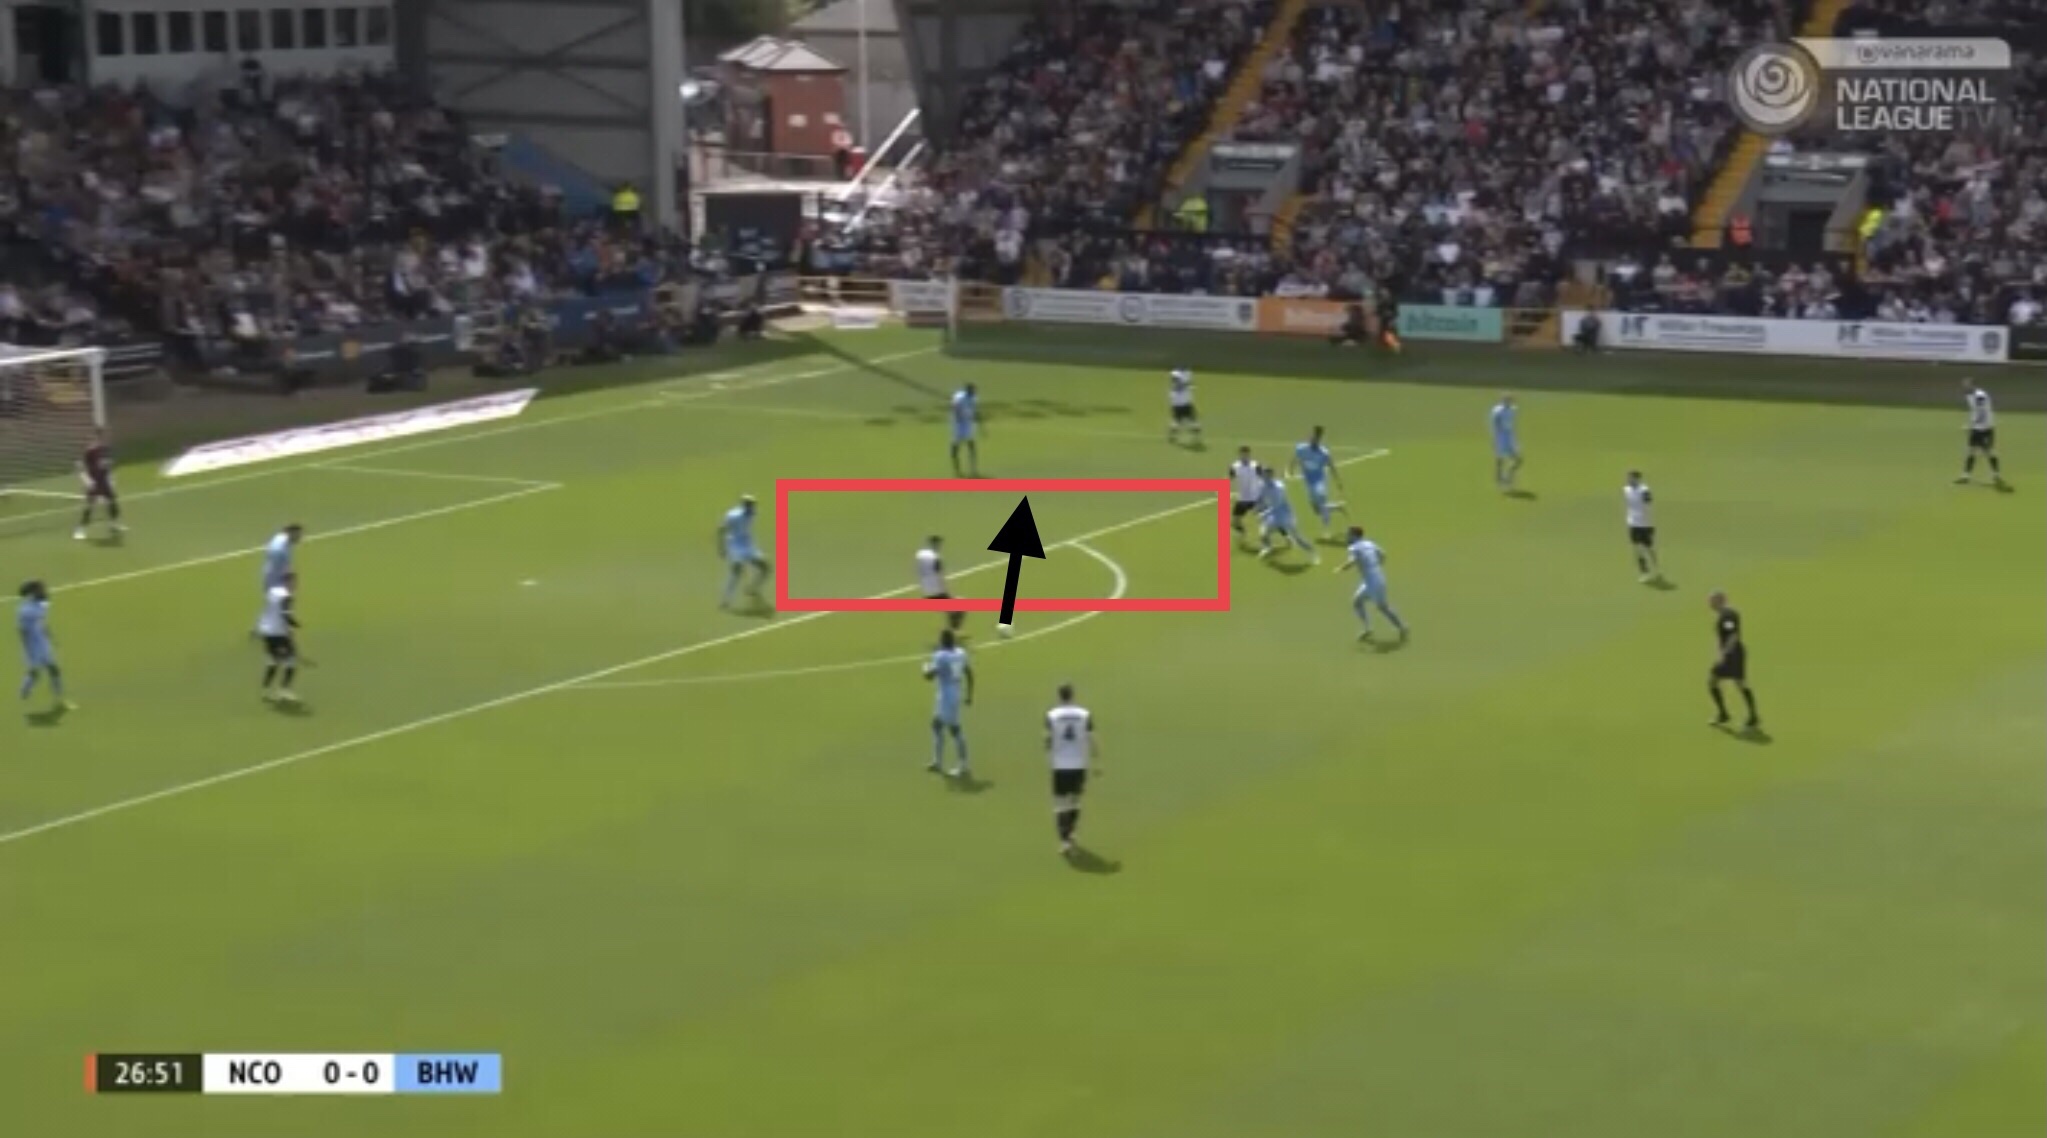
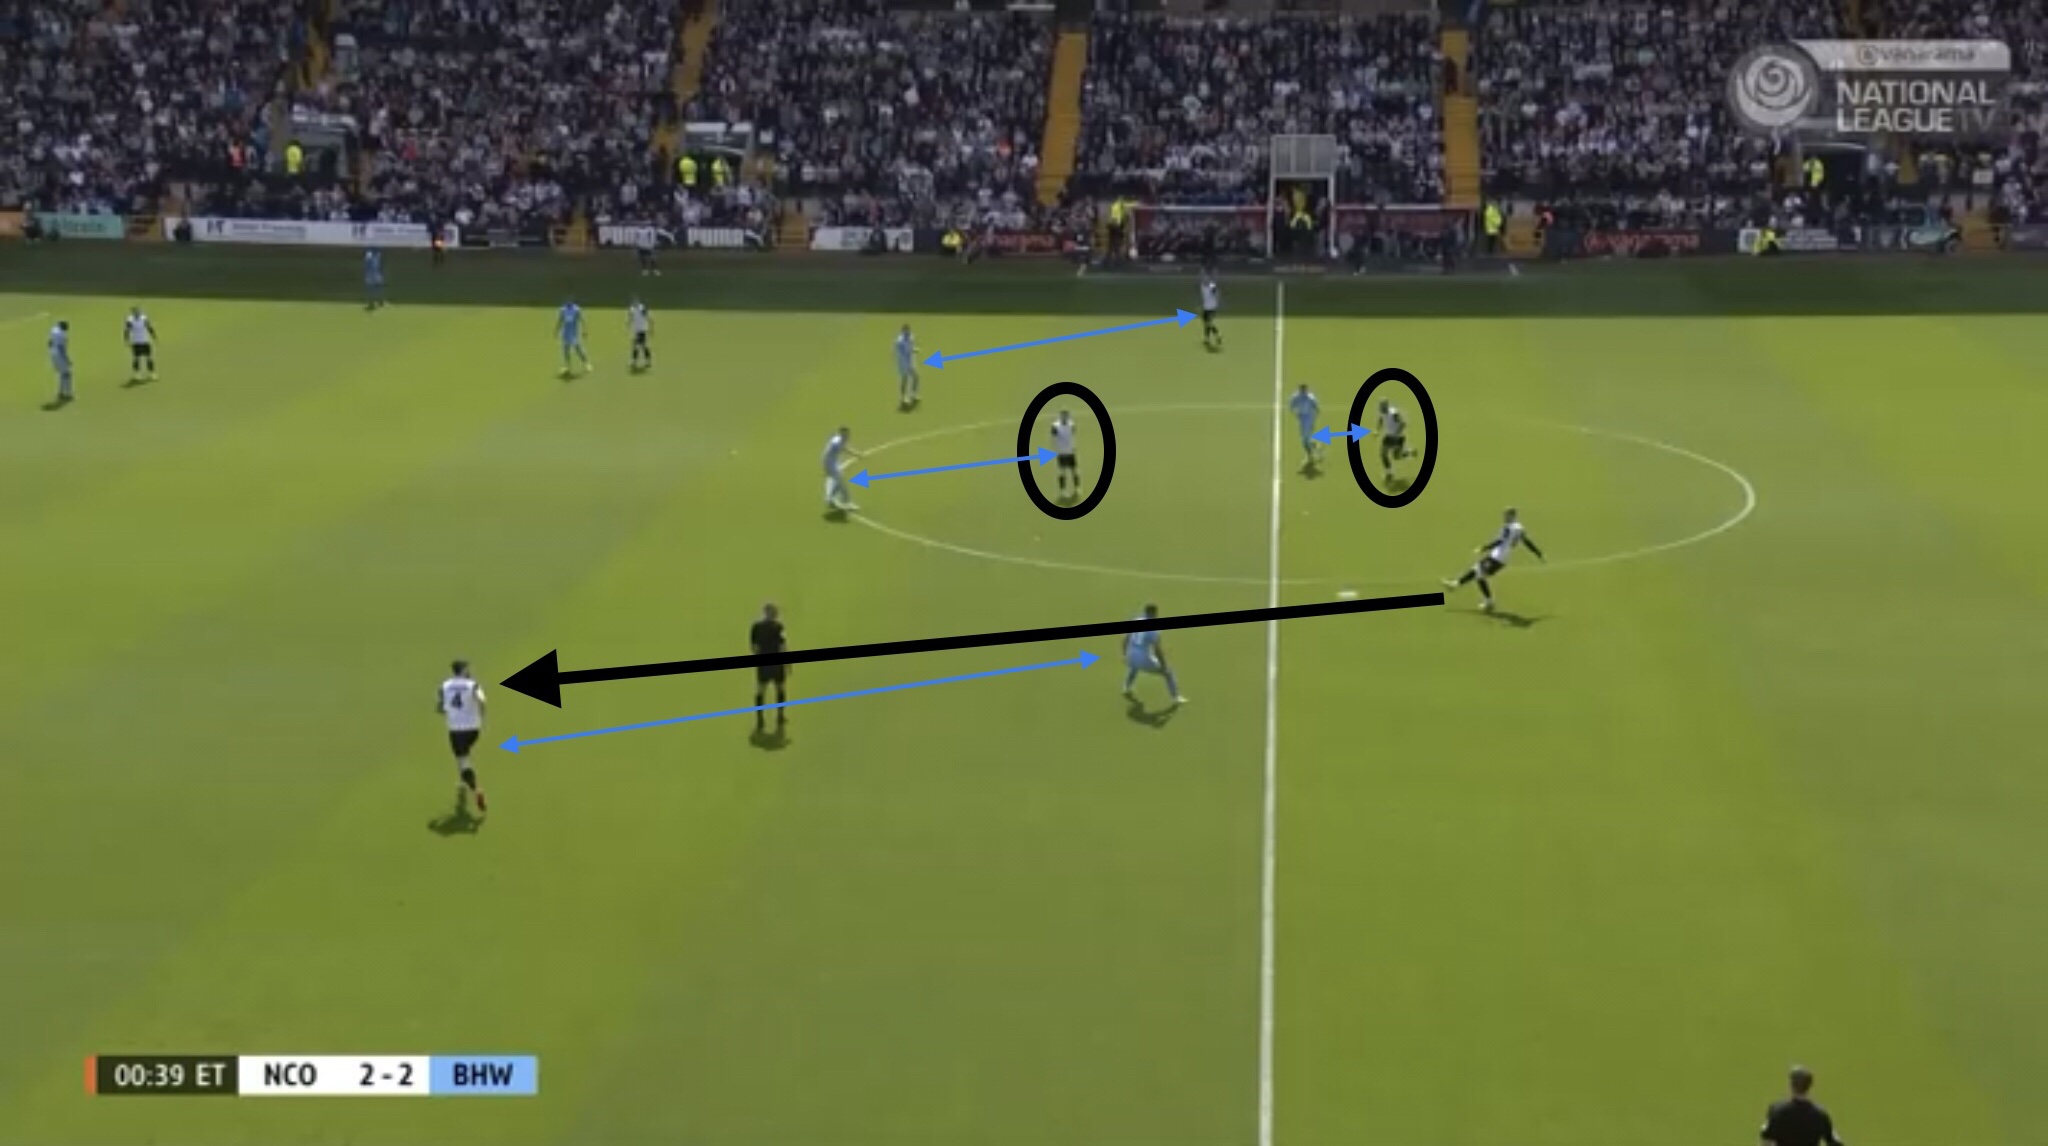
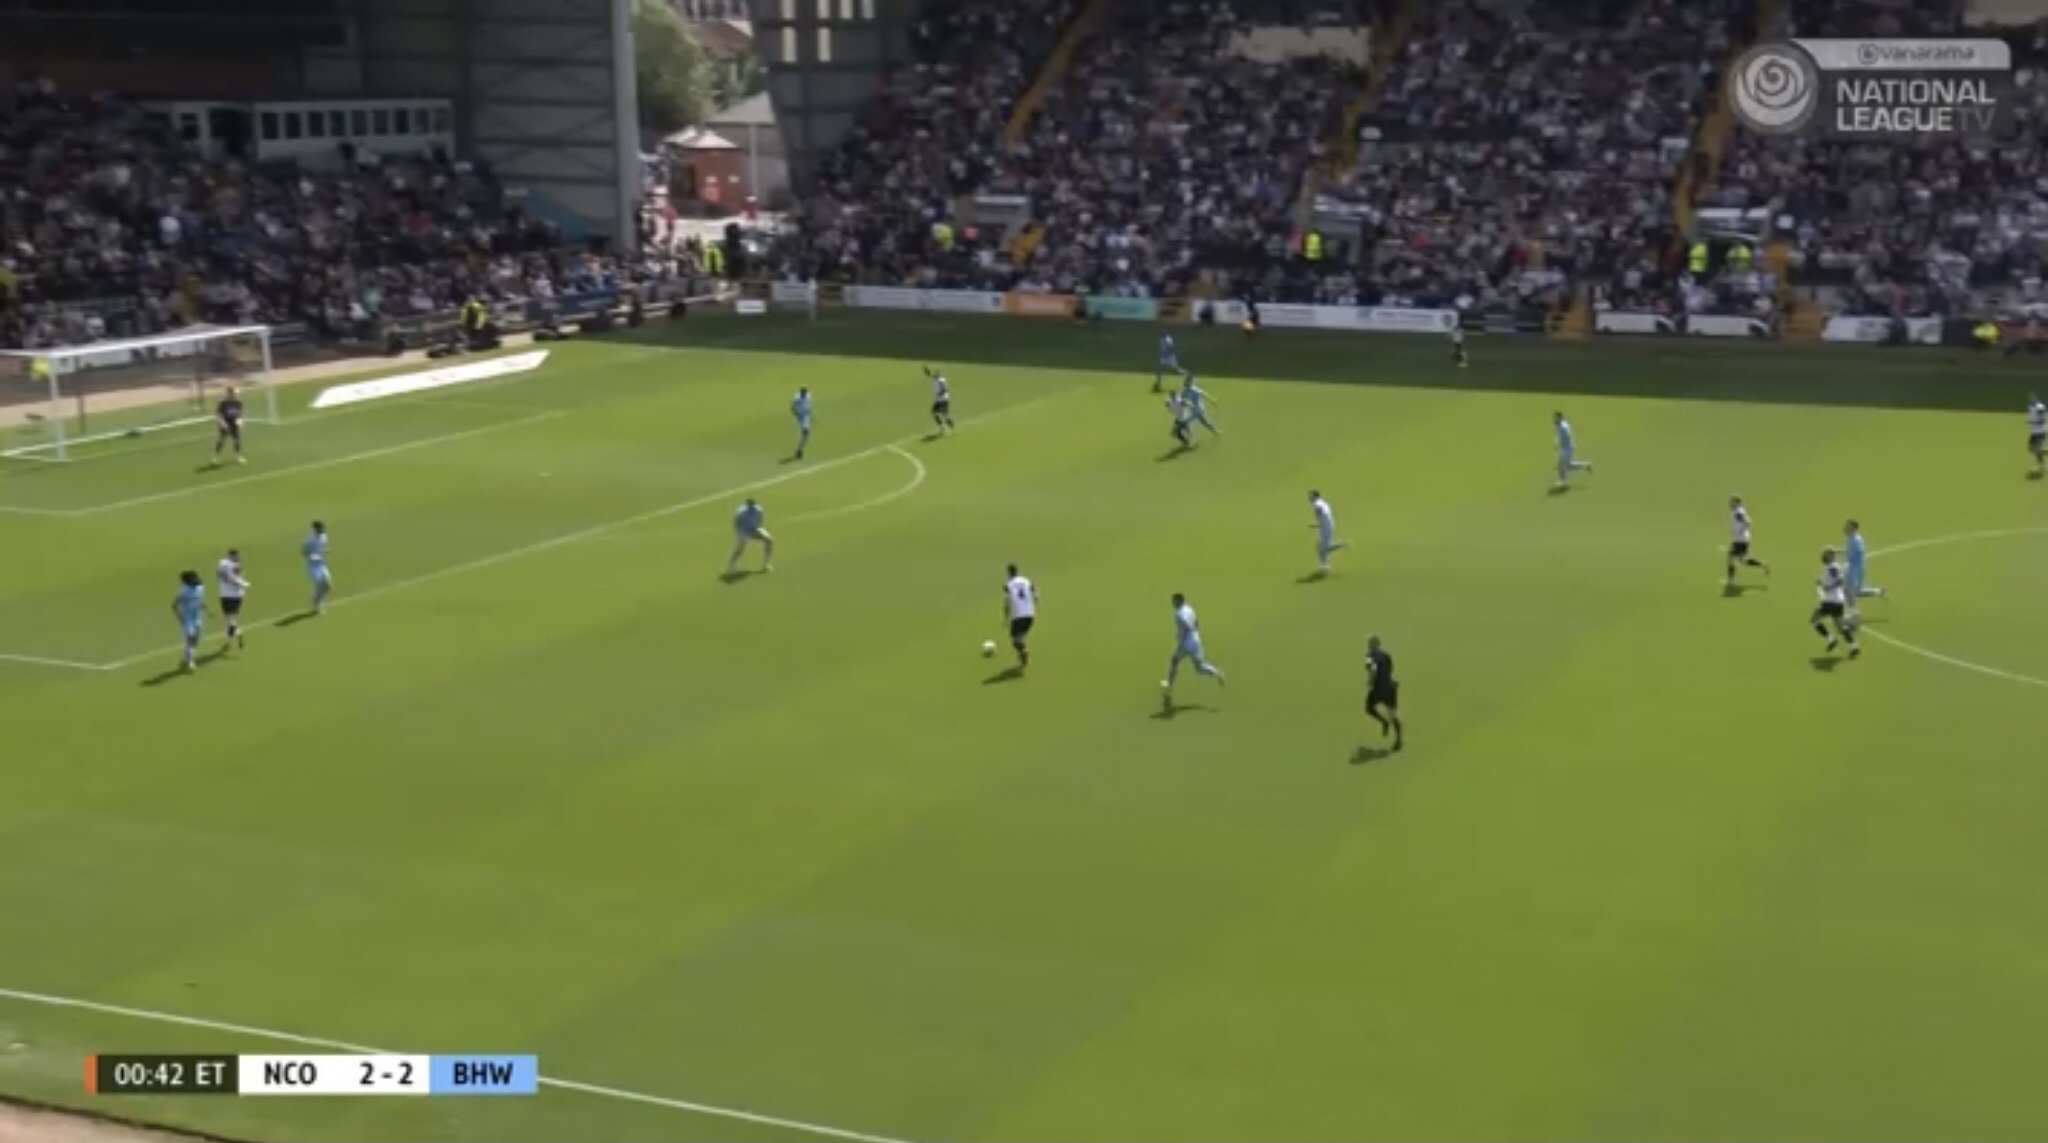
On this occasion, you can see Boreham Wood pressing the Notts players who were closest to the ball carrier, leaving Notts’ Austin free in the process.

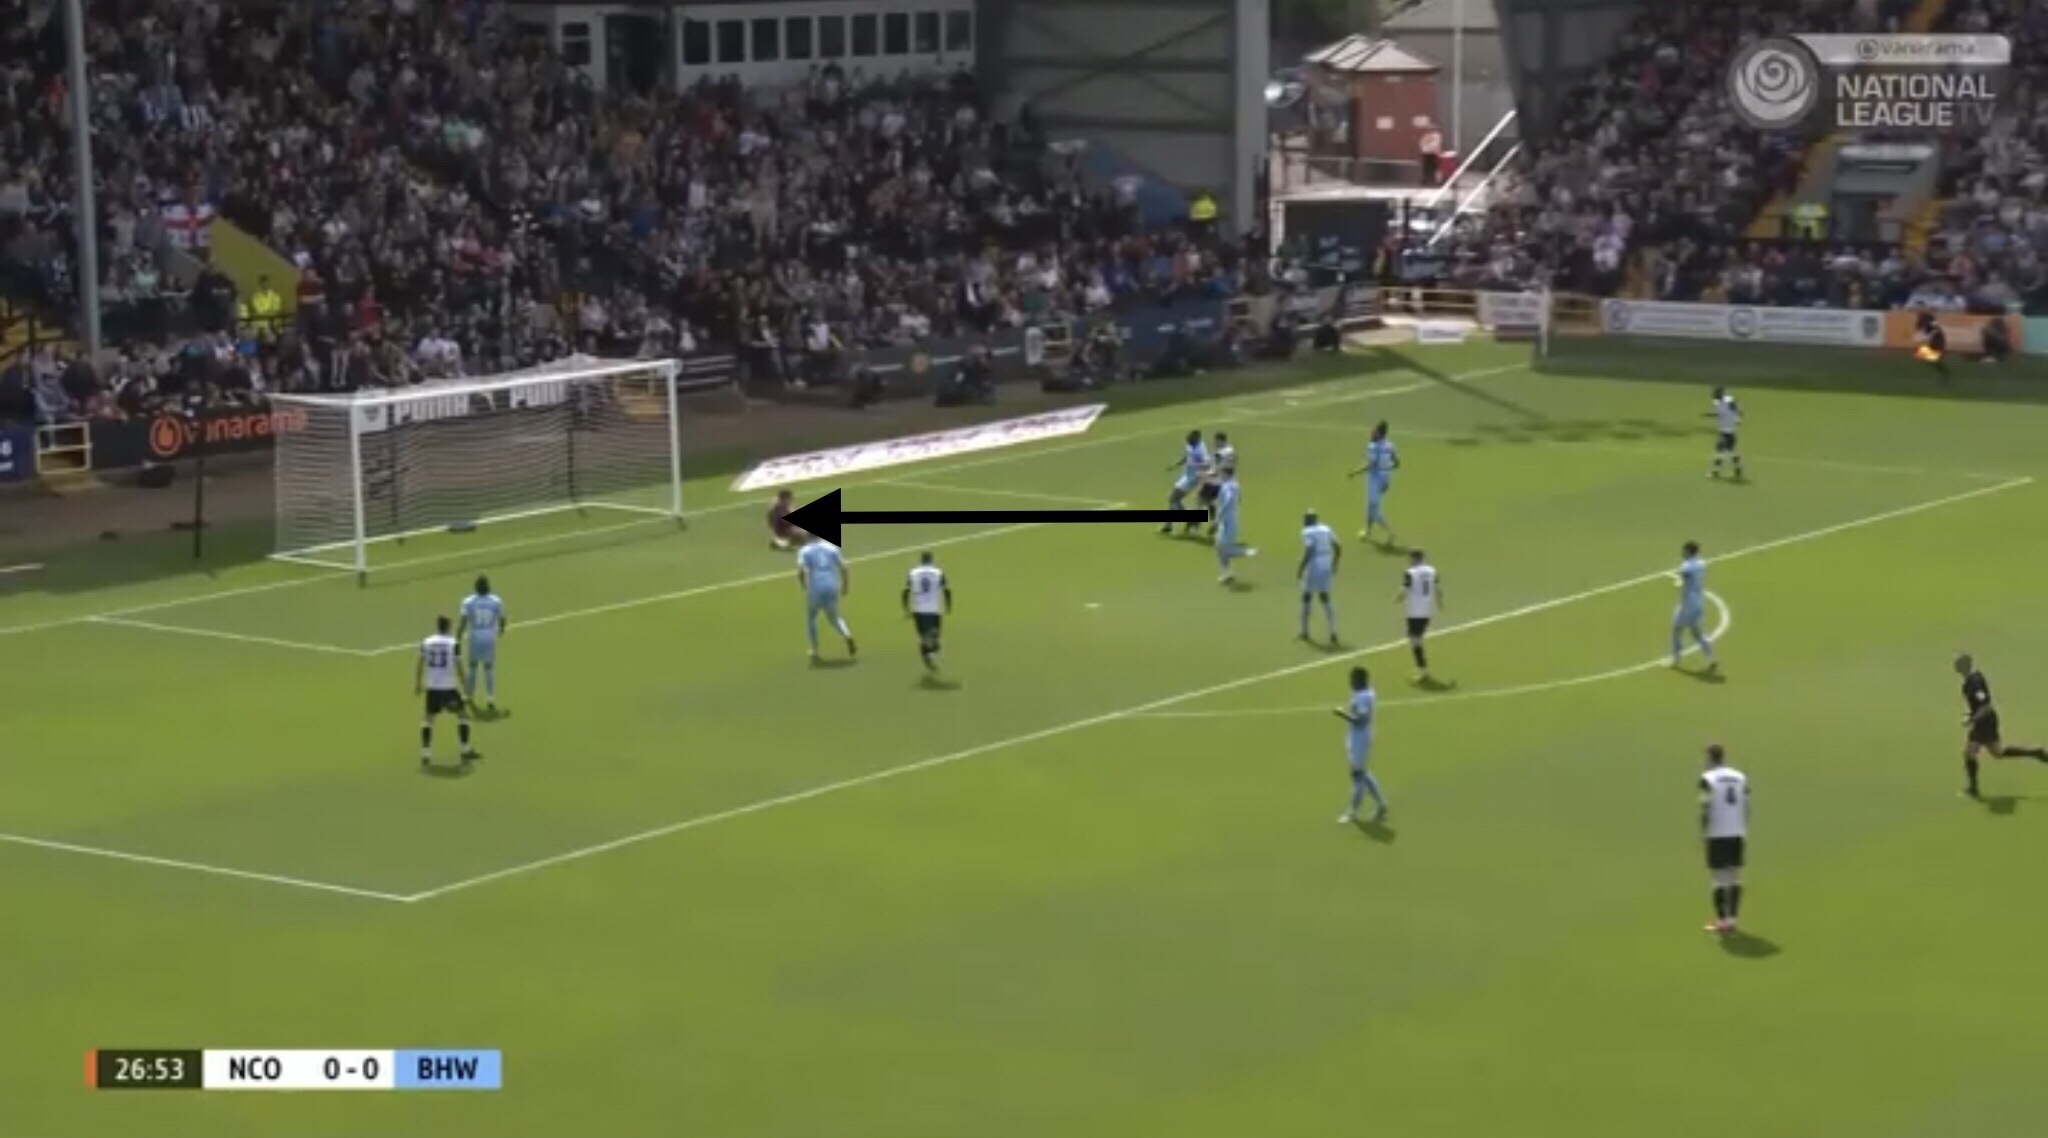
Notts were able to play through the press and find Austin, who was in space. He in turn could then pass to Chicksen.

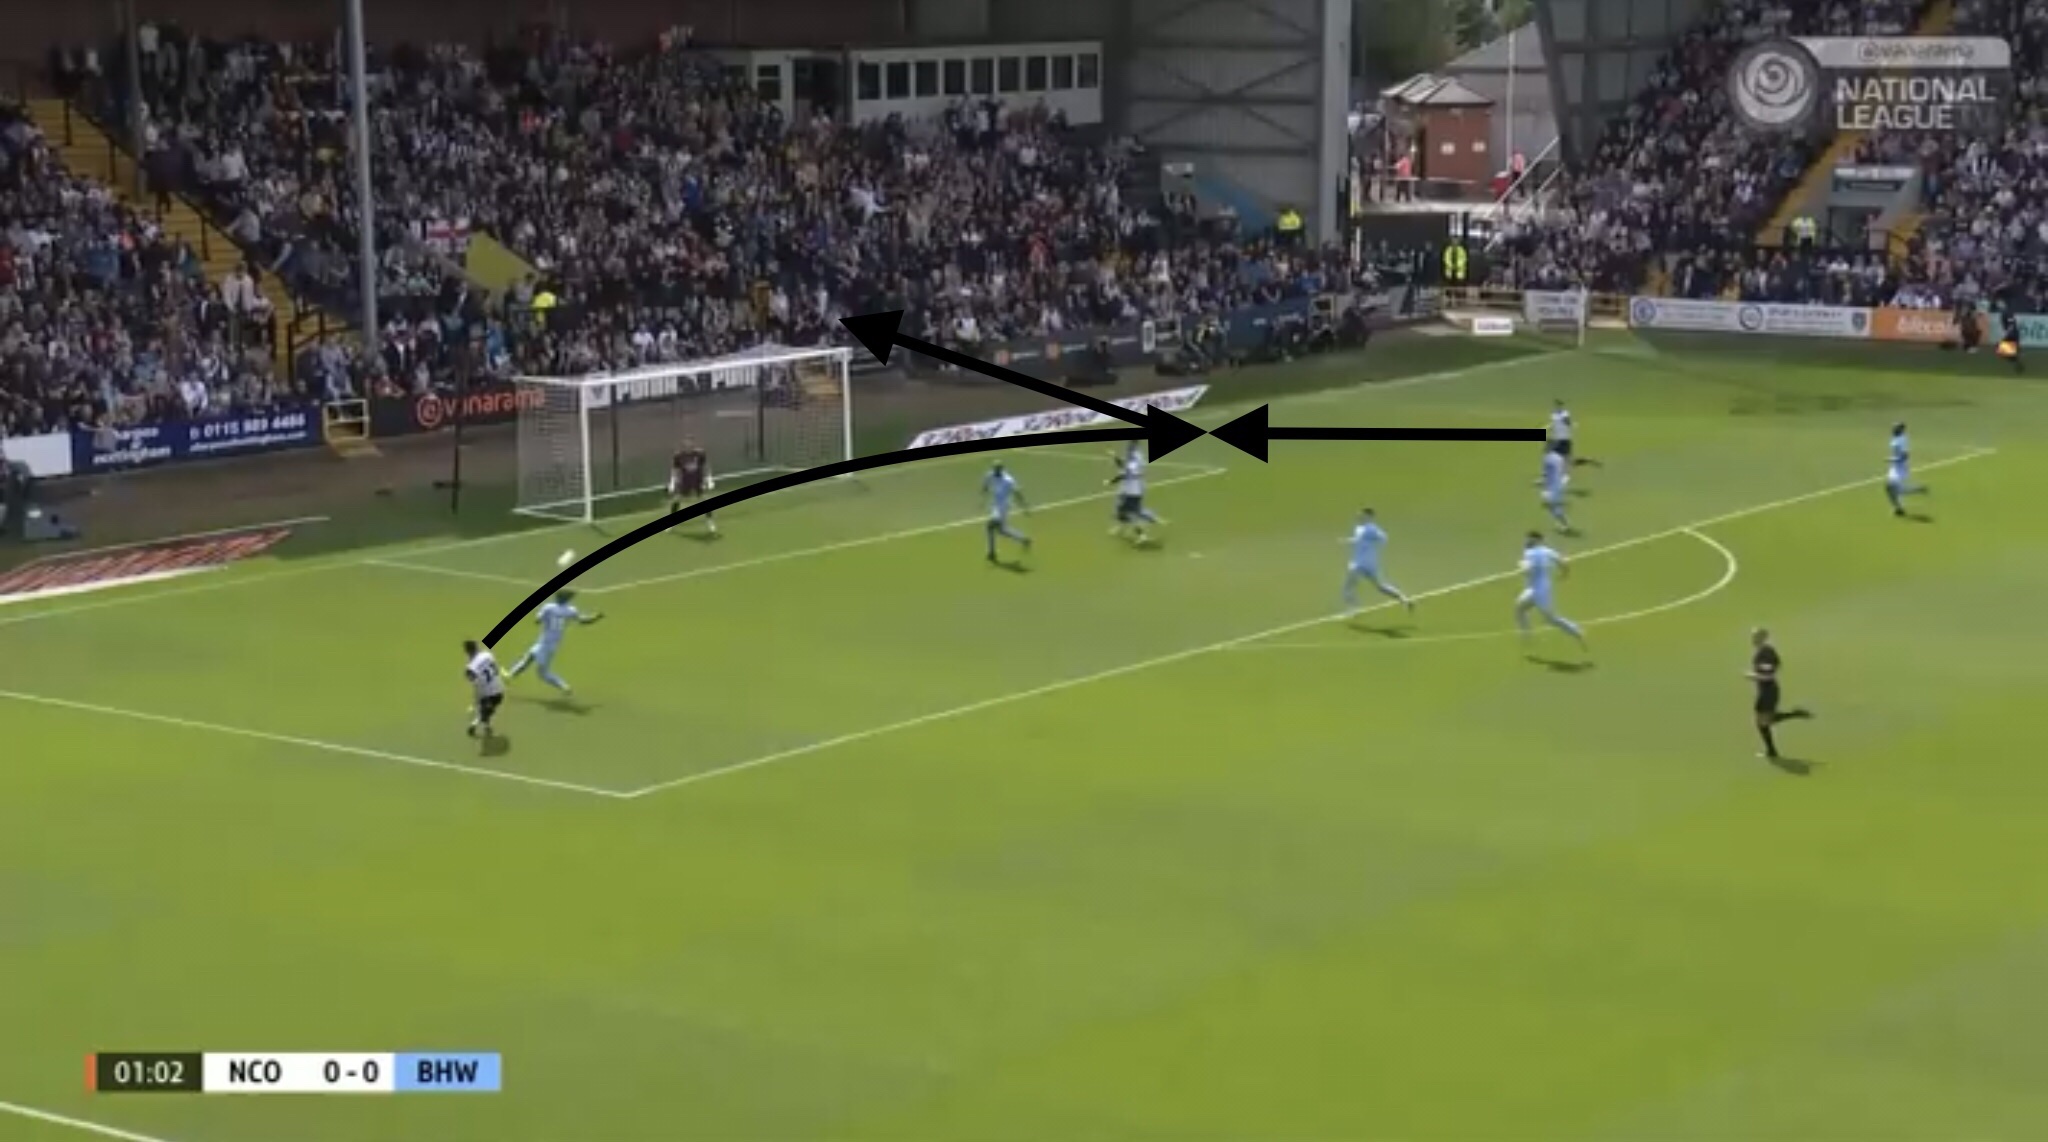
Chicksen crossed towards Rodrigues, but his shot was off target.
Using The Spare Man
As mentioned earlier in this article, Boreham Wood’s pressing structure meant that Notts’ Baldwin was often allowed lots of time on the ball, with Boreham Wood looking to prevent his passing options instead of applying pressure to him.
A lot of the time, this just meant that, if the Notts players who were out of possession’s movement was intelligent enough to create space for Baldwin, he had space to carry the ball into, before initiating an attack himself.
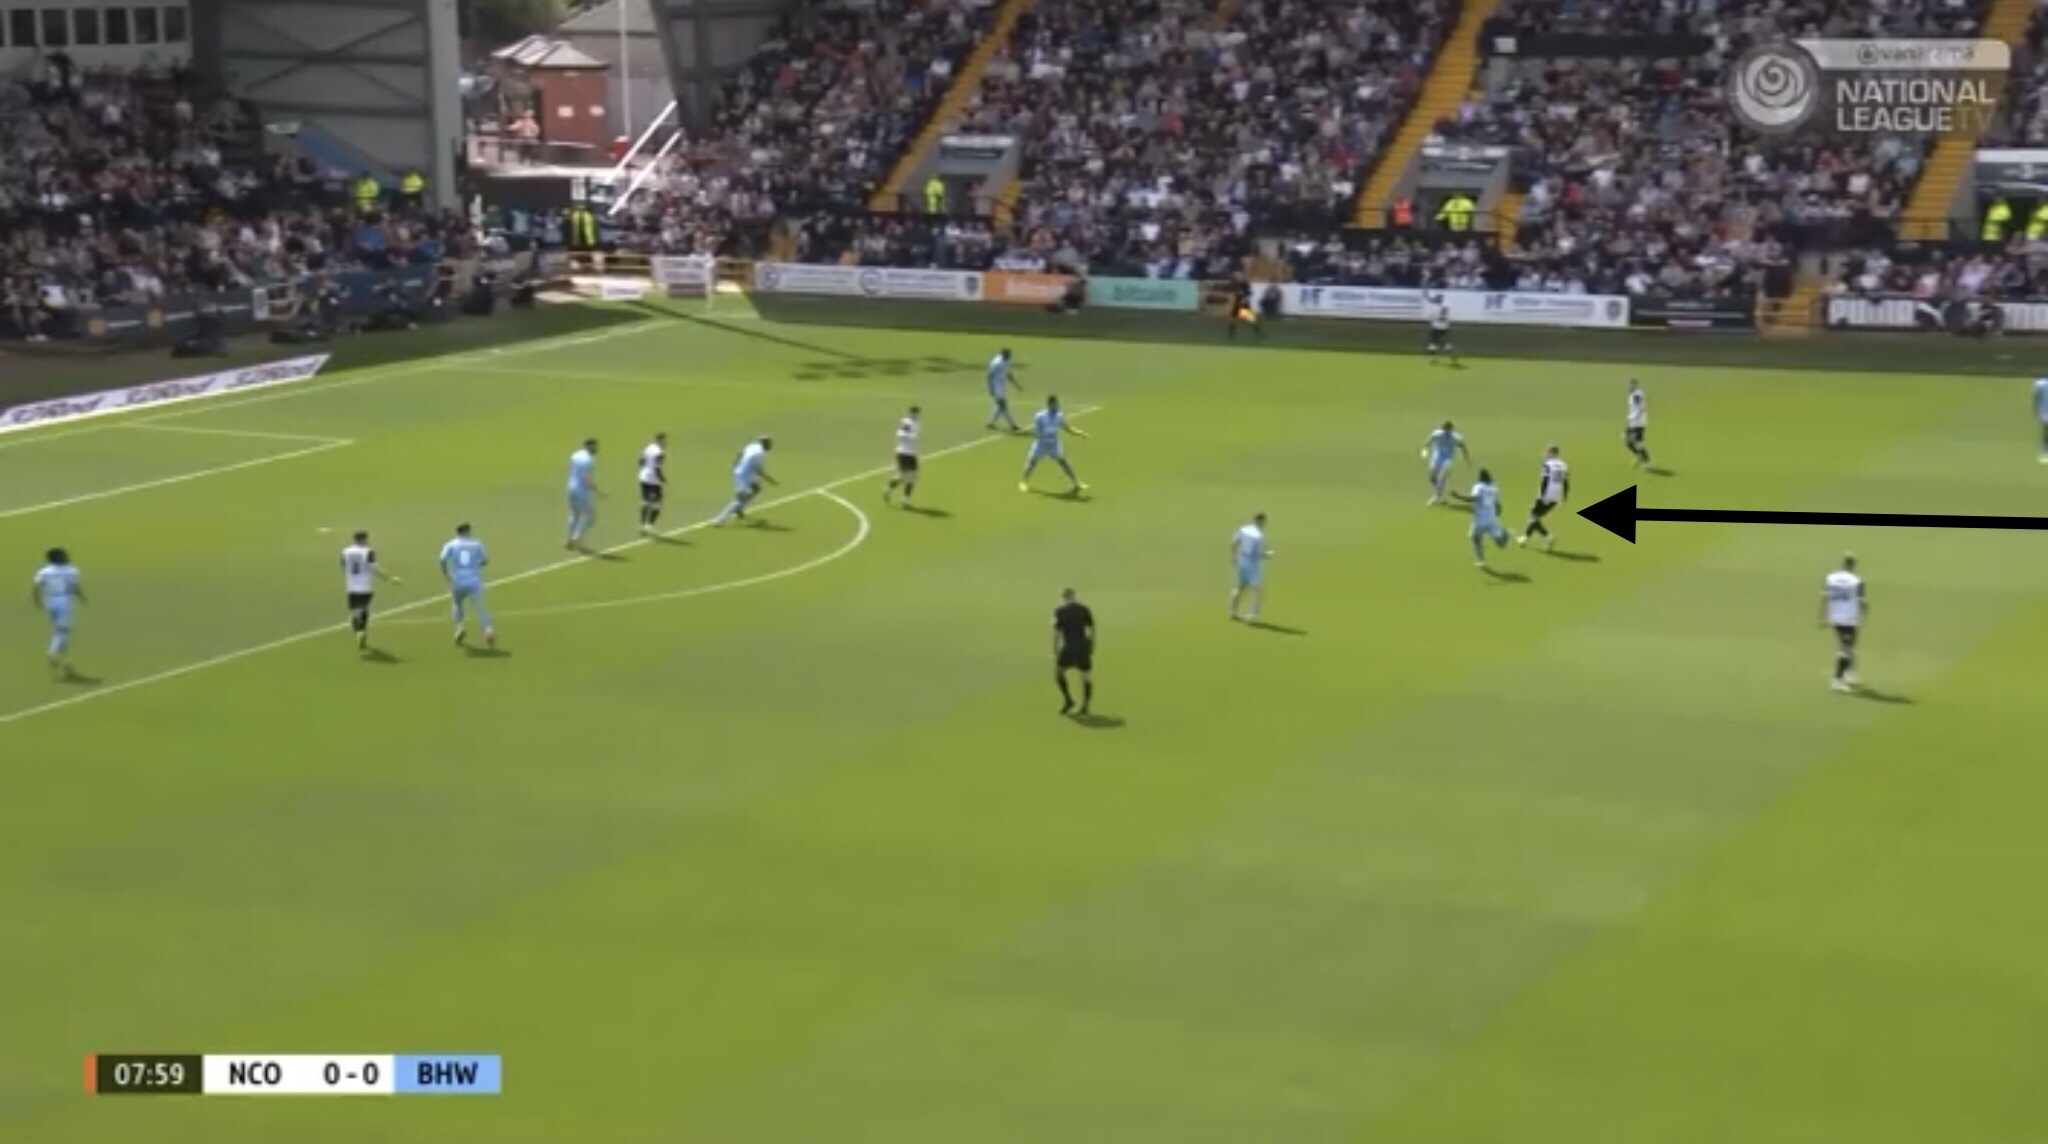
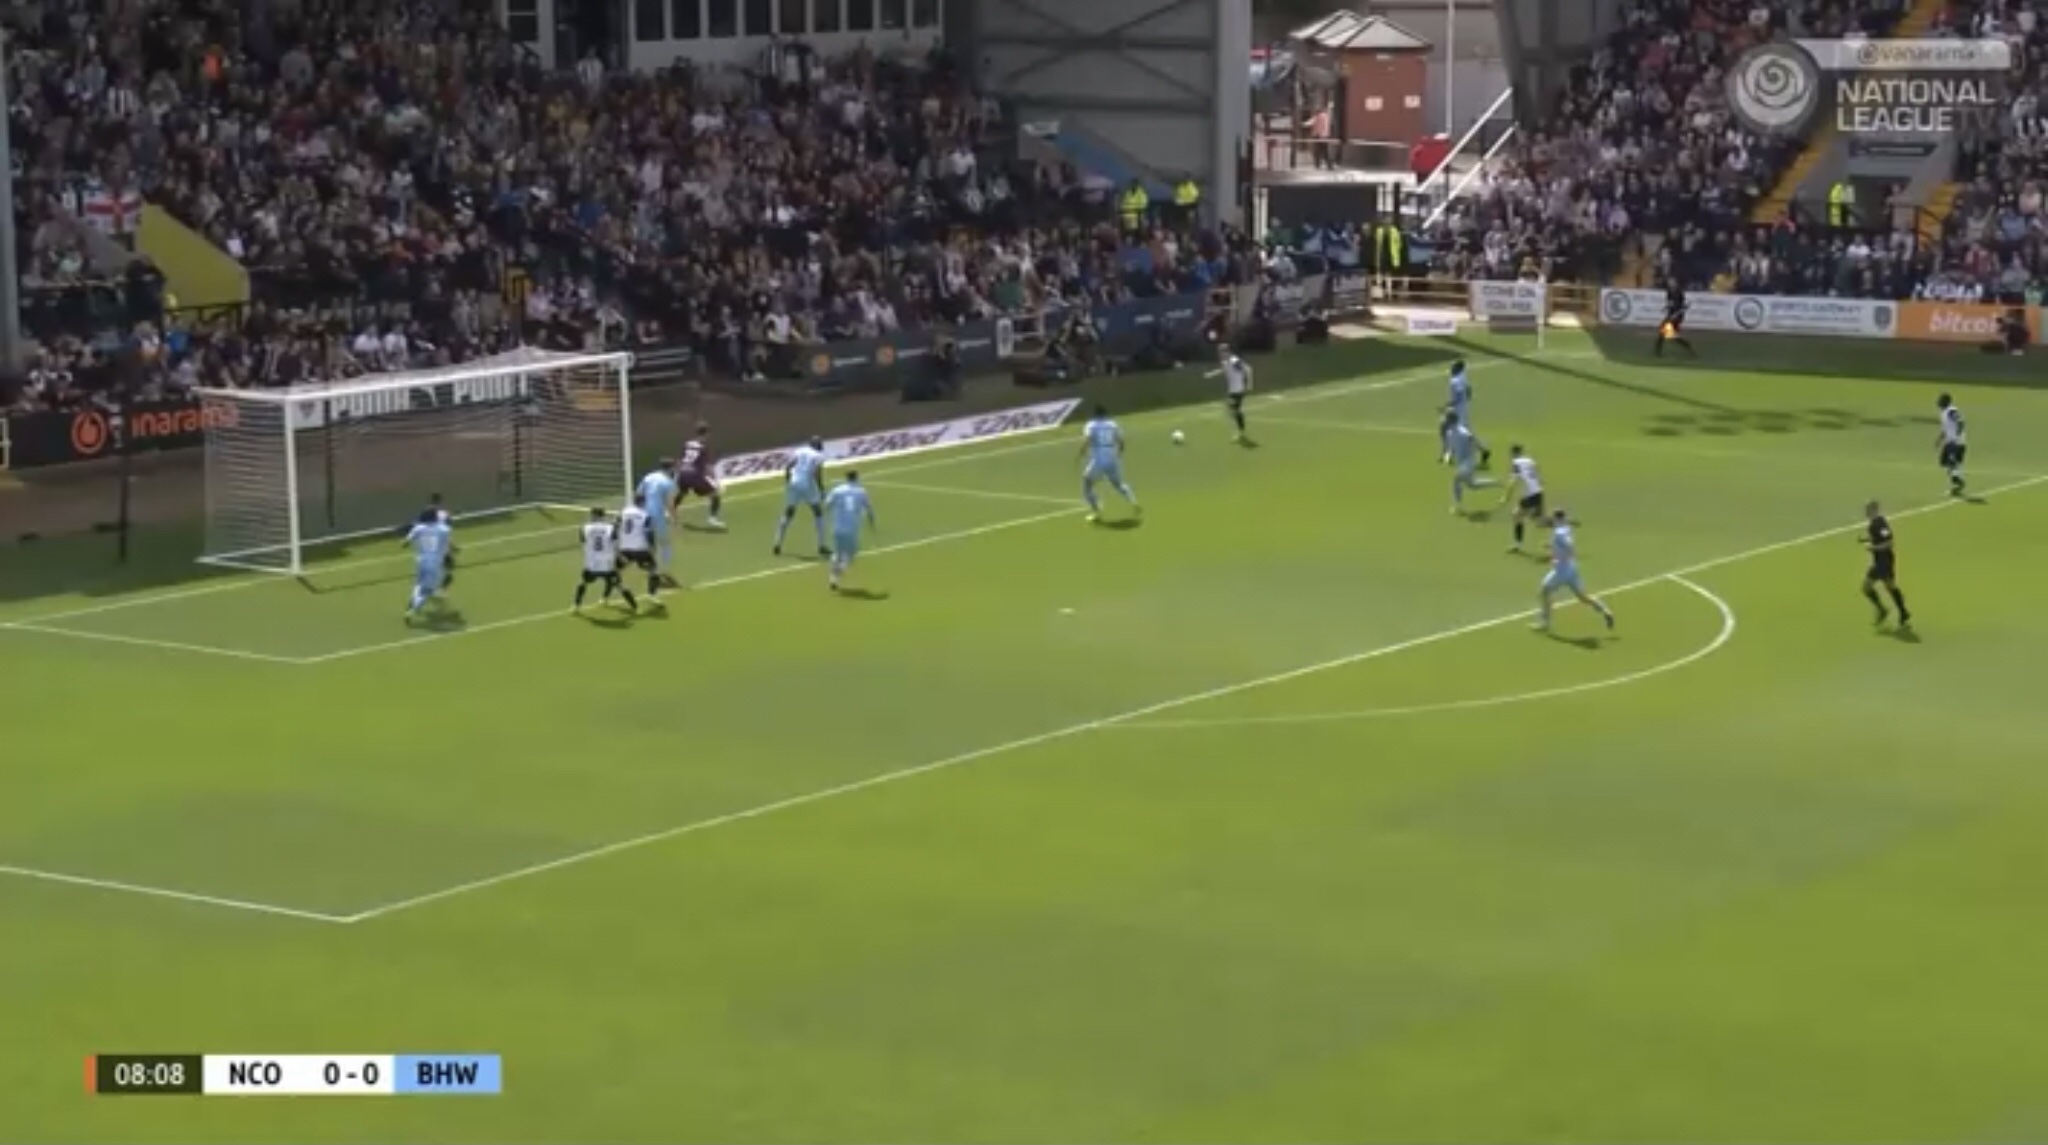
Late in the first 45 minutes, Baldwin was able to carry the ball forwards to the edge of the Boreham Wood penalty area, before shooting just wide of the post.
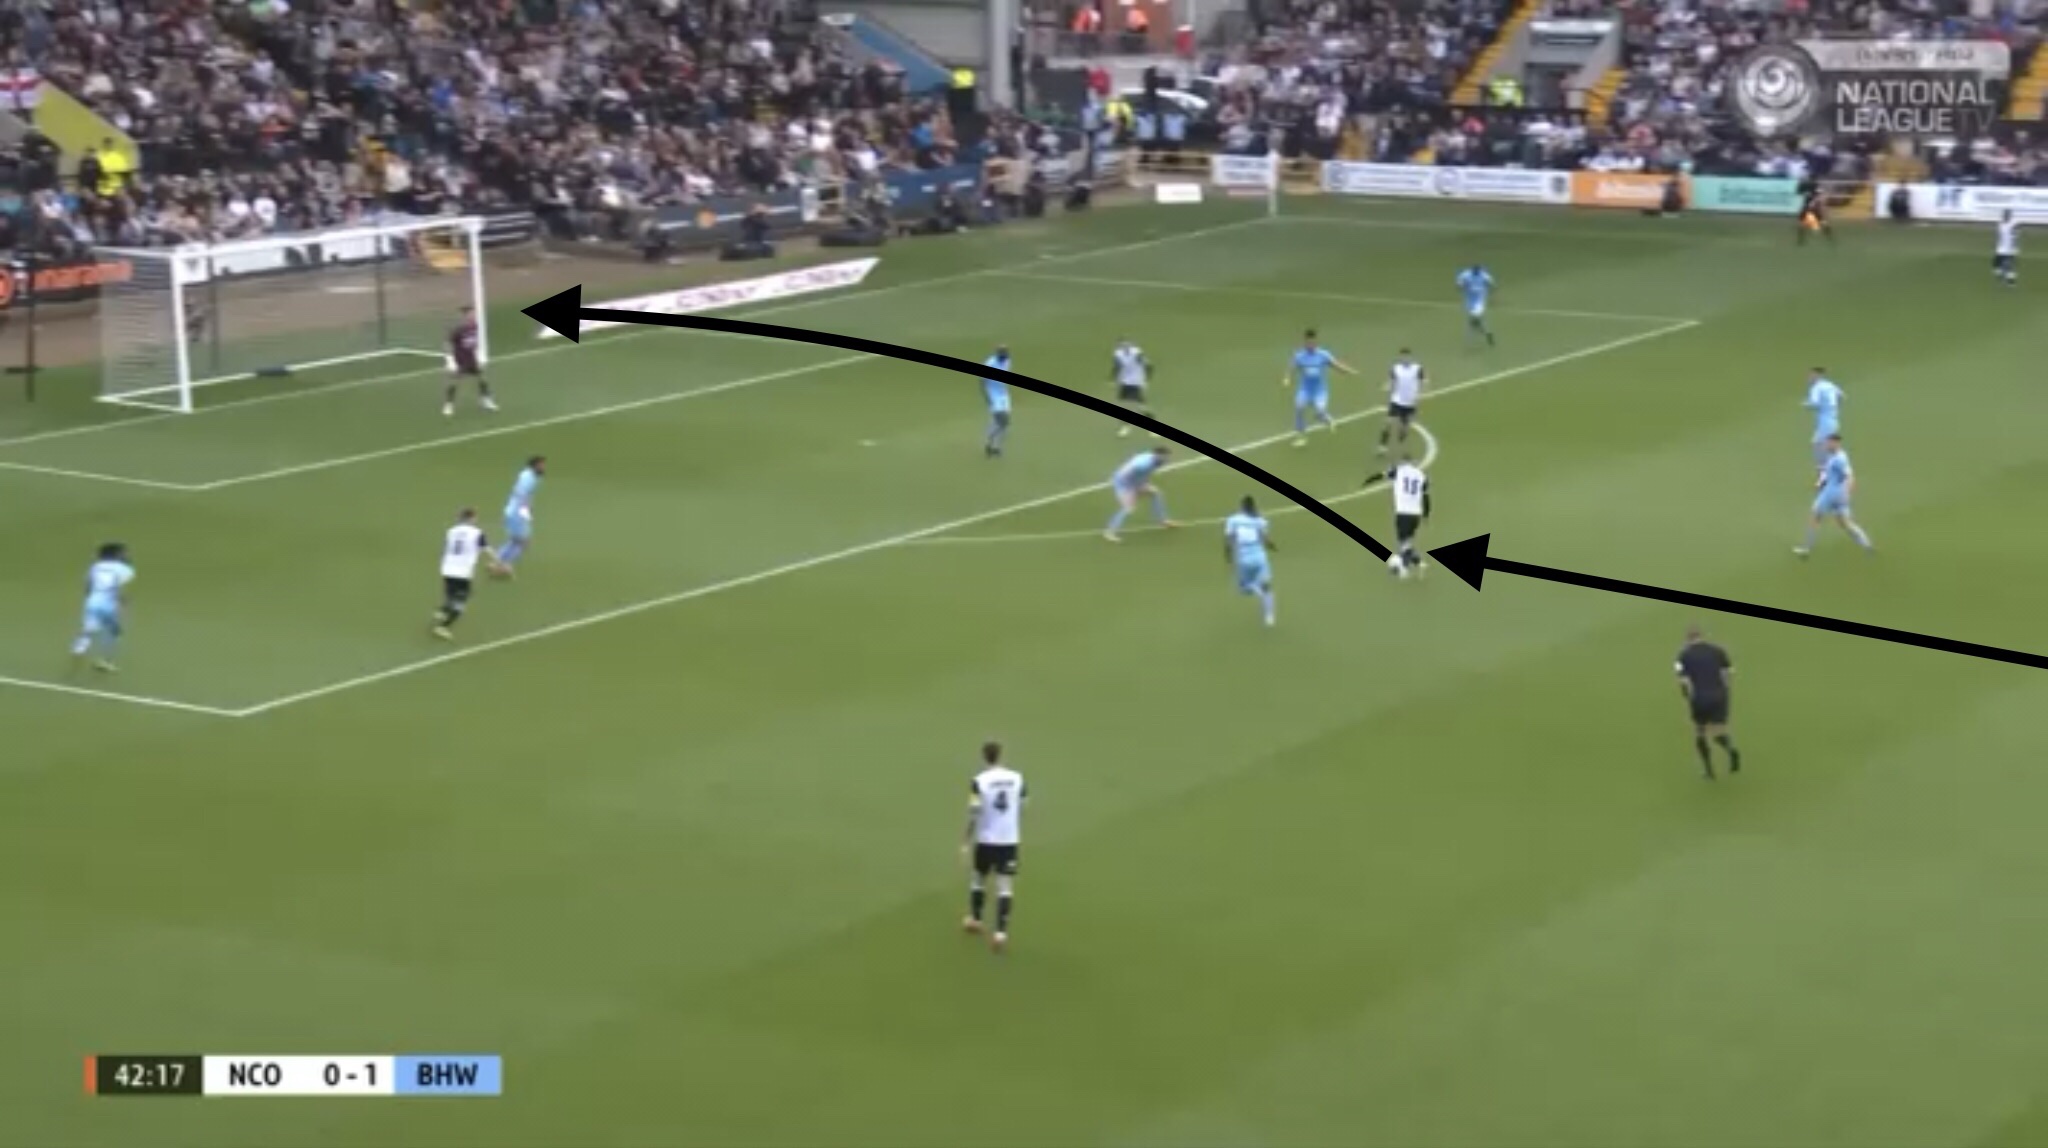
A couple of minutes later, a similar scenario happened. This time the shot was saved.
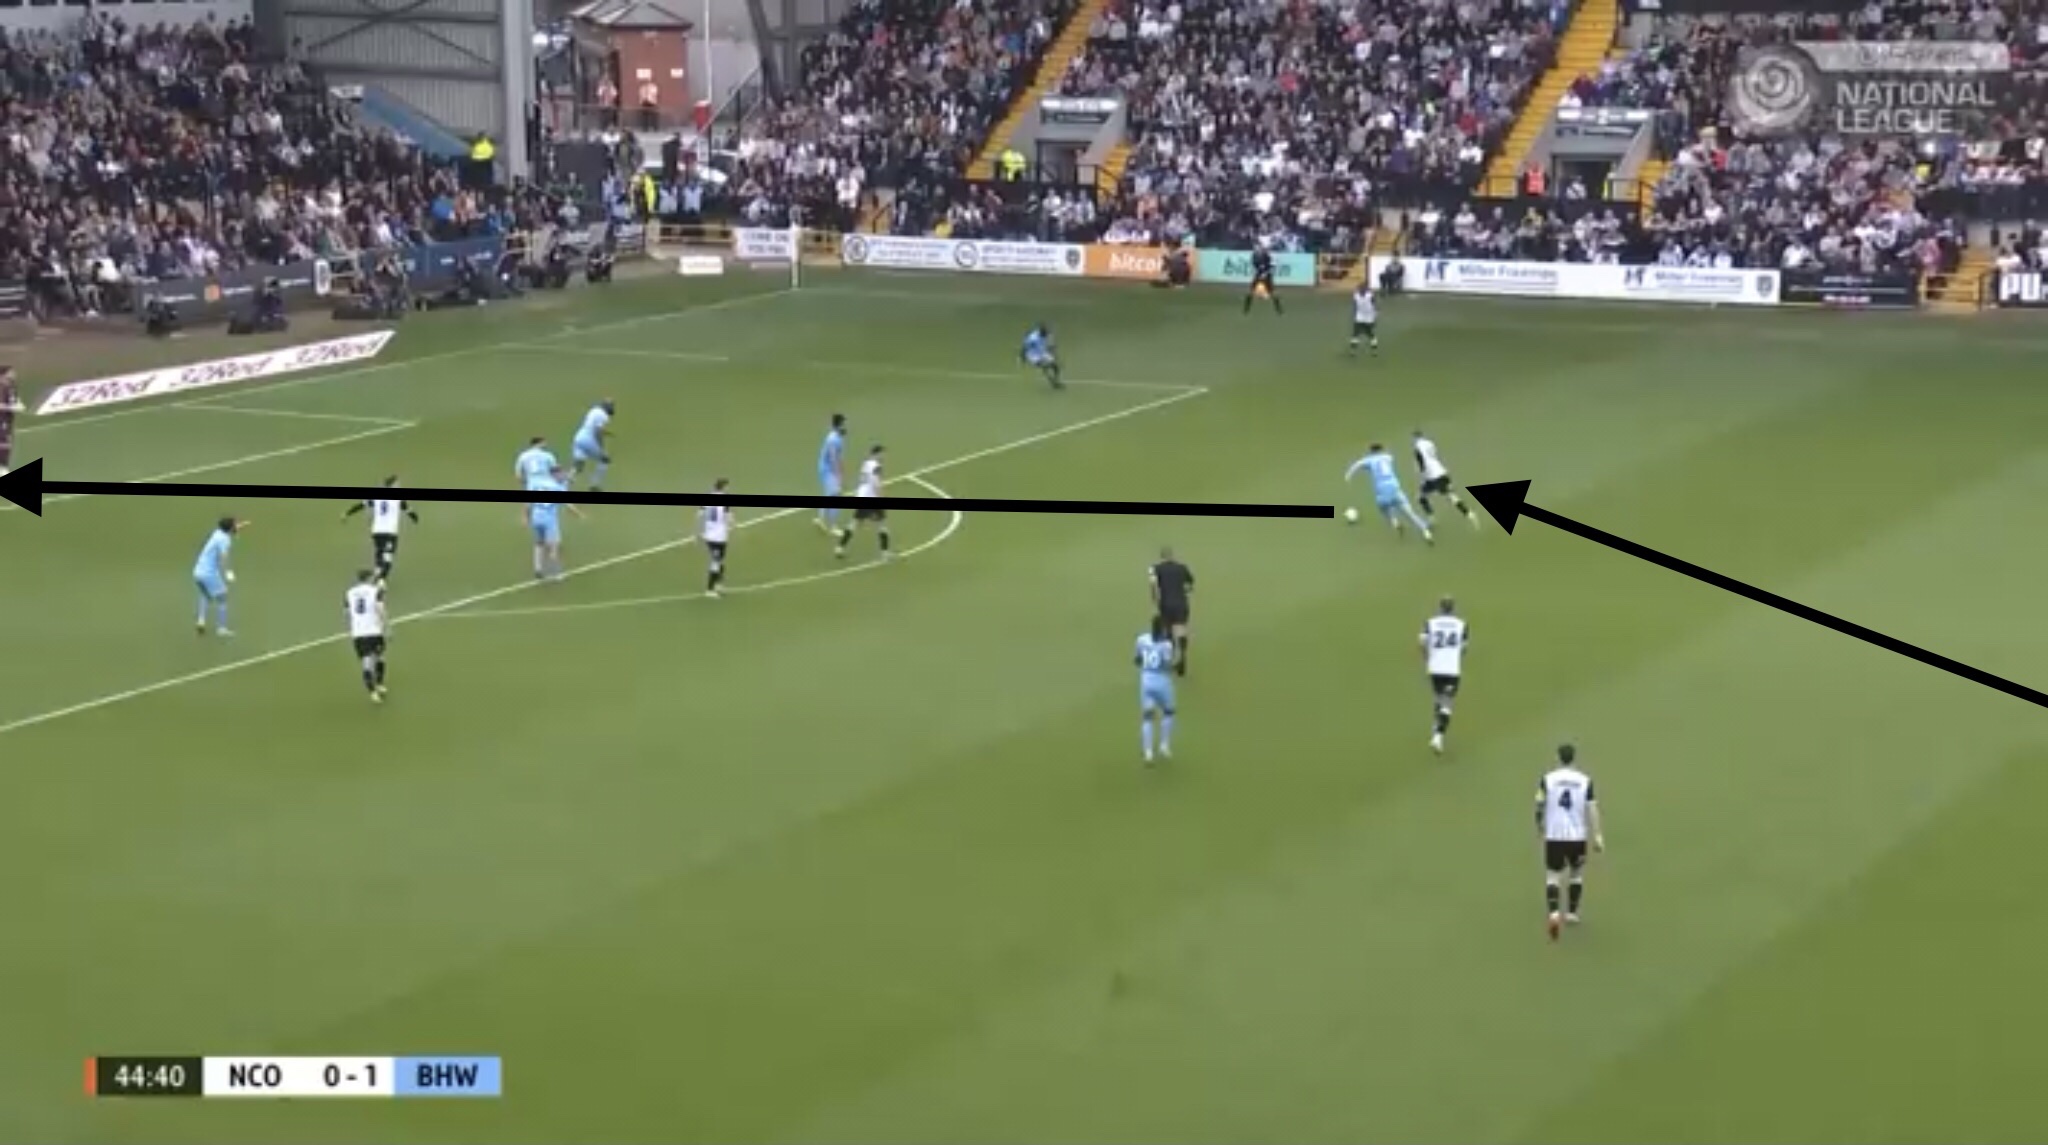
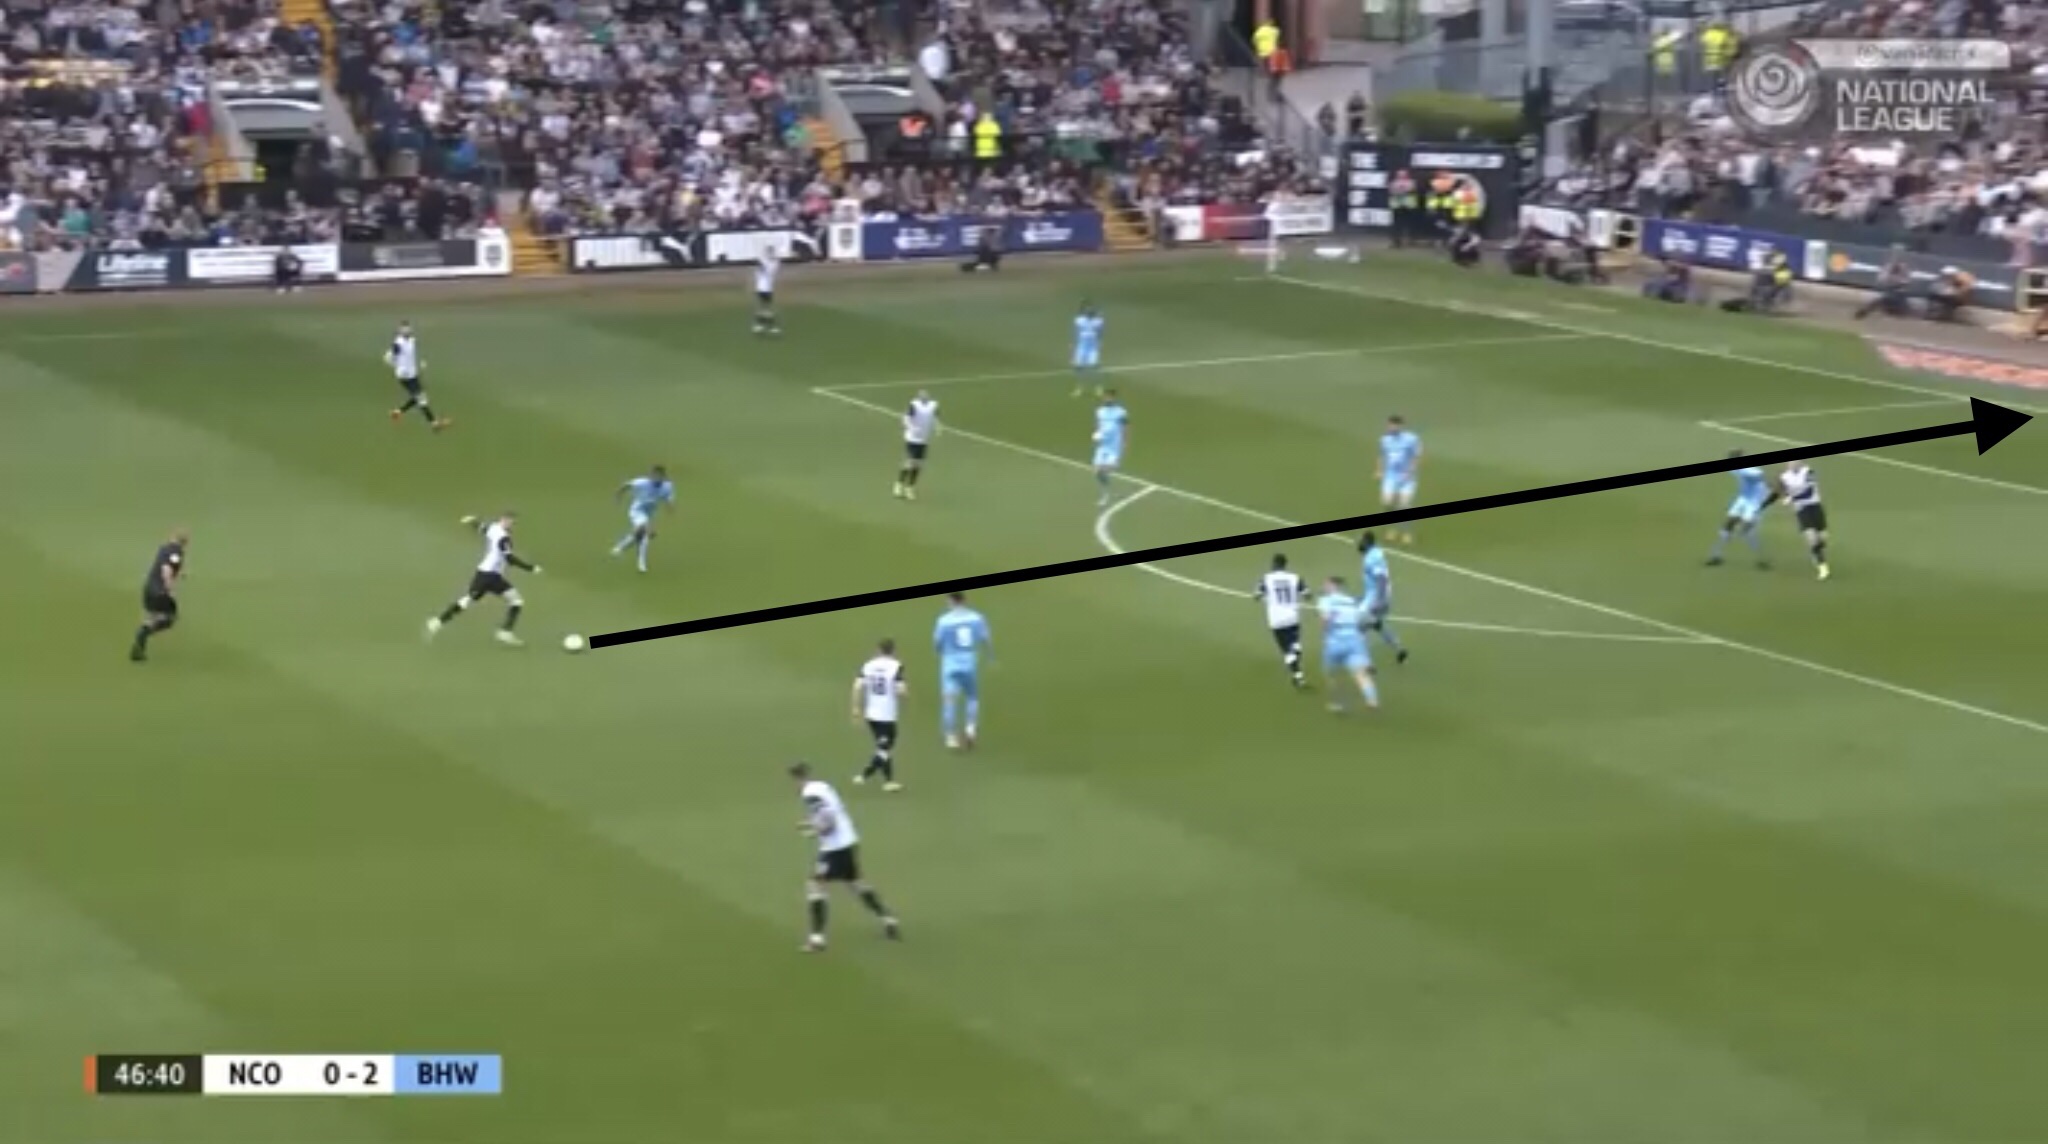
These two efforts should have acted as a warning sign to Boreham Wood, but within two minutes of the second half starting, Baldwin was able to convert one of these chances to get Notts back into the match.

You must be logged in to post a comment.