On Saturday, Southend United beat Jimmy McNulty’s Rochdale at Spotland. Here, I break down the tactical battle and explain how it led to a 1-0 victory for Kevin Maher’s side.
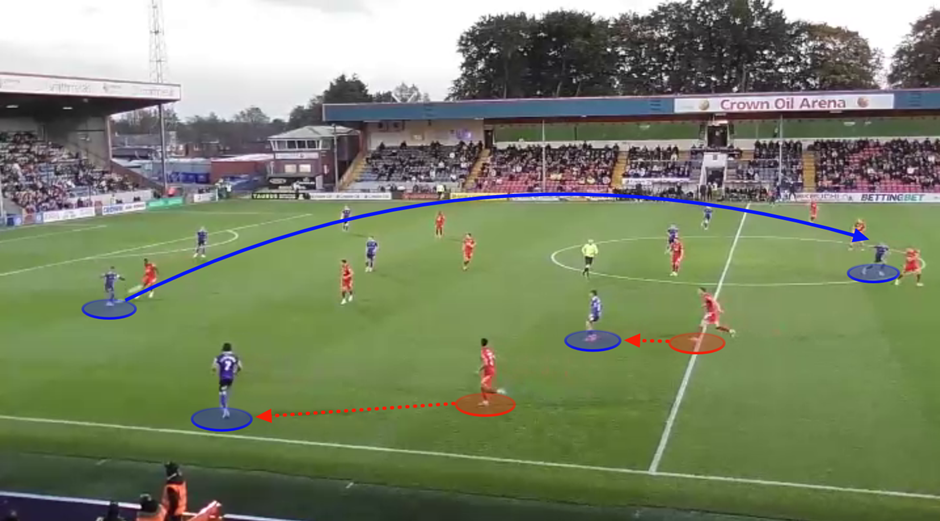
As the home side, and a possession-based one, the onus was on Rochdale to control possession. Rochdale built play in a 3-2-5 shape by pushing their wing-backs high and wide. Southend set up in a 5-3-2 shape, used their strikers to shadow-mark Rochdale’s double-pivot from in front, and their #8’s to mark them from behind.
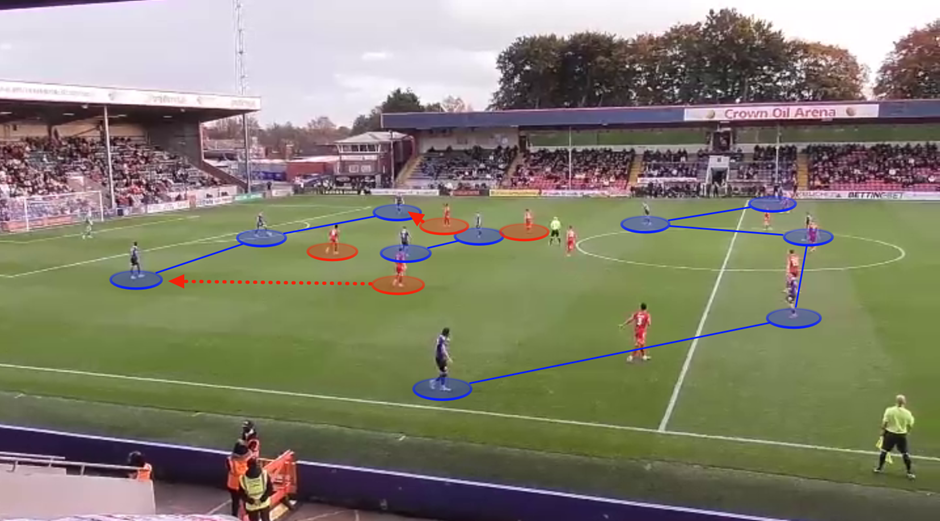
As we can see from the above image, if play went out to Rochdale’s left-sided centre-back, Sam Beckwith, Josh Walker would press him and the press was backed up by Oli Coker, who would tightly mark the pivot player who was previously being shadow-marked by Walker.
If the ball went out to the right-sided centre-back, Kyron Gordon, Noor Husin would press instead from his #8 position. When he did so, it left a Rochdale pivot player free. It was therefore either up to Aribim Pepple to drop back and mark him, or Southend’s #6, James Morton, to back the press up, step forward and mark him (below).
Although Rochdale had a numerical advantage during their build-up phase (5v4), they moved the ball too slowly to make the most of it, and allowed Southend time to apply pressure.
If one of Rochdale’s pivot player moved outside the block, Southend would keep their shape, before applying pressure if the ball went out to them – pressing zonally.
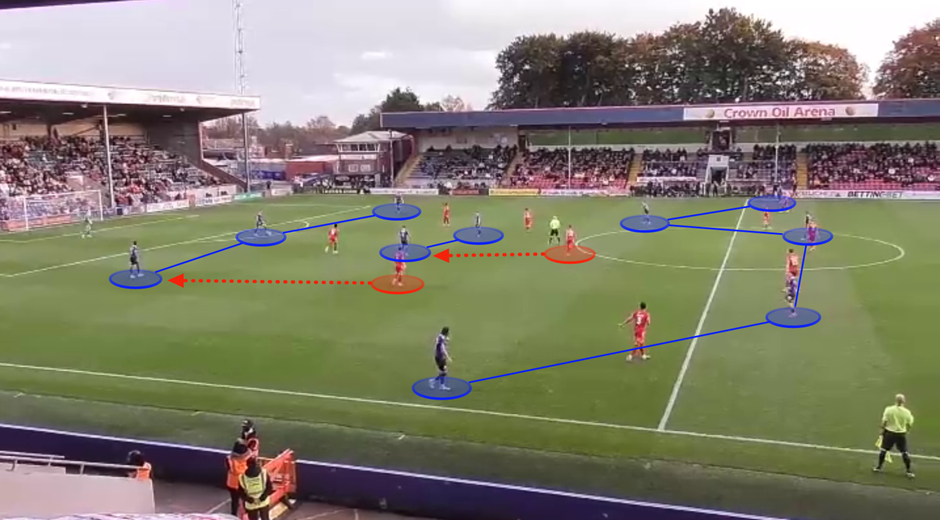
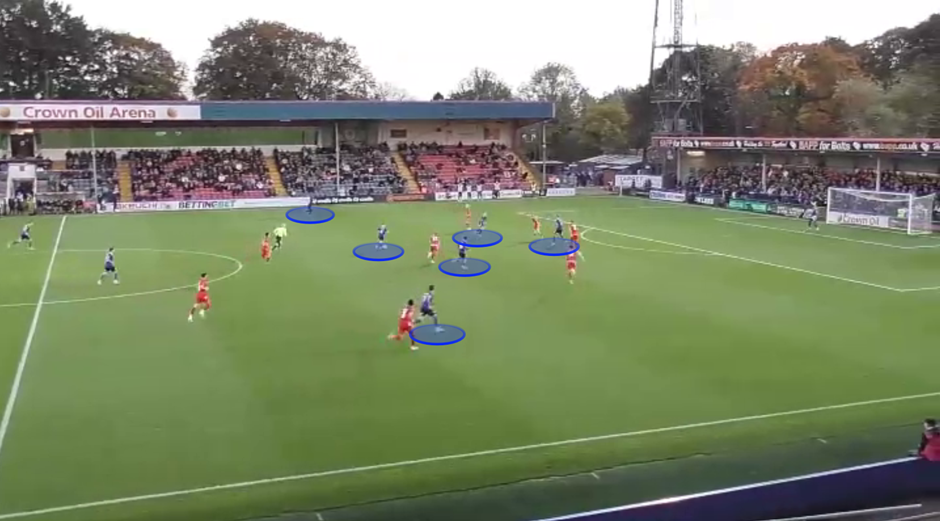
In the event that one of Rochdale’s #10’s dropped deeper, they were managed by Morton and a Southend centre-back (below), who would step into the midfield to apply pressure.
As we can see from the below image, Southend’s left-sided centre-back, Joe Gubbins, had stepped into the midfield to press. When this happened, he had to make sure he acted quickly in order to not give space to the Rochdale #10. If he was too slow, his advanced positioning could be exploited, and it required top concentration to maintain this throughout the match. When pressure was applied quickly, the best available option for Rochdale was to play backwards.
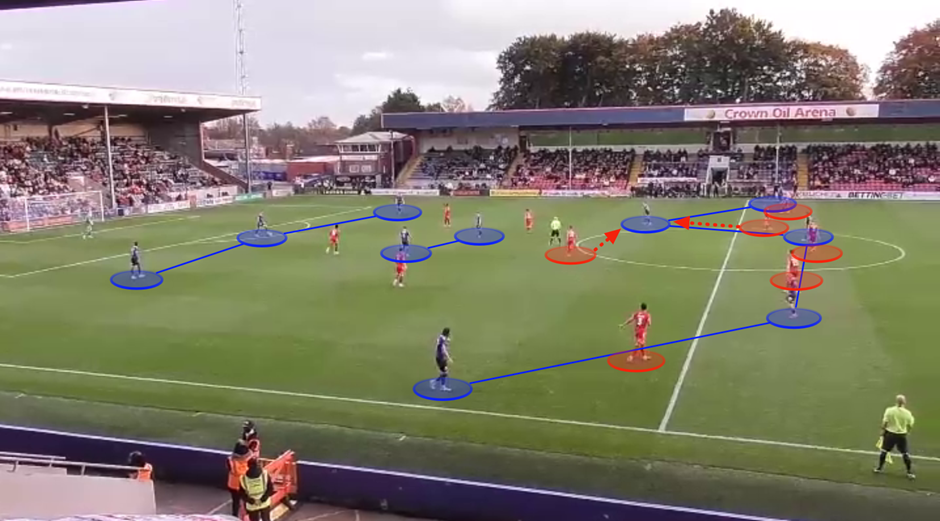
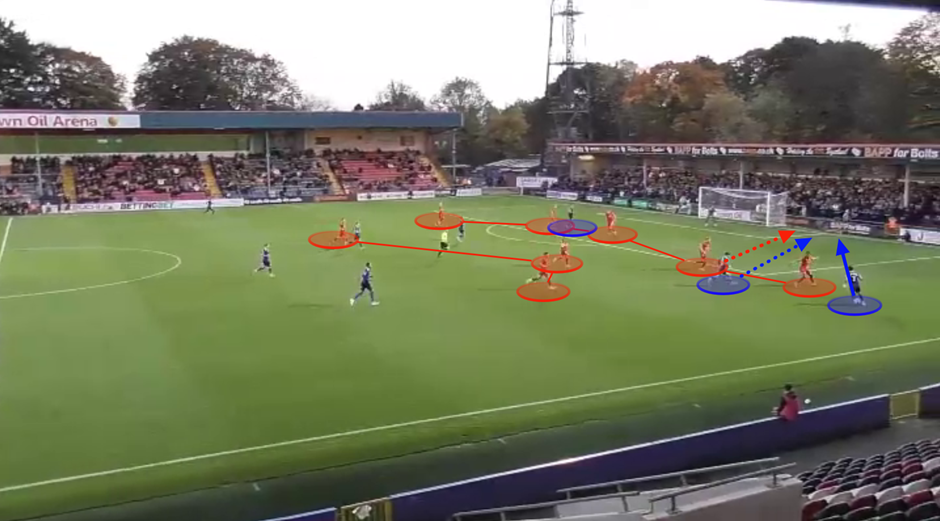
Because Southend’s back-five would often man-mark Rochdale’s front-five, it had the potential to be exploited, however. From the below image, we can see how Rochdale’s right wing-back and #10 had both dropped deeper, baiting two Southend defenders to press. This created space within Southend’s defensive line.
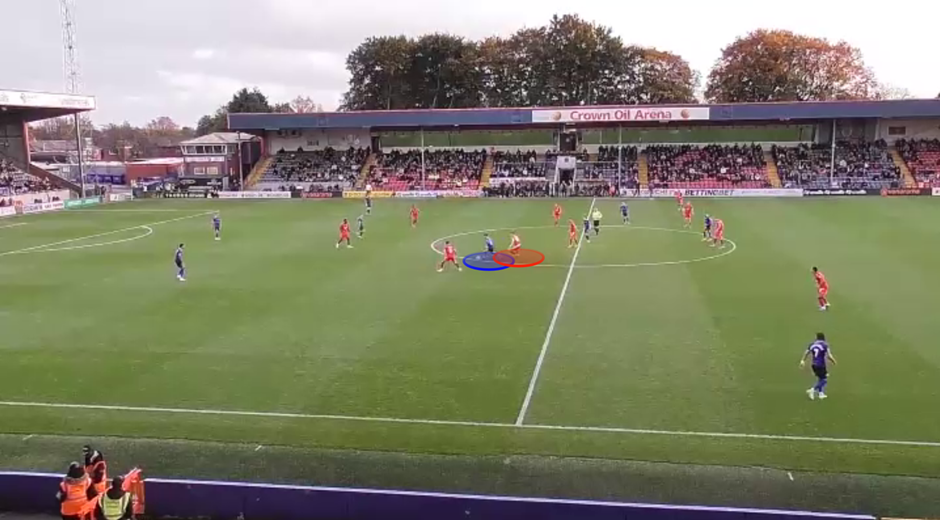
After ‘going long’ towards their centre-forward, Kairo Mitchell, Rochdale could counter-press, win the loose-ball duels and attack in space, committing bodies forward – as we can see below. However, Rochdale didn’t attempt this method of ball-progression often enough, and were too reliant on trying to play safely past Southend’s mid-block, rather than playing over and beyond it. Just 7.99% of Rochdale’s total passes were classed as ‘long passes’, compared to Southend’s 13.96%, and Rochdale’s season average of 10.46%.
Whether Rochdale progressed play into the final-third by building safely or via long passes, they still struggled to break down Southend’s defensive block. Once defending deep, Southend formed a 5-3-2 low-block. This meant that they weren’t outnumbered in the last line, versus Rochdale’s front-five, and could track the half-space runs effectively whilst also having sufficient numbers centrally to mark Mitchell (below).
If Southend had to rely on midfielders dropping deep to pick up the half-space runs instead, it would be more difficult to do so consistently. This, again, required immense concentration levels from Southend to sustain for 90 minutes, who limited Rochdale to just 1.06 expected goals (xG) – with just 0.16 xG coming before half-time.
Rochdale had a 57% possession share, but what about when Southend had possession?
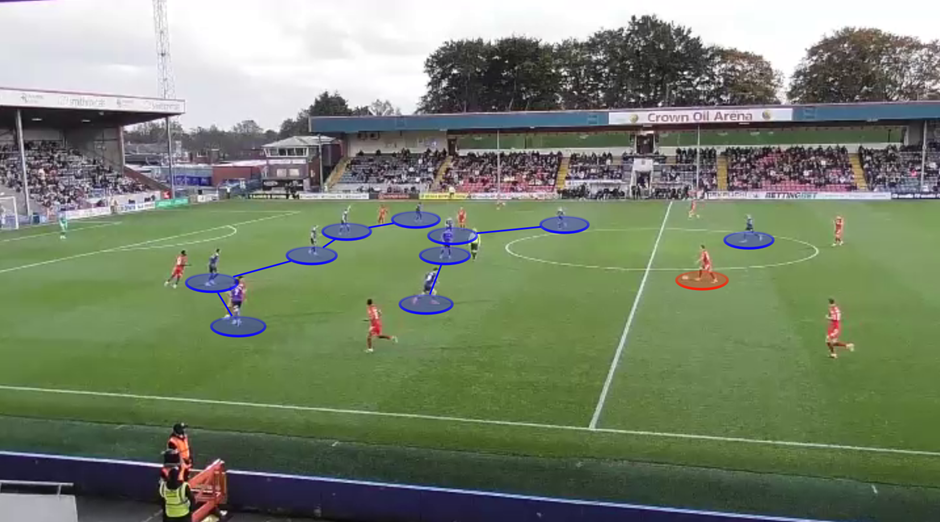
Southend formed a 3-1-2-4 shape in the build-up, with their wing-backs pushed high and wide (below). As we can see below, Rochdale’s defensive block matched up fairly nicely. However, there is one important detail to mention…

Rochdale had a 5v4 numerical advantage in the last line, but this additional player was taken from the first line of the press. With their pivot players occupying Southend’s #8’s, Rochdale only had three players committed to the high press. Therefore, it was the responsibility of Mitchell to both shadow-mark Morton and press Southend’s central centre-back, Adam Crowther.
This meant that it was fairly easy for Southend to bait Mitchell to press and find Morton. It was also difficult for Rochdale’s pivot players to jump to press Morton, because they were pinned deeper by the advanced positioning of Southend’s #8’s.
Overall, though, Southend weren’t as persistent with trying to ‘play out’ from defence as Rochdale were. They went long from goal-kicks, for instance, and were content to quickly gain territory and win duels. This way, Southend could either initiate attacks high up the pitch; or pin Rochdale back into their 5-4-1 block (below), create space to allow them more time on the ball, and have possession themselves.
This is how the only goal of the match was scored. Southend goalkeeper, Collin Andeng Ndi, played a long pass which led to a throw-in for Southend. This gave them the opportunity to pin Rochdale back and get the ball into the penalty area. The cross was kept alive by Nathan Ralph, and Walker scored.
Overall, it was a match of few chances. Although Jimmy McNulty’s side controlled the majority of the possession, they often moved the ball too slowly to disrupt Southend’s mid-block, and were quite one-dimensional in their build-up approach. However, when Rochdale did manage to pin Southend back on the edge of their penalty area, Kevin Maher’s side were well-drilled to nullify the effectiveness of Rochdale’s attacking structure. Southend were well-organised, more physical, mixed between short and long passes better and, ultimately, took their chance when it came.

You must be logged in to post a comment.