On Tuesday evening, Dean Brennan’s Barnet travelled to York City. Below, I’ll break down the tactical battle and explain how it led to a 3-1 victory for Adam Hinshelwood’s side.
York formed a 4-3-4 shape from goal-kicks (below) by dropping their #6, Dan Batty, into the first line beside their goalkeeper, Harrison Male, with their centre-backs split either side. Further ahead were the full-backs and one of York’s central-midfielders, Alex Hunt. In the last line York had their other central-midfielder, Marvin Armstrong, their wingers and their centre-forward.
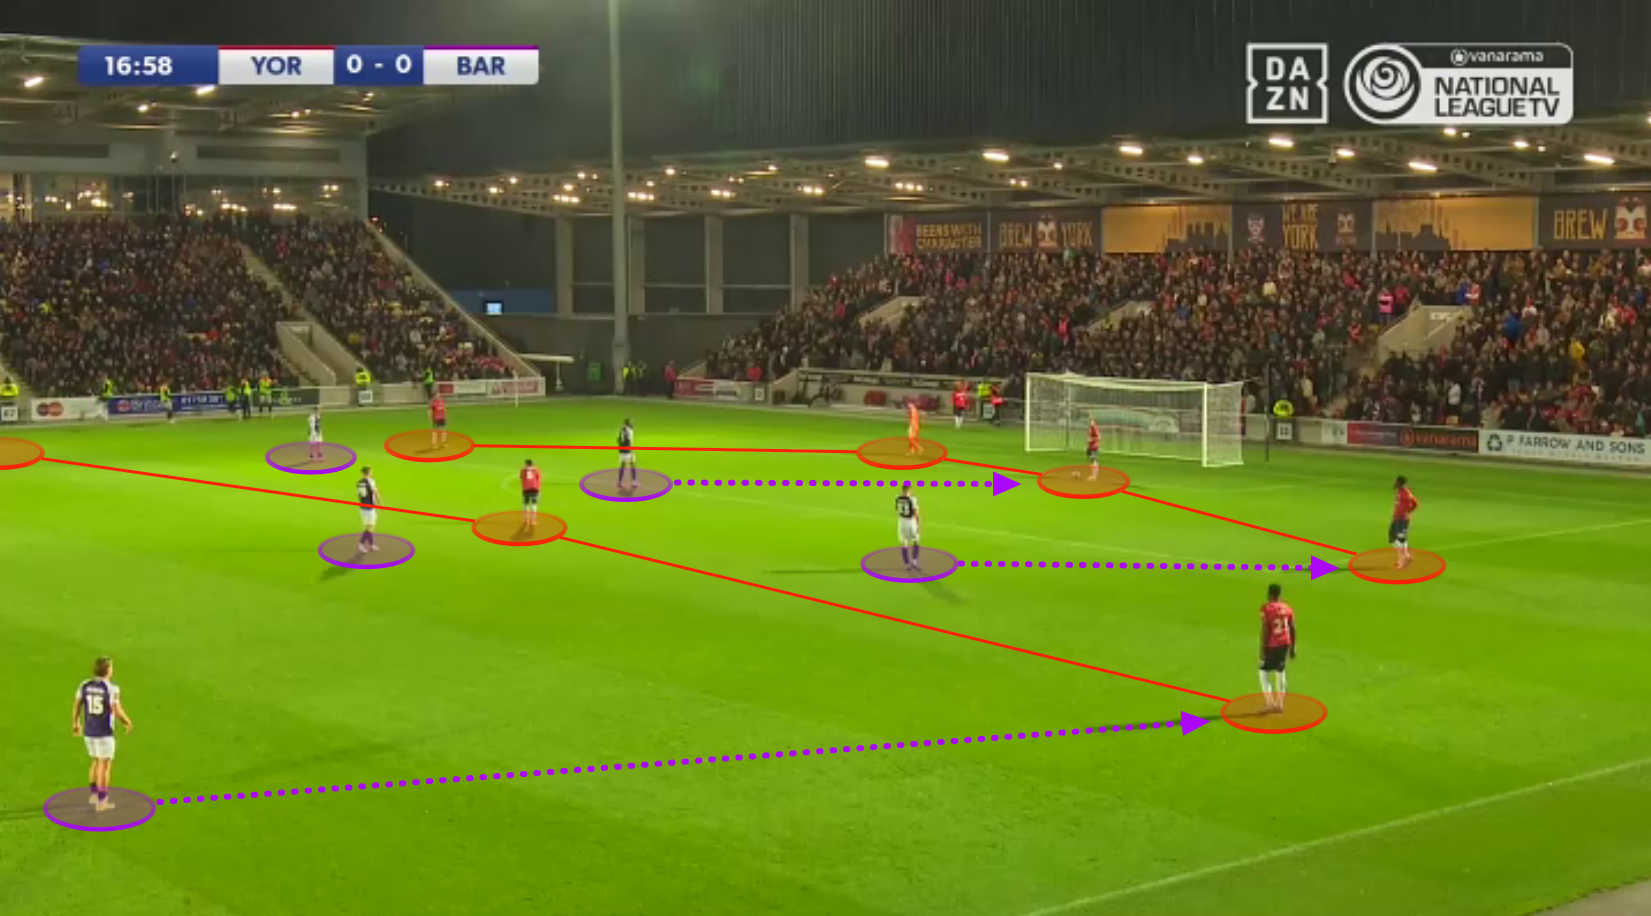
In this phase, Barnet pressed in man-to-man fashion all across the pitch to apply maximum pressure, as illustrated above. Their front-three in their 5-2-3 formation pressed York’s back-four; although ‘keeper Male made a +1 for York. Barnet’s wing-backs were ready to jump to press York’s full-backs, one of their midfielders marked Hunt with the other dropping deeper. This meant that Barnet had four players in the last line, ensuring their back-three wasn’t outnumbered.
When building higher up the pitch, York built play from defence in a 4-2-4 shape with Batty now alongside Hunt. To counter, as we can see below, Barnet were ready to press man-to-man. Their #10’s pressed the centre-backs, and their wing-backs were ready to jump to press York’s full-backs. Their centre-forward, Nicke Kabamba, shadow-marked Batty; and one of their central-midfielders marked Hunt.
In the last line, Barnet’s other central-midfielder marked Armstrong, and they had a 5v3 numerical advantage versus York’s front-three (below).

There were some subtleties to York’s shape and Barnet’s press, which I will now explain…
York’s centre-forward Ollie Pearce was positioned slightly deeper than would be expected – alongside Armstrong. York, therefore, actually went with two false-nines within their 4-2-4 build, with Pearce and Armstrong dropping deeper in an attempt to overload the midfield. This caused an issue for Barnet. Although a central-midfielder dropped deeper to mark Armstrong, how were they going to deal with the false-nine Pearce when he dropped into the midfield?
The answer was for one of their centre-backs, usually Joe Grimwood, to man-mark him and follow him all the way into the midfield. This did, however, have the potential to be exploited if he was pulled out of position.
Additionally, Barnet required their wing-backs to cover a lot of ground to ‘jump’ to press York’s full-backs. However, if their wing-backs were unable to ‘jump’ they could be outnumbered 2v1 on the sides, and York could progress.
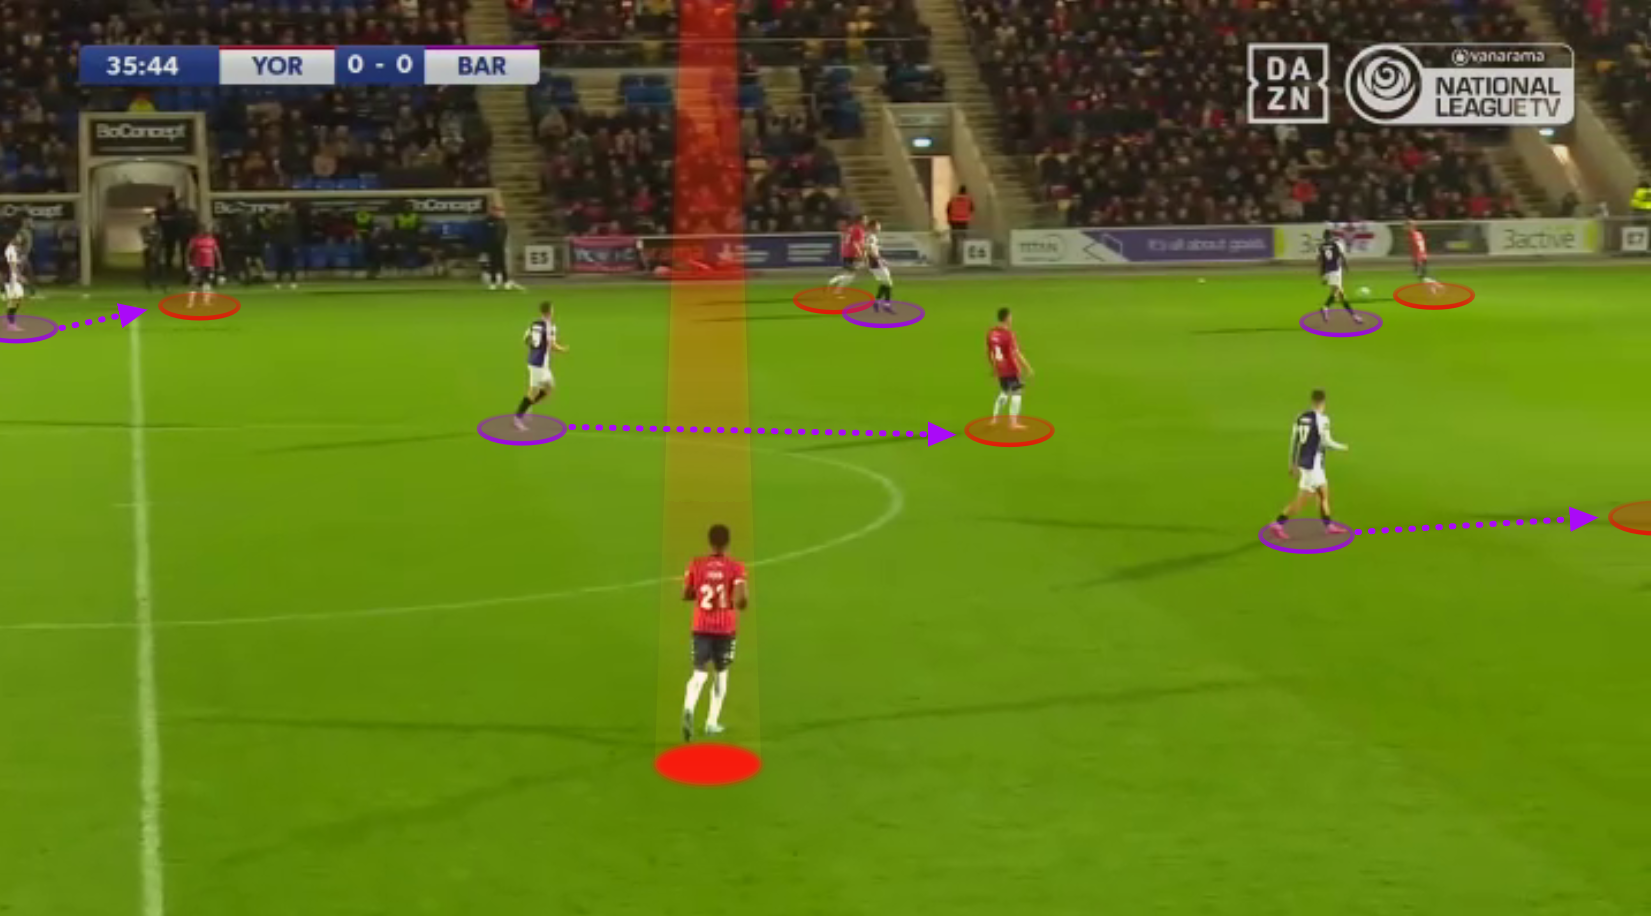
Nevertheless, Barnet’s press did work fairly well and limited York to a 50% possession share. The aim was for them to be ready to press man-to-man all across the pitch before forcing York to one side, where they could press in man-to-man fashion on the sides whilst also having an additional player in their defensive line.
This is illustrated in the below image, where Barnet had forced York to build down their left-side, whilst applying maximum pressure. They allowed York’s right-back on the far-side to be spare, which allowed them to have a +1 in the last line.

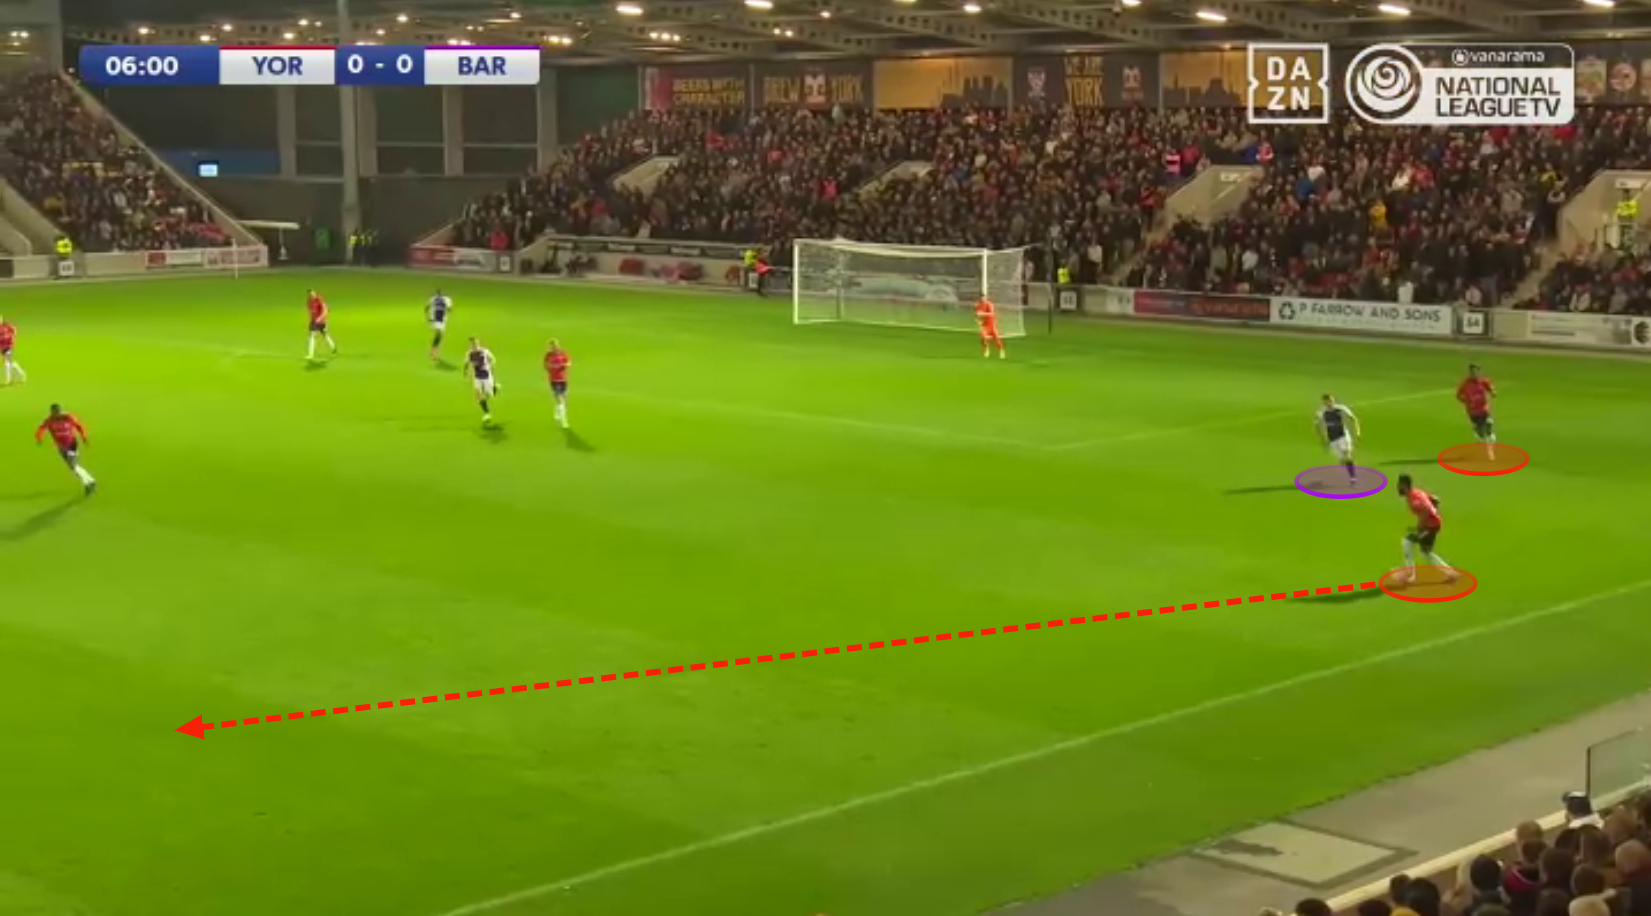
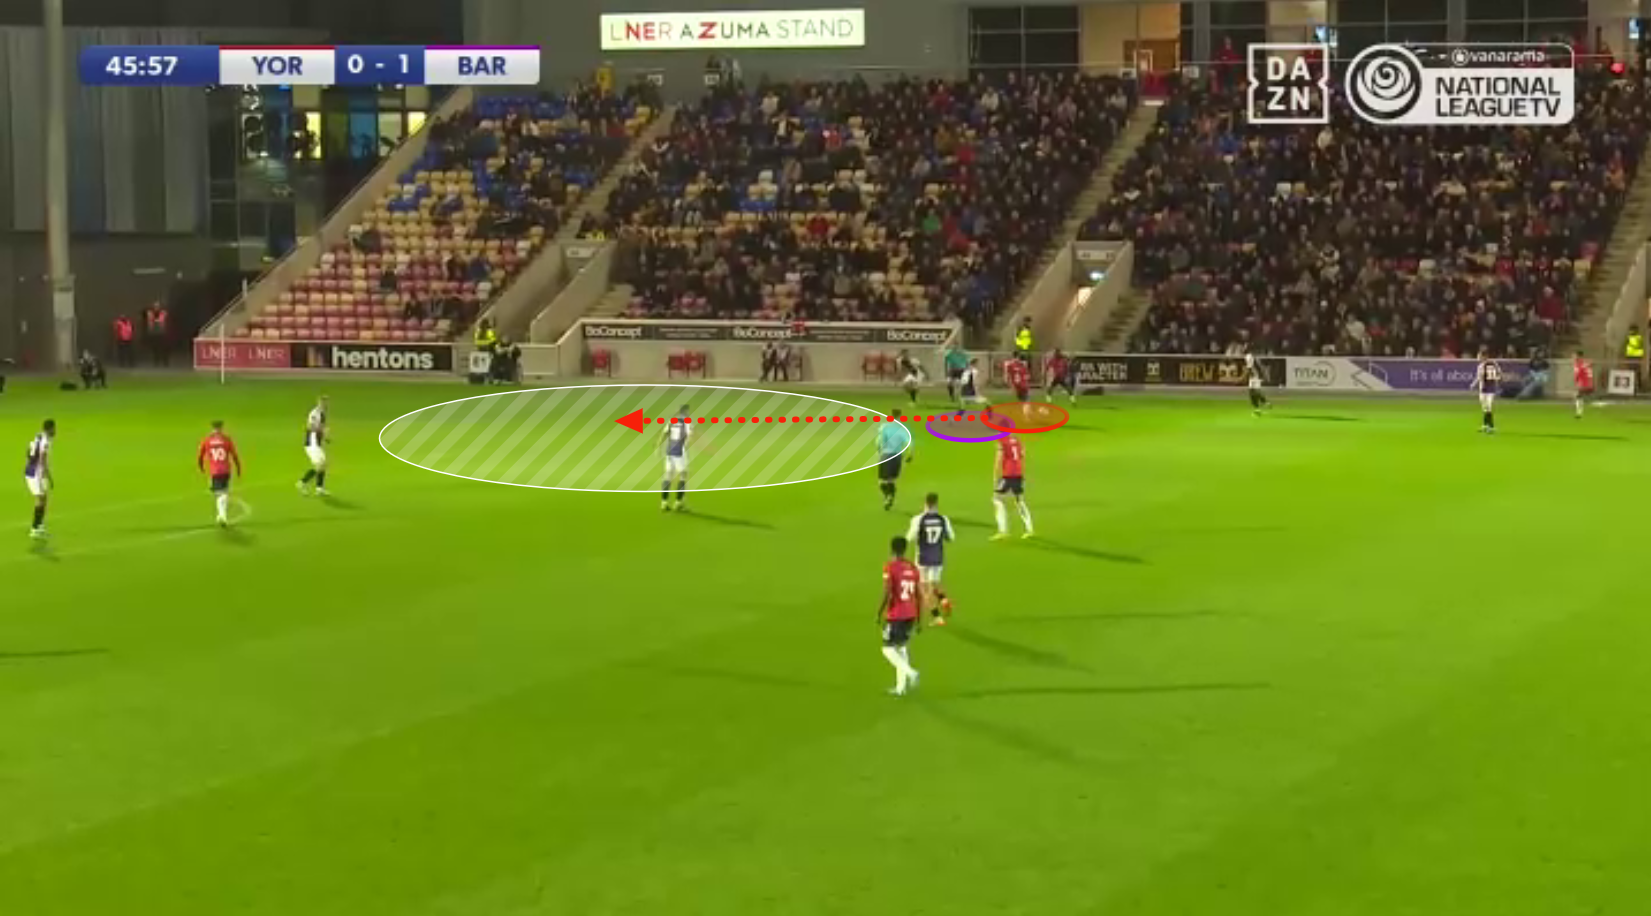
In fact, this pressing structure is how Barnet took the lead. They allowed York to build down their right-side before matching up in man-to-man fashion. Below, we can even see York’s left-back, Cameron John, spare.
Once Barnet had turned possession over through their press, they found one of their #10’s free between York’s defensive and midfield lines. Then, Barnet used their front-five to overload York’s back-four to easily find their right wing-back, Ryan Glover, in space (below). He crossed the ball into the penalty area, and Bailey Hobson scored.

But what about further forwards, once York had beaten Barnet’s press? In an evenly-contested match, York only accumulated an expected goals (xG) figure of 1.45 xG compared to Barnet’s 1.04 xG.
For York’s equaliser, they managed to exploit Barnet’s defensive line. With their left wing-back, Idris Kanu, dragged out wide, Barnet’s left-sided centre-back, Myles Kenlock had to shift across to defend the wide space. This created a large space between him and the central centre-back, Grimwood (below).
Hunt moved out to the right for York, and he was being marked by a Barnet #10, who had dropped deeper to help out. However, Hunt made a run into the space, beyond Barnet’s defensive line, and he wasn’t tracked by Barnet’s #10. Consequently, he managed to cross the ball into the penalty area, and Armstrong scored.
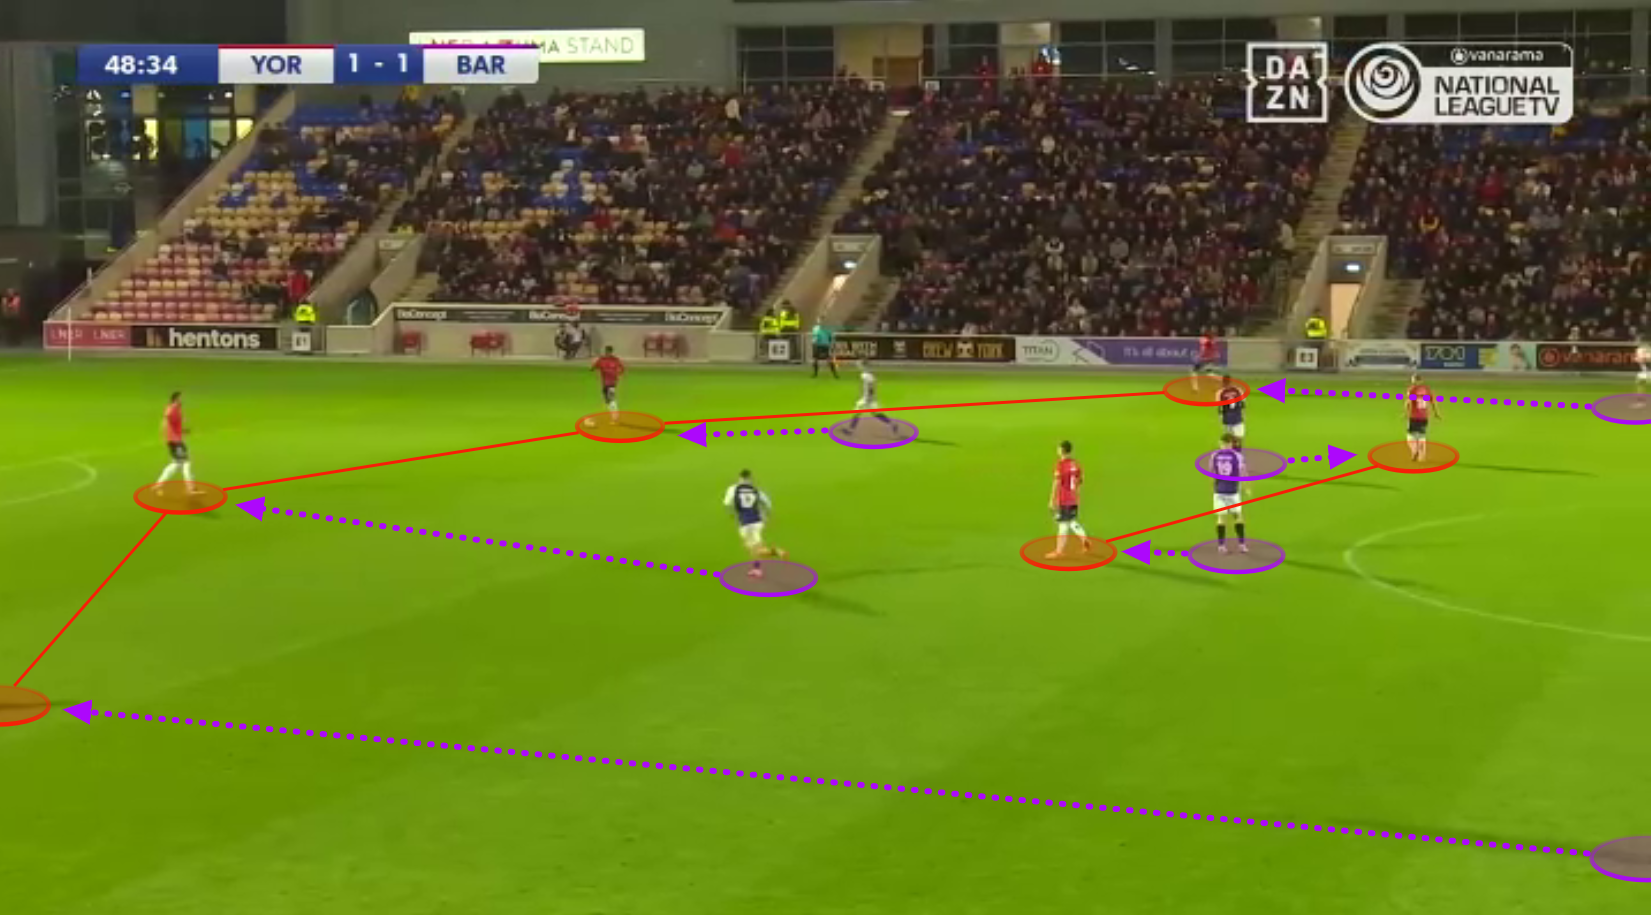
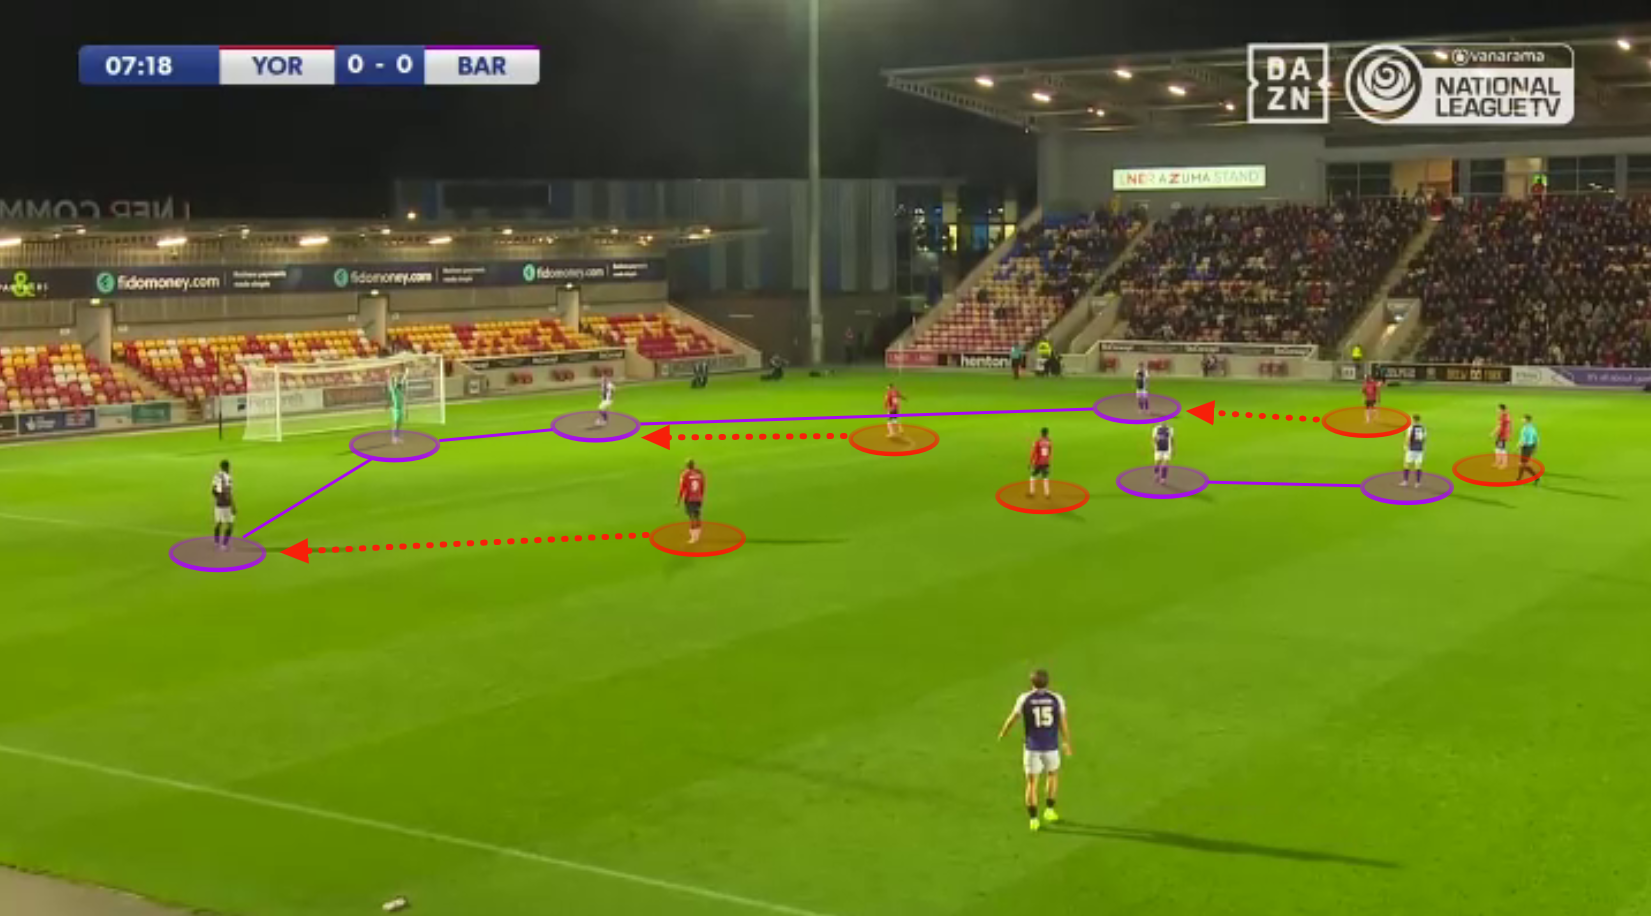
When Barnet built play from goal-kicks, they formed a 4-2-5 shape. Again, their goalkeeper helped them to form a back-four; their double-pivot sat ahead; and their wing-backs, #10’s and Kabamba were positioned in the last line. From the goal-kick moment, like Barnet, York also pressed in man-to-man fashion all across the pitch – as illustrated below. The front-three of their 4-1-4-1 pressed Barnet’s back-four (including ‘keeper Hayes), their central-midfielders press Barnet’s pivot, and Batty dropped deeper to plug the gaps in the defence to give York a 5v5 in the last line.
When building higher up, Barnet built play from defence in a 3-2-5 shape. York’s block matched up very nicely to this shape, and they were able to press man-to-man very easily. In fact, this is how their third and final goal was scored from.
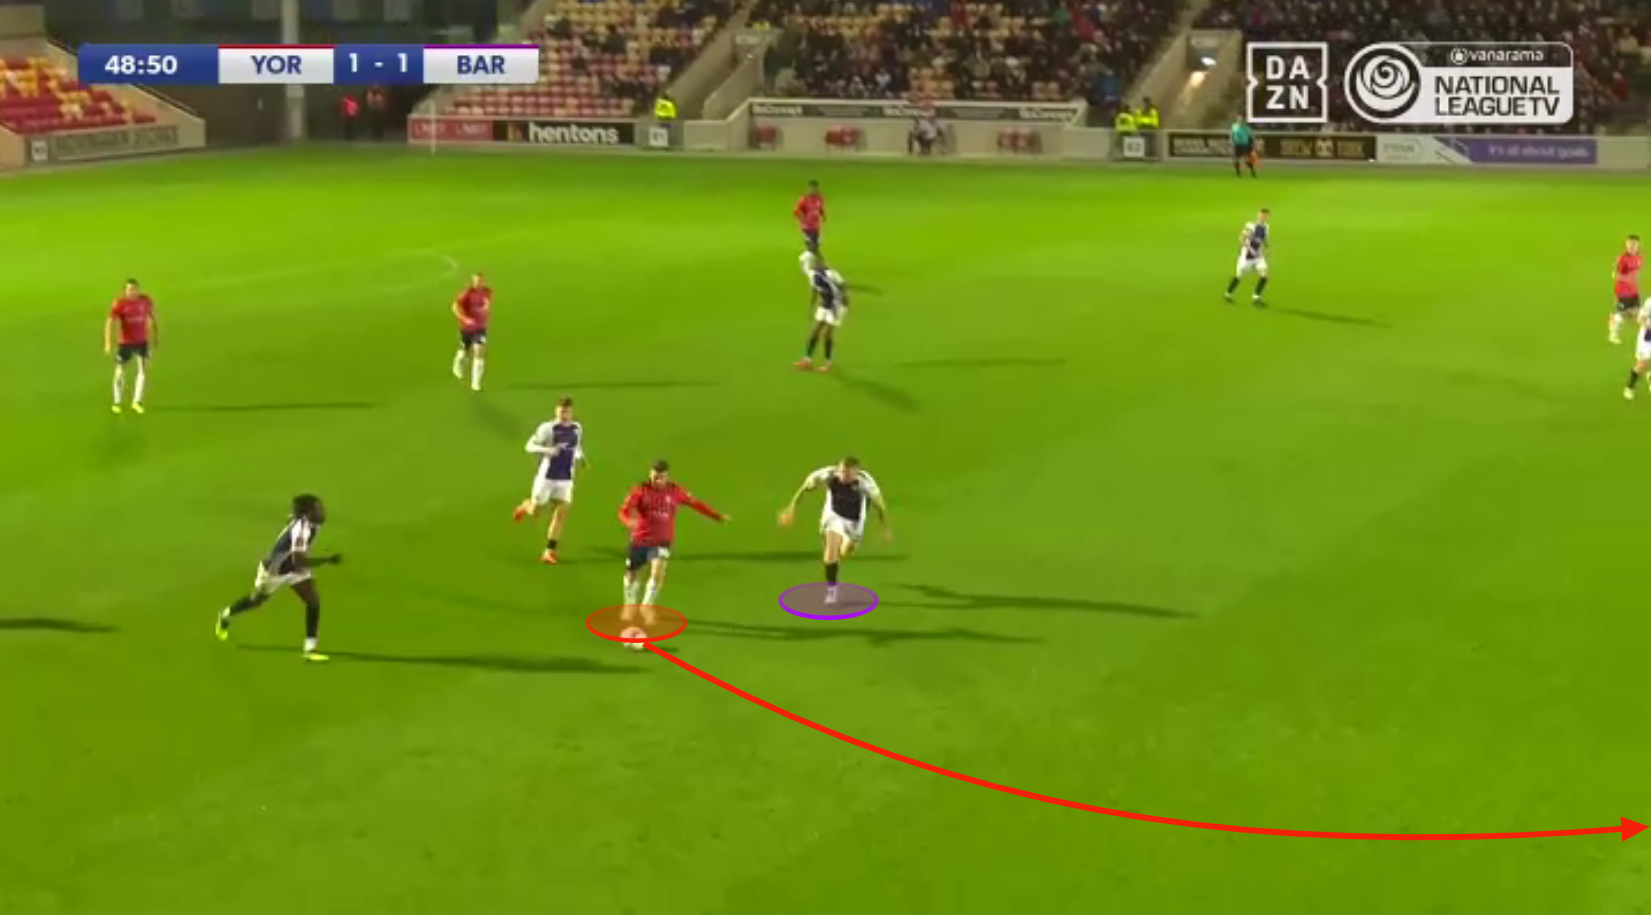
Immediately from kick-off after Hunt had put York ahead, Barnet passed back to their defence and this acted as the trigger for York to implement their man-to-man press (below). Due to applying maximum pressure on the ball, they forced a turnover high up the pitch, and Pearce was played through on goal, who scored.

That put York 3-1 ahead and finished the match as a contest.
From a tactical perspective, this title-race six-pointer was an even battle between two of the best sides in the National League. Possession was split evenly, and neither side dominated in terms of clear chances or expected goals (xG). Both sides’ pressing structures worked well, contributed to a goal each, and prevented either side from gaining the upper hand in terms of control.
The difference was that York, on this occasion, were more clinical with the chances they created. The reverse fixture at The Hive promises to be another interesting tactical battle between two of the division’s best tacticians in Hinshelwood and Brennan.
