On Saturday, Dean Brennan’s Barnet faced Jimmy McNulty’s Rochdale at The Hive. Below, I break down the tactical battle and explain how Brennan’s out-of-possession approach helped his side to control the majority of the match, but why it also almost allowed Rochdale to salvage a point.
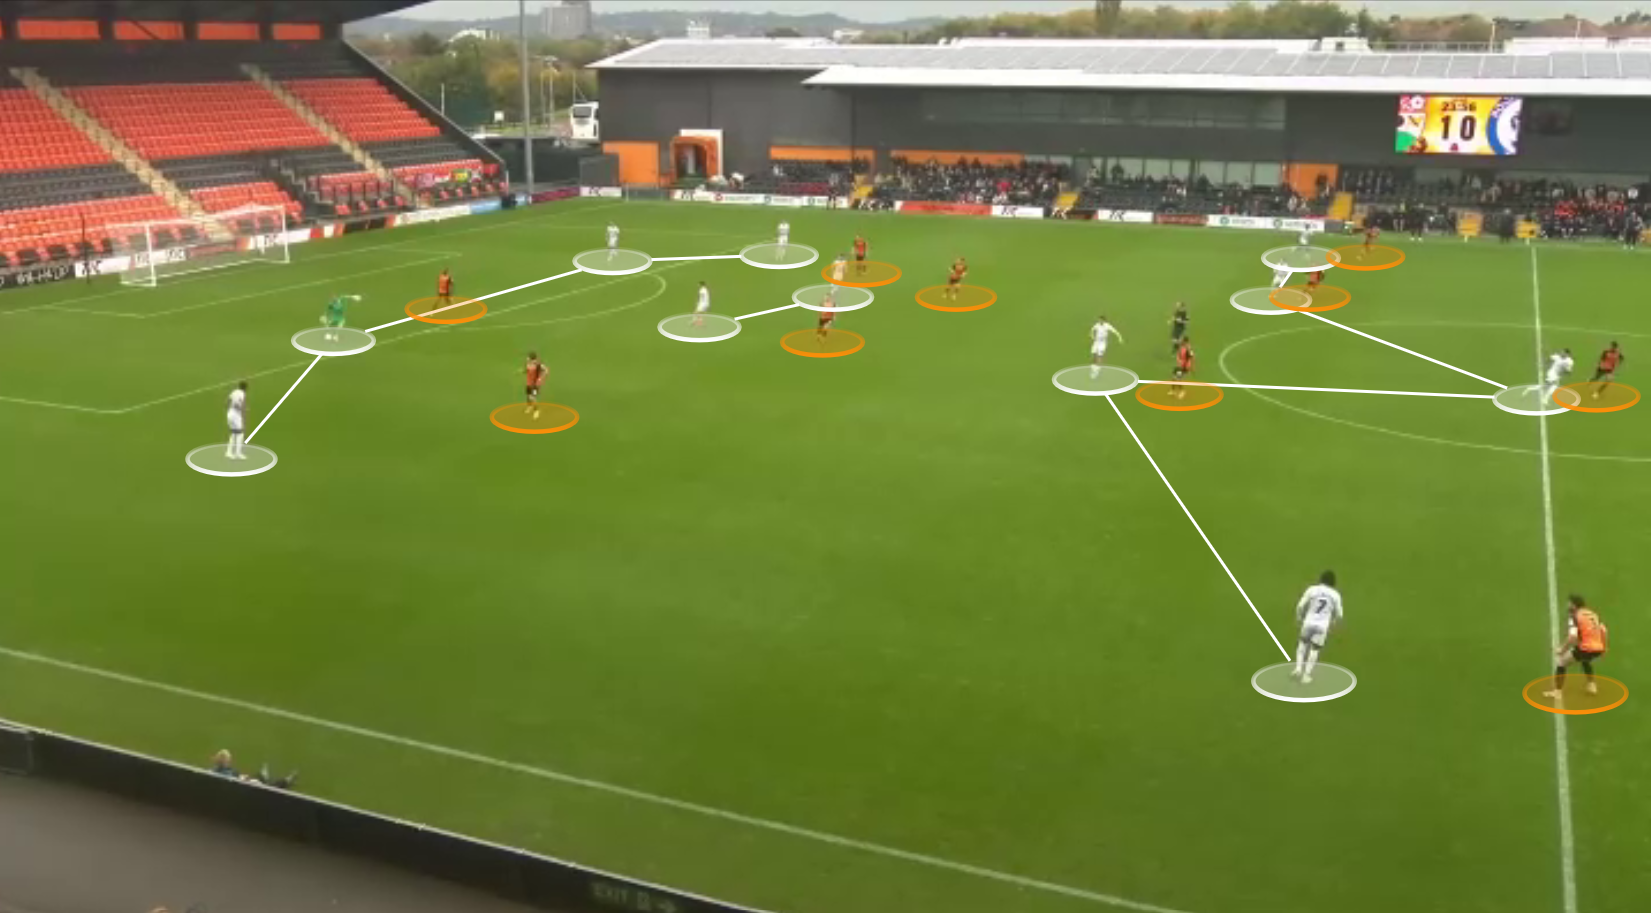
Both sides looked to ‘play out’ from defence, and formed 4-2-5 (or 4-2-2-3) shapes from goal-kicks by using their goalkeepers as situational centre-backs. However, their pressing structures were very different…
Barnet pressed Rochdale’s 4-2-2-3 build from goal-kicks in man-to-man fashion all across the pitch, as we can see below; although goalkeeper David Robson gave Rochdale a +1 versus Barnet’s front-three.
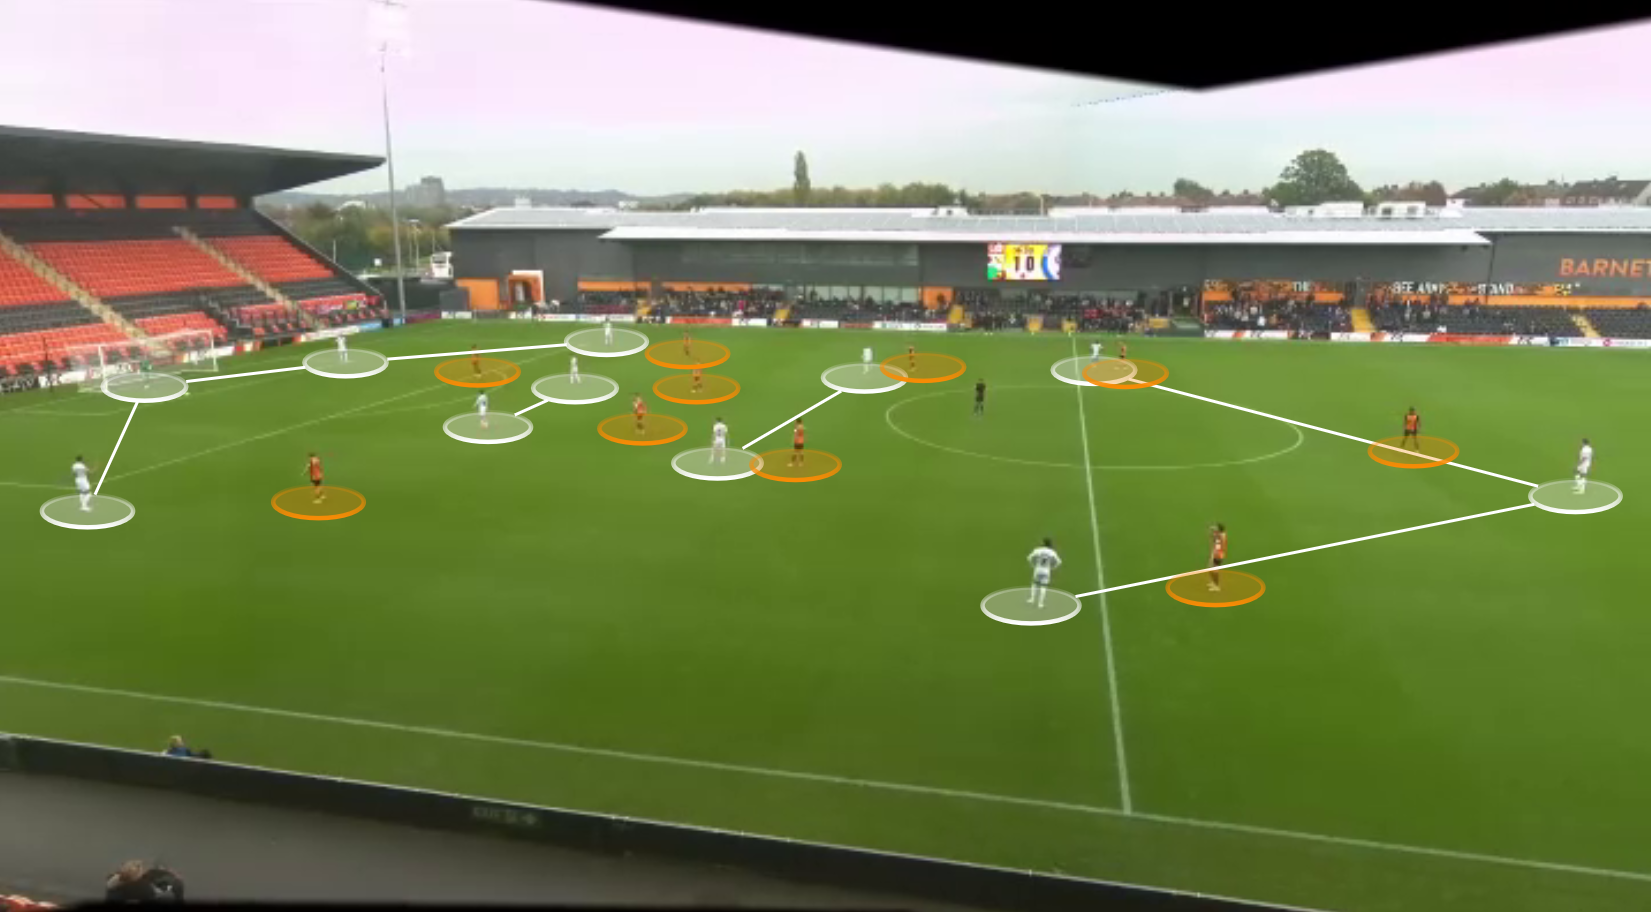
Barnet’s outside centre-backs even followed Rochdale’s two #10’s, Connor McBride and Aidan Barlow, into the midfield. This pressing approach of Brennan’s allowed Barnet to exert optimal pressure on Rochdale straight from the goal-kick moment.
On the other hand, Rochdale went with more of a zonal press against Barnet’s build-up from goal-kicks.
McNulty’s outside centre-backs were less inclined to man-mark Barnet’s two #10’s, Bailey Hobson and Ryan Glover. Consequently, Rochdale’s central-midfielders were positioned deeper to take care of the #10’s, and struggled to jump to Barnet’s double-pivot. As a result, Rochdale’s front-three were outnumbered 6v3 straight from the goal-kick moment (below), and Barnet could ‘play out’ with more ease.
The pressing approaches used from goal-kicks were typical of how each side looked to press from open-play, too.
Higher up the pitch, Rochdale formed a 3-2-5 shape when they were unable to use Robson as a situational centre-back. Again, Barnet pressed in man-to-man fashion right the way across the pitch, consistent with their approach from goal-kicks.
In fact, this is how Barnet scored their opening goal.
Barnet’s centre-forward, Nicke Kabamba, had blocked the passing lane into the Rochdale centre-back, and was closing Robson down. He passed into the midfield, but Barnet’s man-to-man press forced the turnover. The ball then fell to Kabamba, who scored.

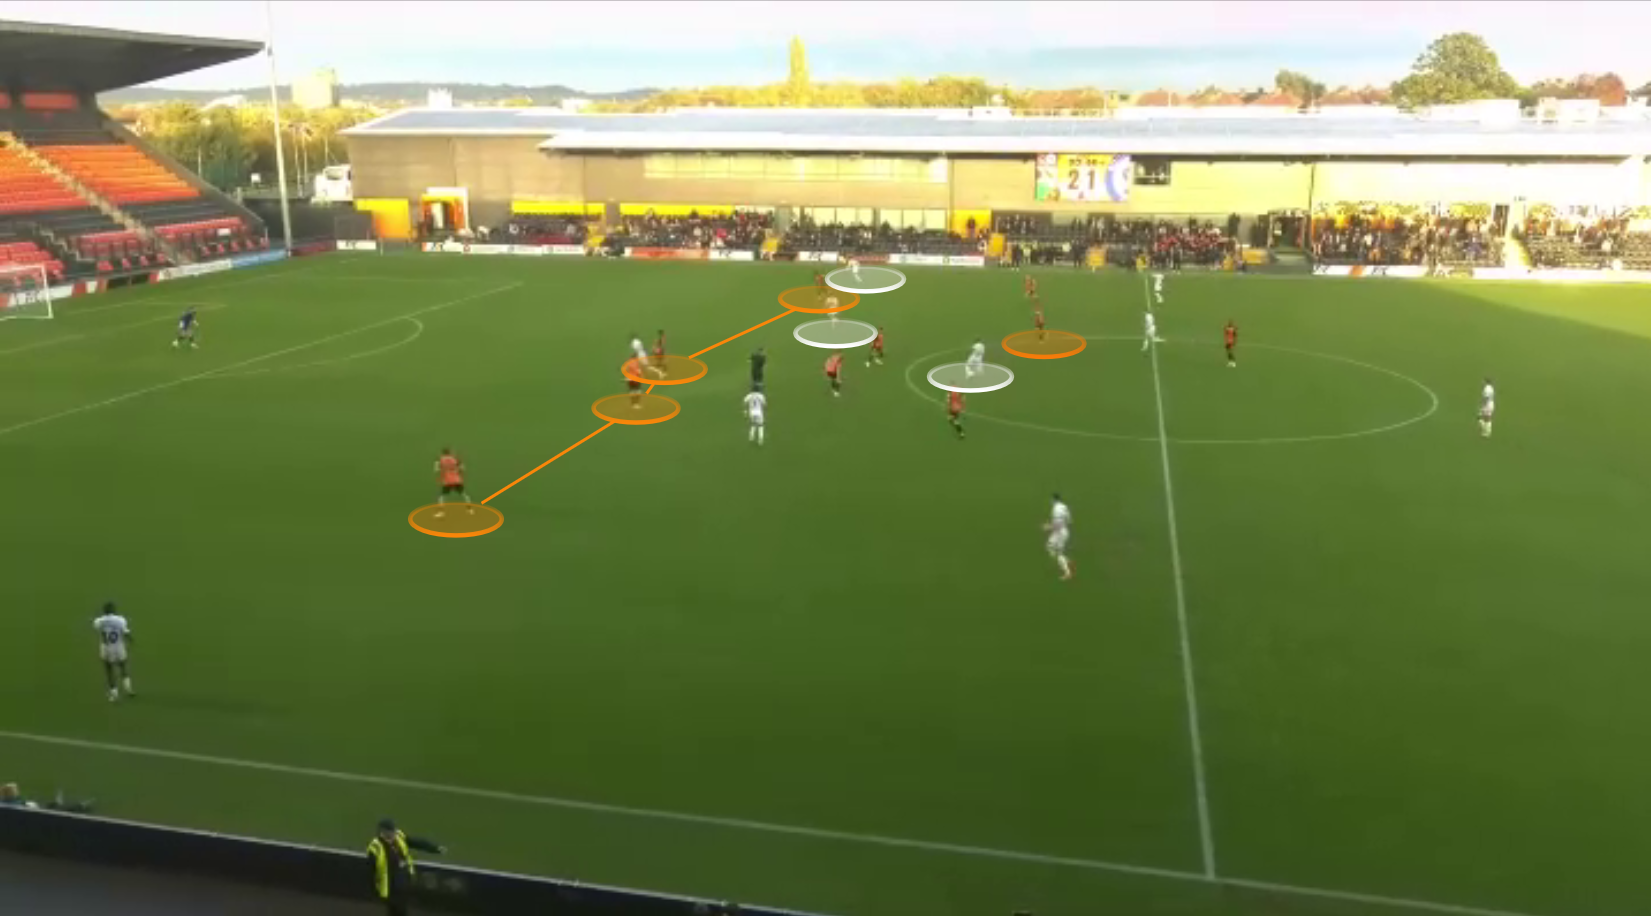
Barnet also formed a 3-2-5 shape in the high build, and Rochdale’s 5-2-3 block did allow them to match up nicely. There were moments when they could move into a man-to-man press to force Barnet to ‘go long’, or manufacture turnovers of possession.
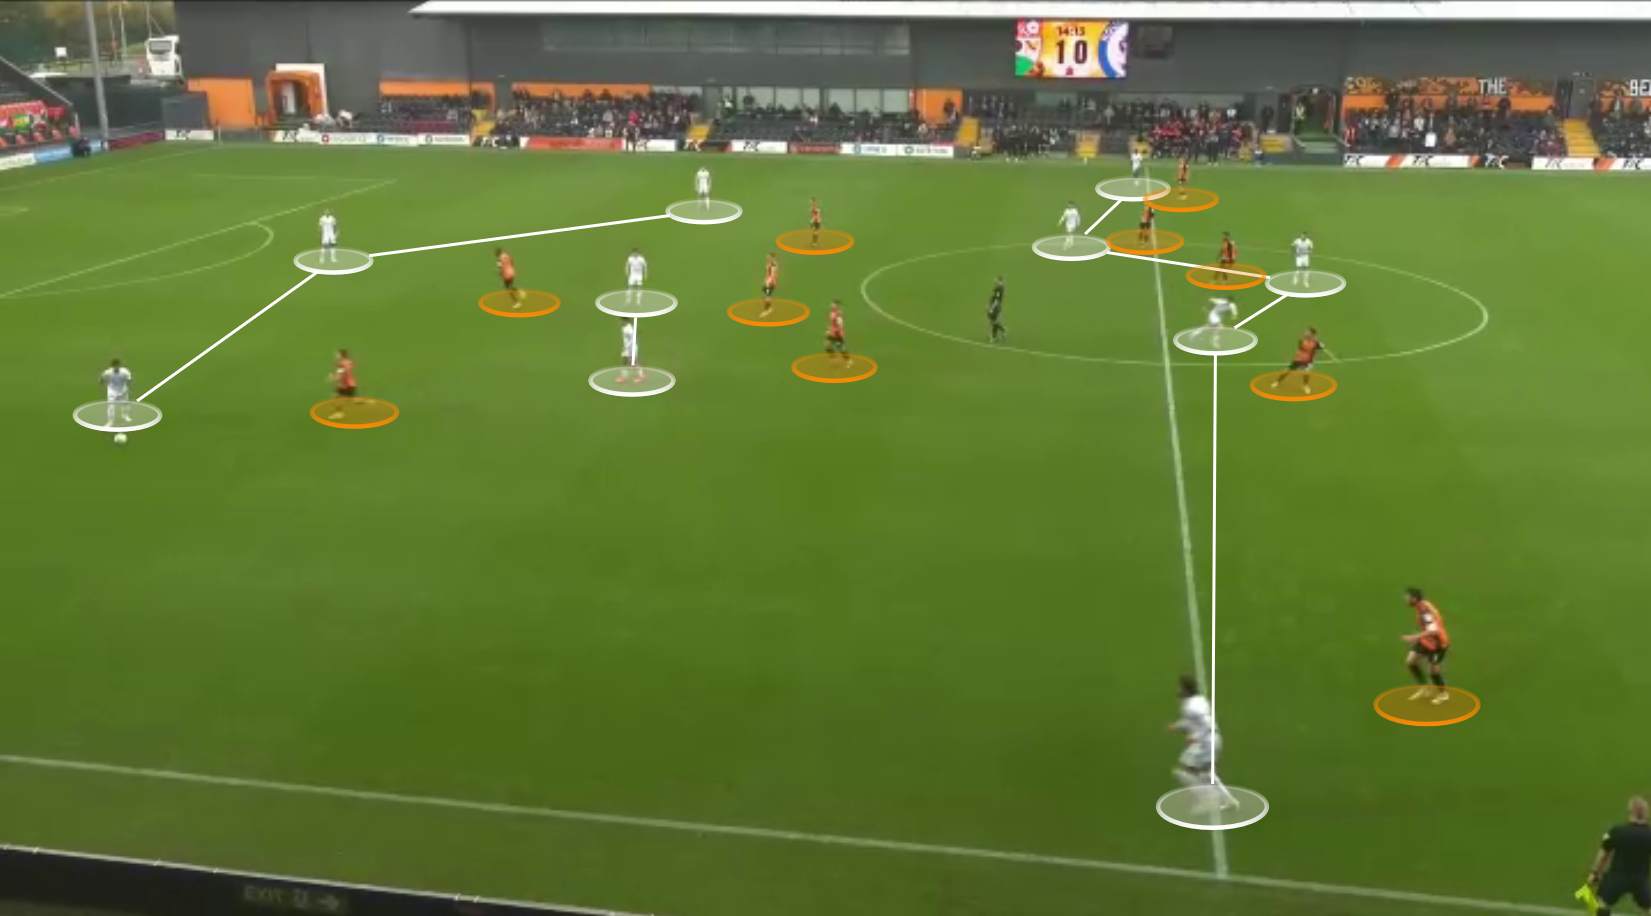
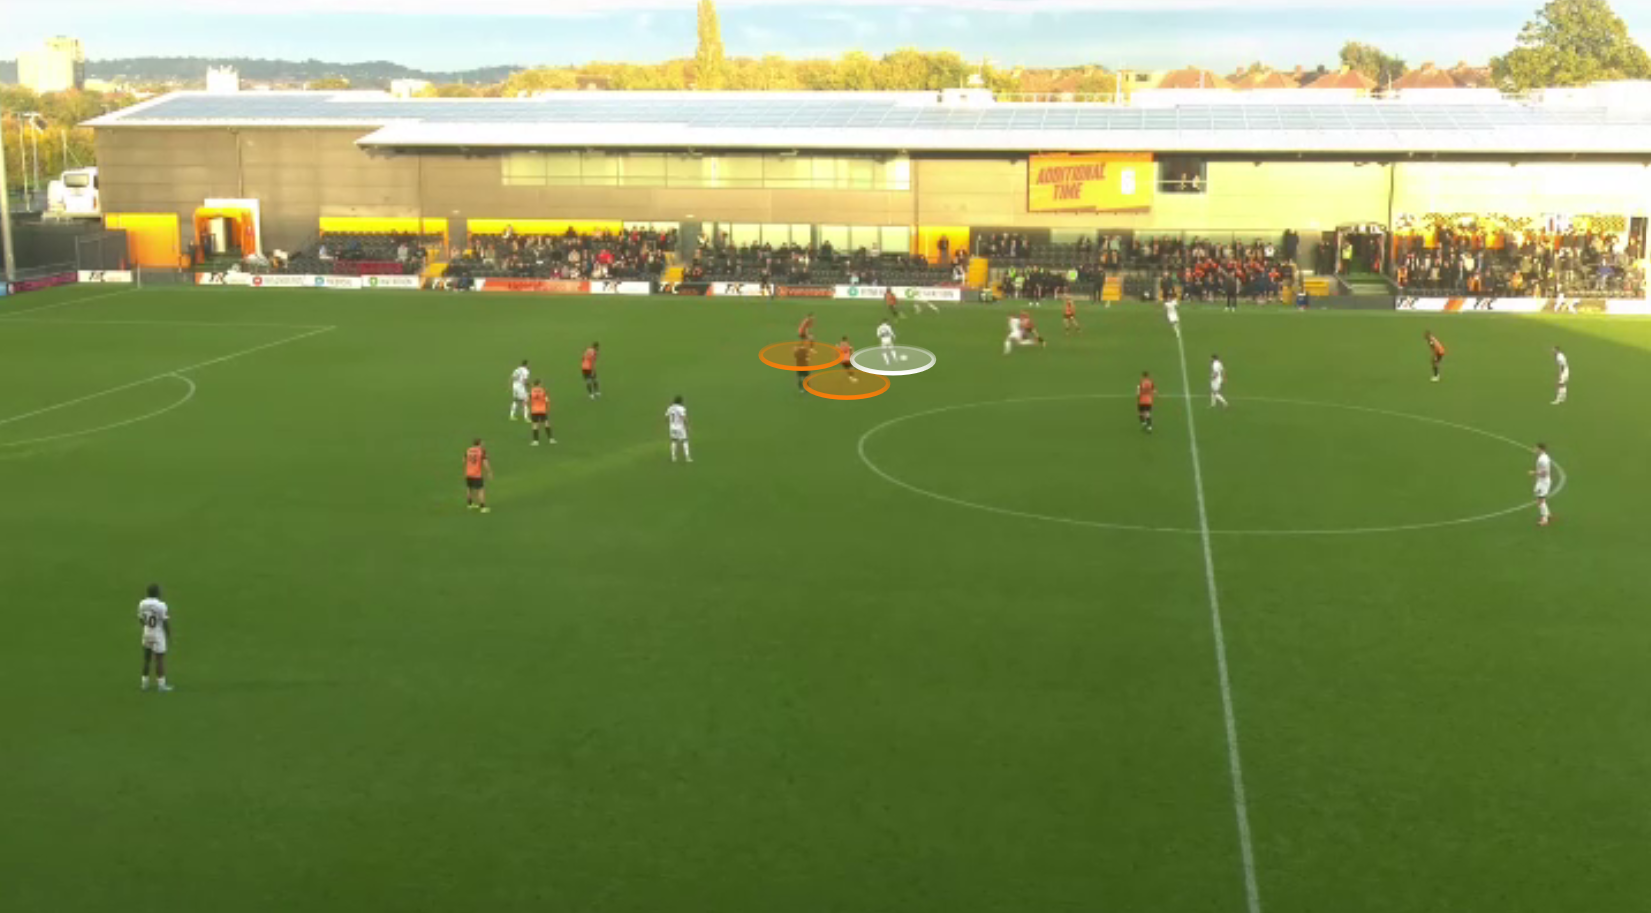
However these moments weren’t often enough and, again, a big part of the problem was to do with Barnet’s #10’s. With the #10’s often dropping from the last line to overload the midfield, it caused Rochdale issues.
Their defenders were often reluctant to jump to press, which meant their midfielders had one eye on them rather than being able to commit to Barnet’s pivot players. As a result, Rochdale’s front-three had to be more passive in an attempt to stop the supply into the pivot. This meant Rochdale lacked the same intensity as Barnet had to press aggressively from the front, as the intention was to be passive to make them difficult to play through instead.
This is illustrated in the below image.
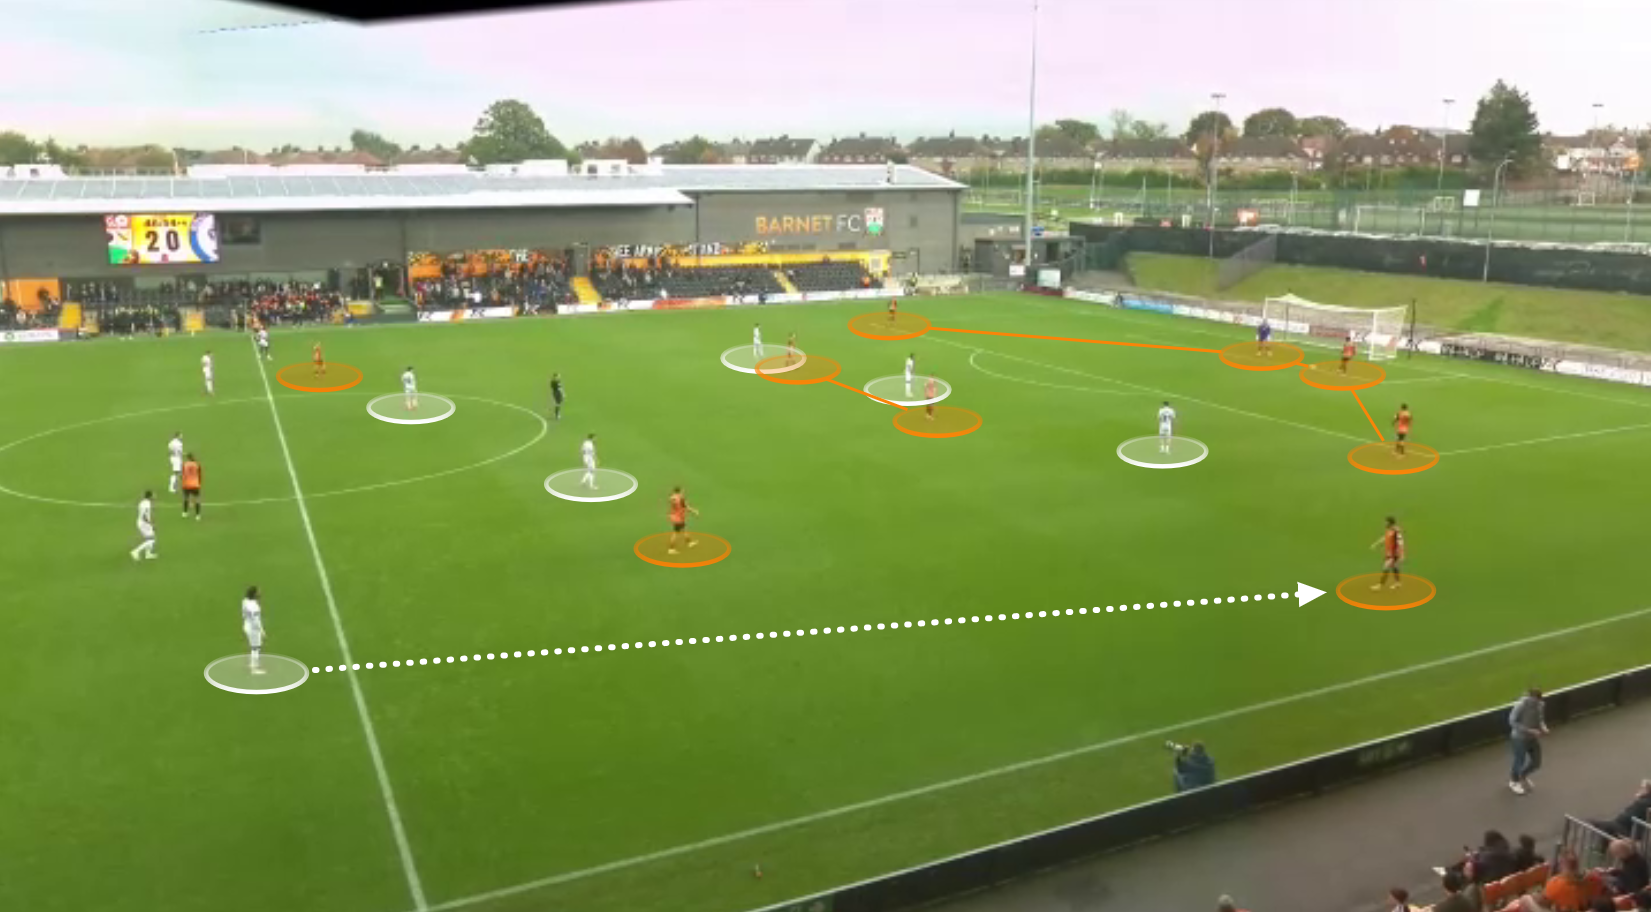
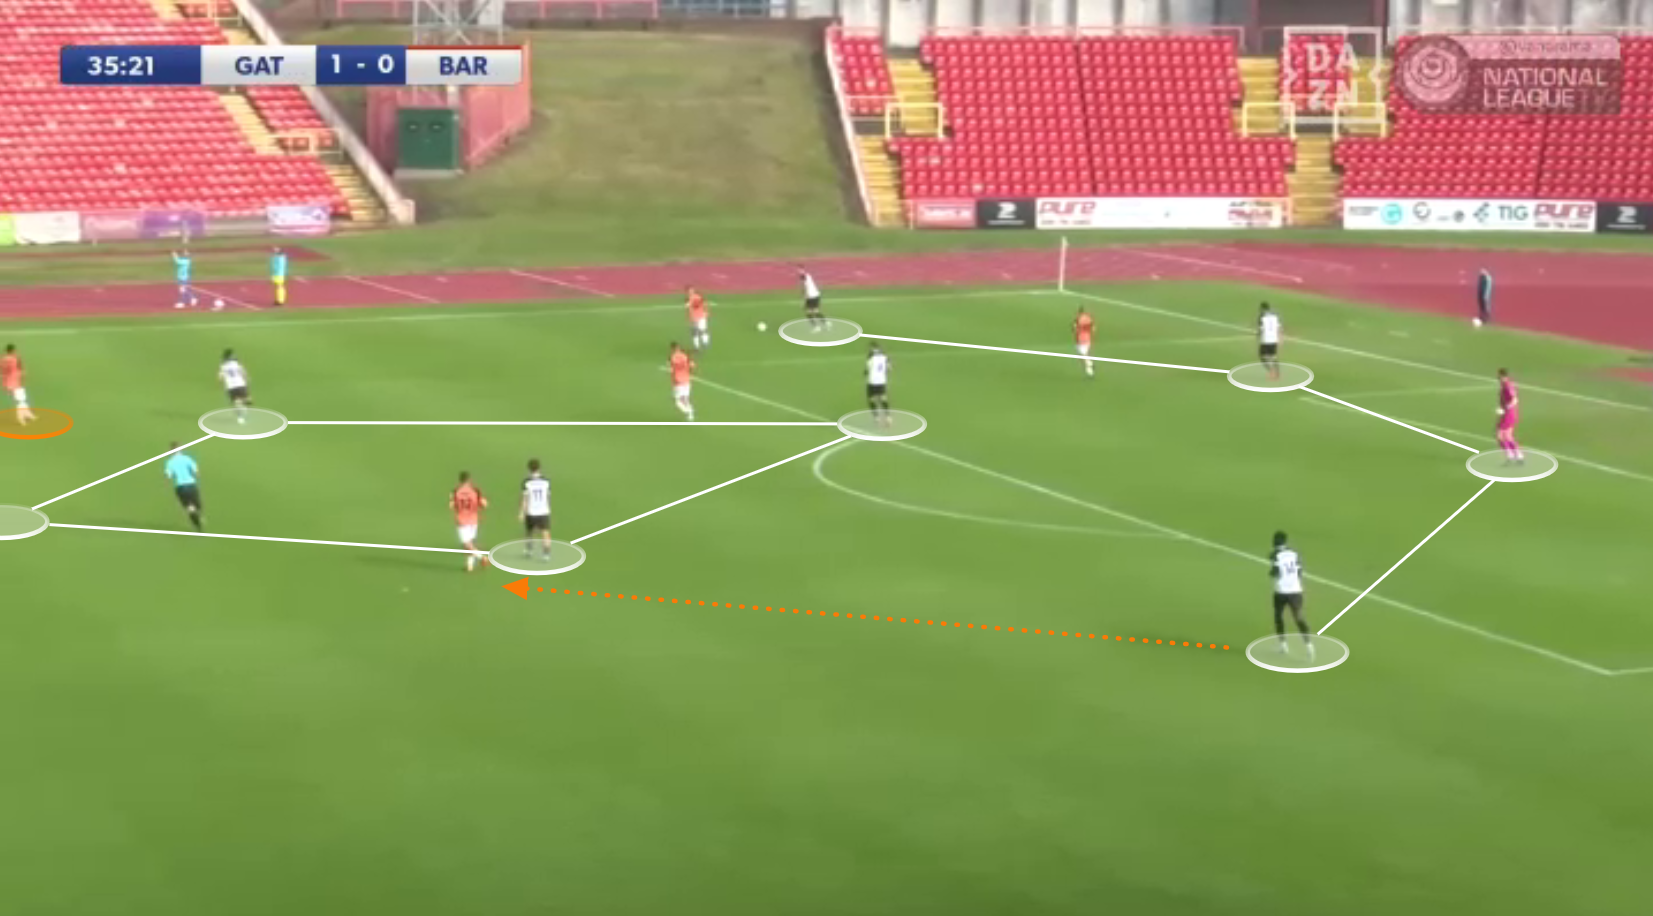
Rochdale’s passive press actually had a hand in Barnet’s second goal. One of Barnet’s central-midfielders found time and space on the ball, and played a pass over Rochdale’s block. The ball was flicked on and found its way to the left wing-back, Ben Coker, who stretched the pitch horizontally (below). Coker cut inside onto his right-foot and curled the ball into the bottom corner.
The combination of Barnet’s aggressive, man-to-man press – which made it difficult for Rochdale to safely ‘play out’ – and Rochdale’s inability to apply optimal pressure through pressing, meant that Barnet controlled the majority of the match.
Barnet had over 62% possession which, even though they were the home side, was far more than Rochdale – another top possession-based side – would have liked to allow them.
However, whilst Barnet’s press allowed them to apply good pressure on the ball, it was very nearly exposed on a number of occasions…
With Barnet man-marking all across the pitch, there entire back-five were tasked with following each member of Rochdale’s front-five everywhere they went.
Below, we can see how a Barnet centre-back ended up pushing high to follow his marker, which created a huge gap in their defensive line. A forward pass from Rochdale left them with a 2v1 numerical advantage on their right-side, and a through pass played in their right wing-back, Courtney Senior, who’s shot went just wide.
Barnet’s man-to-man press could also be exploited through dribbling. By definition, with Barnet relying on 1v1 duels all across the pitch, what if these duels were lost? Barnet would be outnumbered as soon as one player was beaten, and the whole structure could fall apart, leaving them vulnerable.
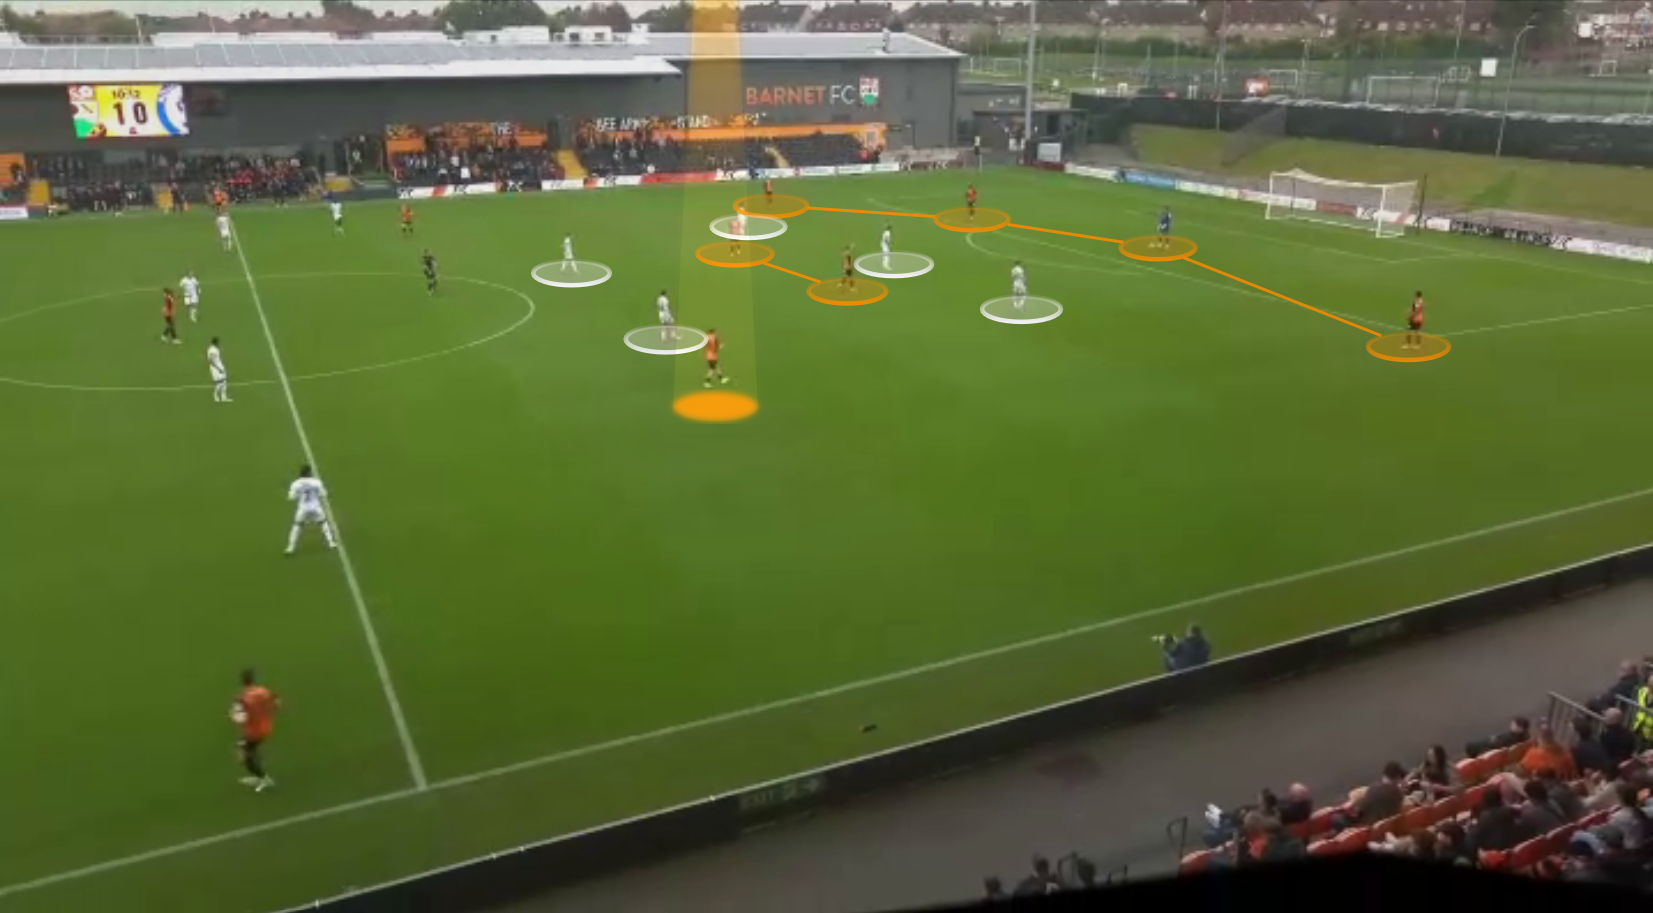
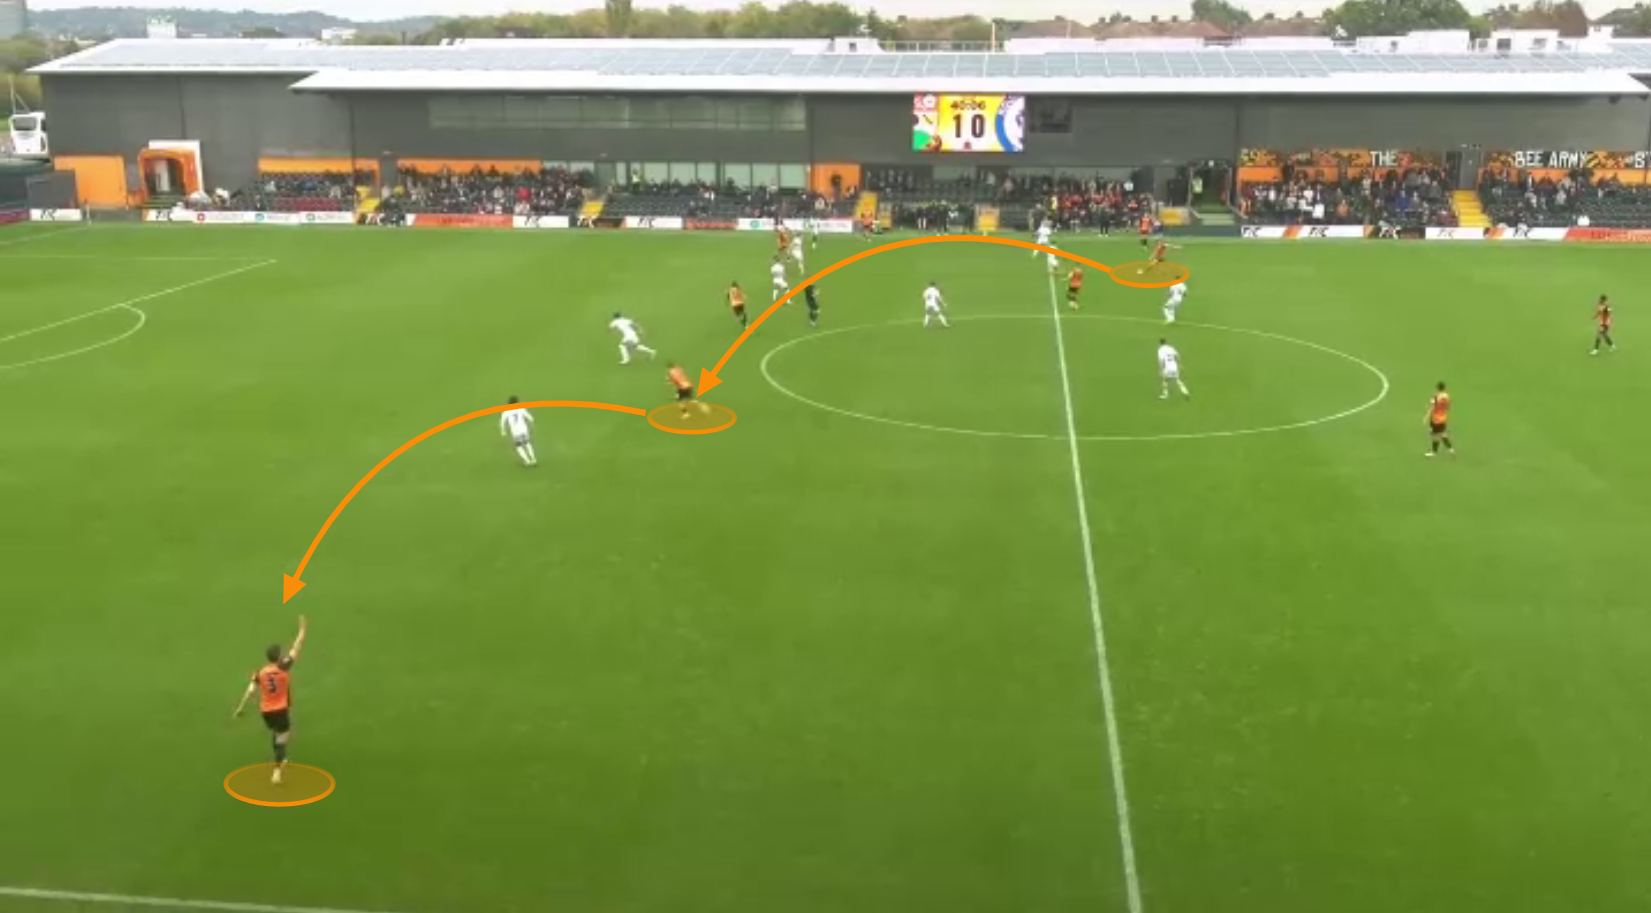
Another noticeable way that Rochdale looked to exploit Barnet’s man-to-man press, whether that be from goal-kicks or open-play, was by using their centre-forward, Kairo Mitchell. With Barnet’s outside centre-backs man-marking Rochdale’s #10’s, when both of these #10’s dropped into the midfield, Mitchell was left 1v1 with Barnet’s centre-back, Adebola Oluwo.
Rochdale could then launch long passes towards Mitchell (below). From here, it could lead to attacking situations directly; or indirectly through sustained pressure, if Mitchell could hold play up.
The percentage of Rochdale’s passes versus Barnet that were classed as ‘long passes’ was 14.53% – just about their highest percentage so far this season.
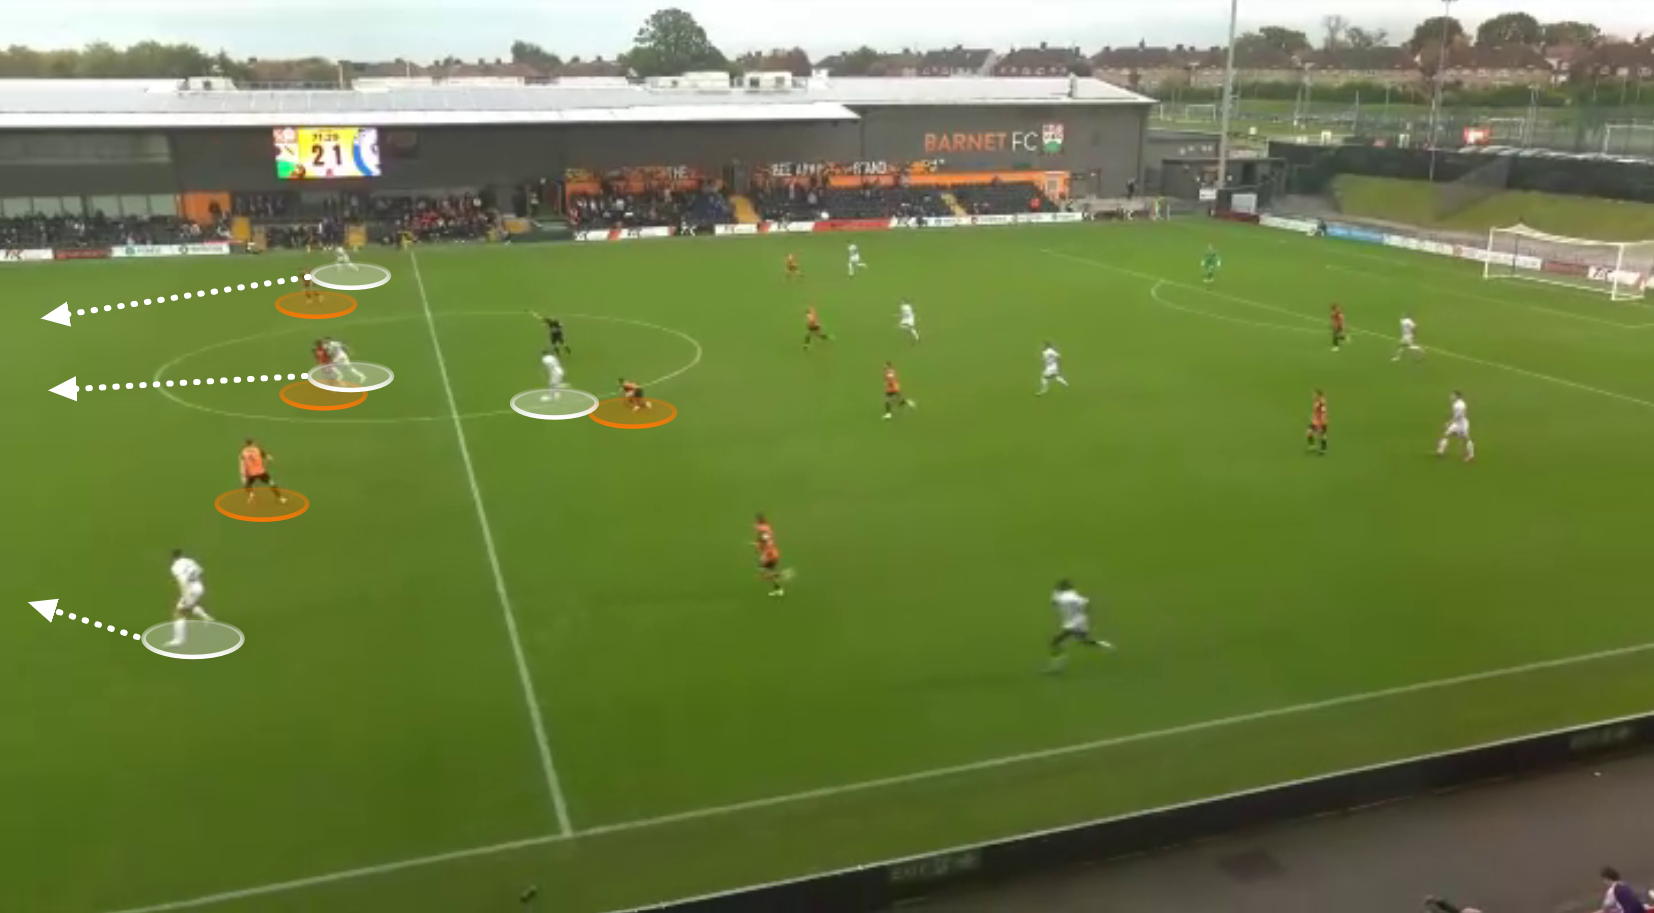
If a Barnet centre-back stepped into the midfield, it didn’t just leave Mitchell isolated 1v1, however. It also created space in Barnet’s defensive line, which could be exploited via runs from deep.
Below, we can see how a Rochdale player had baited Myles Kenlock to step forward and press. This left a gap in the defensive line and, when he ran into the space, the Rochdale player could cause problems for Barnet once he was met by the forward pass.

Here’s one final example. Kenlock had once again stepped into midfield to press, which created space within Barnet’s defensive line. A through pass was played in-behind and, following a cut back, Tarryn Allarakhia’s shot hit the post.
That sums up the pros and cons of Barnet’s press. It allowed them to consistently apply good pressure on the ball, but it did have a direct influence on the chances Rochdale created. With better quality, Rochdale could easily have been the first side this season to have gone home with a point from The Hive.
It’s important to note, however, that Barnet don’t always set up with this out-of-possession approach. They often transition into a man-to-man press from a zonal one, matching up down the sides whilst also having a +1 in the last line. This gives them the same benefits of a man-to-man press, but also allows them to have extra security in defence.
However, Rochdale’s 3-2-5 build made this approach difficult, and Barnet were often forced to press in man-to-man fashion all across the pitch with their 5-2-3, instead.
McNulty’s in-possession approach almost worked. The 3-2-5 forced Barnet to go man-to-man, and they almost paid the price. However, Rochdale were also a bit naive at times, and conceded their first goal as a result of trying to ‘play out’ rather than aiming for Mitchell.
